Authentic tried and tested simple recipes in mainly Indian cooking, including traditional mangalorean, Goan, East Indian, North Indian recipes and much more…
These prawns turn out absolutely delicious, so juicy and succulent. Makes a great starter or appetiser!! Serve with lots of lemon and crusty bread to mop up delicious gravy.
Trim the head and keep the shell & tail on the prawns. Use kitchen scissors to cut down the middle to remove the vein. Clip off the legs, etc. as shown. Wash and pat dry. Rub salt on the prawns.
Take 1 tsp of just the oil from the aglio e olio sauce. Heat a large wide pan till very hot. Add oil and prawns. Press the prawns down so that the shell gets a nice char. After 2 mns on each side, add about ½ cup of the aglio e sauce and cook for 5 mns or till done. Add lemon juice and cream, mix till heated through. Take it off the heat and top with chopped parsley/coriander leaves. Serve with crusty bread and lots of lemon wedges.
Literally means garlic with oil! If red pepper flakes are used then the name is aglio, olio e peperonicino.
A great sauce to have on hand! Commonly used to make ‘Spaghetti aglio, olio e peperonicino’, a traditional Italian dish from Naples. But there are many ways the sauce can be enjoyed e.g. to spread on bread or as a dipping sauce with crusty bread. I always keep this sauce on hand to add some spice to sandwiches and use a tablespoon or two into the dough when making Foccacia. Tastes absolutely divine!
Ingredients
1 cup chopped garlic (150 gms)
¼ cup chilli flakes (30 gms)
¼ cup oregano (10 gms)
1 tsp. salt
1 ½ cup olive oil (360 ml)
Add olive oil to a (Cold) pan. Add chopped garlic and stir well. Place on medium heat and bring to a boil and let it cook on low flame for 20 minutes while stirring. Take the garlic off the heat and add chili flakes, oregano and salt. This sauce keeps for two weeks in a glass jar at room temperature. For longer, store in the refrigerator.
Delicious tangy soup, if you have roasted garlic handy the soup would be real easy, otherwise would take a bit longer to roast the garlic. Check my tips for roasting garlic! Excellent for garlic lovers, great panacea for flu and colds due to the healing properties of onion and the large amount of garlic used. The garlic flavor however does not overpower the dish.
Ingredients
2 large heads garlic (one roasted)
4 medium Onions
3 stock cubes, any flavor
1 bunch cilantro (or parsley)
1 tsp. thyme (fresh if available)
½ cup milk (substitute with Soy or almond milk)
2 tbsp. lemon juice
2 tbsp. olive oil
½ tsp. black pepper powder
½ tsp. salt or to taste
½ tsp. lemon zest
Prepare stock. Add the stock cubes to 1 litre (4 cups) hot water, stir to dissolve. Peel onions and chop roughly, peel one fresh garlic head and chop, peel the roasted garlic and discard the skins. Heat the olive oil and add the fresh and roasted garlic and the onion and saute 2 mns. Add the chopped parsley or cilantro (reserve some for garnish) and thyme, cook 2 minutes till onion is soft and translucent. Add the stock and stir well. Bring to a boil and simmer covered for 30 minutes stirring in between. Take off heat and strain the soup. Transfer the onion garlic mixture to a blender. Add some stock to move the contents in the blender and blend to a smooth puree. Transfer the puree to the strained soup and put it back on heat, add salt and pepper powder, stir and simmer further 5 minutes. Add the milk and heat through, do not boil. Garnish with chopped parsley and lemon zest. Serve hot with bruschetta.
To Roast garlic: Cut off 1/4 “ of the tail of the garlic head, dip in olive oil and smear oil all over. Wrap tightly in aluminium foil and bake in an oven for one hour.
TIP: On roasting garlic –
Roast several heads of garlic and store leftovers in the refrigerator for couple of weeks and use as and when required
Roast the garlic when cooking other food i.e. whenever you use the oven for roasting or baking food.
For quick roasting – Peel one head of garlic and roast on a frying pan with a little oil till lightly brown and fragrant.
Bruschetta is served cold as a starter and is an Italian antipasto. Grilled toasted slices bread, drizzled with olive oil, rubbed with garlic and served with toppings of tomatoes and chopped fresh basil. Variations in toppings include onion, beans, vegetables, cured meats and cheese. This recipe is with tomatoes and basil only for topping, yet super delicious and fresh tasting and one of the simplest and quickest to make. Ingredients required are very few but make sure they are very fresh and of top quality to bring out the best flavors in the Bruschetta!
Ingredients
1 large baguette or any crusty bread
2 large or 4 medium, ripe tomatoes
4 to 6 tbsp. olive oil
2 cloves garlic
¼ cup Basil leaves
Salt, as required
Wash and cut tomatoes into halves and scoop out the pulp and seeds. Chop the tomatoes into small pieces and transfer to a bowl. Mix with half the olive oil and set aside. Grate or chop the garlic fine and add to a bowl with the remaining olive oil. Keep aside until required. At the time of serving, slice bread into slices (as thin as you can). Toast the bread slices in a toaster or place in a tray and toast in the oven for 5 to 8 minutes till crisp. Brush the slices with the olive oil and garlic and top with chopped marinated tomatoes and sprinkle with salt (sea salt is preferable). Then garnish with freshly chopped basil and drizzle a little olive oil. Serve immediately as a starter or with soup as an appetiser.
Garlic bread is just bread topped with garlic butter or olive oil and sprinkled with herbs like oregano, parsley, chives or basil. Topped with cheese for a cheesy garlic bread, it is then grilled, toasted or baked in an oven or even on a stove top and enjoyed with any pasta dish or with a soup. Called Knoblauchbrot in German and Chpon in France where is it served with a salad. In Greece onions and olives are used for garlic bread. A rather modest and unassuming dish but loved by young and old!
Ingredients
1 or 2 Loaves French Bread, or 1 large baguette
1 whole head garlic
4 to 6 tbsp. butter, or as required
1/2 tsp. salt
Fresh or dried parsley
Olive oil
Cut off ¼” from the tail of the garlic head. Dip the cut side into olive oil and apply some all around. Wrap the garlic tightly in aluminium foil an place cut side down on a metal tray and bake in an oven for 1 hour.
Take one garlic head and squeeze the base which will push the roasted garlic pearls out of their skins. Discard the skins. Transfer the garlic flesh to a small (dry) grinder, add the butter and pulse till butter and garlic are creamy and smooth.
Cut the French loaf horizontally in two and apply the garlic butter. Cut into desired pieces and play on a baking tray. Sprinkle chopped parsley over the bread, if using dried, crush with your fingers and sprinkle over the bread. At this stage you can pre-prepare and wrap the bread tightly in plastic wrap and refrigerate or freeze and bake when required and just before serving.
Bake in a moderate oven for 8 to 10 minutes till edges are golden. For cheese garlic bread, sprinkle some mozzarella or freshly grated Parmigiano-Reggiano cheese. Serve with any past of your choice or Lasagna or a hot soup.
Make the garlic bread just before serving for best results, although they can be made ahead and grilled just before serving.
TIP:
1.Roast several garlic heads and store in the refrigerator for couple of weeks.
2.When using your oven to bake any food, take the opportunity to roast several heads of garlic so you have them at hand when required.
For Italian purists, lasagna is an occasion. The layered pasta dish is a labor of love to create, from mixing and rolling homemade noodles to making sauce from scratch to carefully layering the meat, cheese and noodles. It’s a special occasion dish that, done right, is a true showstopper. (Taste of home)
Lasagne are a type of pasta, possible one of the oldest types made of very wide flat sheets and made of stacked layers of lasagne alternating with fillings such as ragu (ground meat and tomato sauce), vegetables, cheeses and seasonings and spices, topped with cheese which melts after baking. The resulting casserole is cut into single-serving square portions. (Wikipedia)
Ingredients
500 gm. Or 24 sheets Lasagne noodles
½ cup mozzarella cheese, or as required
¼ cup grated parmesan cheese, or as required
9” x 13” dish, for assembling and baking the lasagne
Meat sauce:
2 tbsp. oil or butter melted (I have used olive oil)
3 to 4 medium onions, chopped
4 lbs. ground beef or lamb
2 14 oz (500 gms. each) can/bottle bolognaise sauce
1 tsp. mixed herbs (oregano & basil)
2 tbsp. worcestershire sauce (optional)
2 cups beef stock (made with 2 beef stock cubes)
Freshly ground black pepper, to taste
1 tsp. salt or to taste
White sauce:
100 gms. butter
½ cup all purpose flour
1.5 litres milk
1 tsp. salt or to taste
½ tsp. pepper powder or to taste
2 tbsp. shredded cheddar cheese (optional)
To make the meat sauce, heat the oil in a saucepan and sauté the onion until soft. Add the meat and fry till completely browned and liquid has almost evaporated. Stir in the remaining ingredients. Adjust the seasonings, cover and simmer for 30 minutes, stirring occasionally.
For white sauce, melt the butter in a saucepan, add the flour and cook for 2 minutes. Remove from the heat and gradually add the milk. Return to the heat and bring to the boil, stirring, reduce heat and cook until thickened, but of pouring consistency. Add cheese, salt and pepper to taste.
Lasagne noodles: Some noodles require to be pre-cooked, some need to be dipped in hot water before assembling. The lasagne sheets that I have used in this preparation are ready to use (as per directions on the box). The Box also stated to cover the dish with foil before placing in the oven. I don’t usually cover the dish and bake it open but it is better to follow instructions on the pasta packaging for best results. So I baked it for 20 minutes covered with foil, then removed the foil covering and completed the baking.
Grease a shallow rectangle or square dish and grease with olive oil, line with the lasagne sheets, followed with meat sauce, white sauce and repeat the layers then top with the mozzarella cheese. Then sprinkle parmesan cheese and drizzle with olive oil.
Bake in a preheated moderate oven (180 dec C/350 deg F), for 45 minutes.
Cover with foil for first 20 minutes, then remove and complete baking, uncovered.
The zucchini, courgette or baby marrow is a summer squash, a vining herbaceous plant whose fruit are harvested when their immature seeds and epicarp (rind) are still soft and edible.
Ordinary zucchini fruit are any shade of green, though the golden zucchini is a deep yellow or orange. At maturity, they can grow to nearly 1 metre (3 feet) in length, but they are normally harvested at about 15–25 cm (6–10 in).
In botany, the zucchini’s fruit is a pepo, a berry (the swollen ovary of the zucchini flower) with a hardened epicarp. In cookery, it is a vegetable, usually cooked and eaten as a savory dish or accompaniment.
Source – wikipedia
Ingredients
(I am using 12 zucchinis approx. in the video recipe, so the ingredients used are proportionately more)
4 to 6 Zucchini
½ tsp ginger garlic paste
1 to 2 tbsp. Vinegar or Lemon juice, or to taste
½ tsp. turmeric powder
1 tsp. chilli powder or to taste
½ tp. Cumin powder
½ tsp. coriander powder
3 to 4 tbsp. rice flour
2 tbsp. corn flour
Salt to taste
Oil for frying
Method
Wash and drain the zucchinis. Trim the head and tail and cut vertically into ¼” thin slices. If the zucchinis are tender and unblemished the skin can be retained. Sprinkle 1 tsp. salt and set aside for 10 minutes. Then drain the water which is released from the zucchinis. Mix the ginger garlic paste, chilli powder, cumin and coriander powder, rice flour, corn flour, vinegar and salt (if required because the zucchinis are already salted) and make a thick paste using as much water as required. Mix the slices with the batter. A;ternatively you can dip each slice in the batter to coat before frying, in which case more batter will be required. Heat oil for deep frying, when hot reduce flame and fry in small batches till crisp and golden. Drain on kitchen towel. Serve immediately when still crisp as a side with a main meal or with tomato ketchup as a snack or appetizer.
P.S.: The same batter can be used to fry arbi, egg plant, raw banana, bread fruit, potatoes, yam, mushrooms, etc.
Heat the oven to 220 deg C. Clean and scrub the potatoes well keeping them whole. Prick lightly with a fork to avoid the potatoes bursting. Mix the olive oil, pepper and salt and brush the potatoes with the oil. For softer skins, wrap the potato in silver foil, for crunchier potatoes leave open. Bake for 50 minutes to 1 ½ hours depending on the size and oven temperature. To speed up baking pierce a metal skewer through the potatoes so that heat is conducted to the centres. To test if potato is done pierce with a skewer which should go through easily.
Prepare the filling while the potatoes are baking so it is ready to be stuffed into the potatoes when baked. Cut a slit or a cross on the top of the potatoes and squeeze the sides so the top is pushed open. Use oven mitts as the potato will be hot. Fluff the flesh of the potato with a fork. Top with your desired filling. Spoon sour cream mixed with a little olive oil and garnish with green onions and serve with a generous helping of corn salad or fill with sour cream and/or corn salad. Makes a delicious meal or starter or a side.
Full of flavour, a great salad for artichoke lovers, like moi! The addition of herbs and abundance of vegetables makes it a hearty sumptuous salad and could easily double-up as a meal paired with crusty bread and some warm soup! Adding roasted peppers and sun dried tomatoes, rather than fresh would certainly take it a notch up. Must try it myself….. Fell free to add your choice of vegetables like asparagus, cucumbers, shredded carrots, olives, sliced fennel, etc.
Artichoke Salad
Marinated Artichoke Salad
Ingredients
1 Can artichokes (400 gms), preferably marinated
1 can chick-peas (400 gms)
1 capsicum (or roasted peppers)
1 Onion
1 cup cherry tomatoes
1 cup lettuce
1 tbsp. honey or maple syrup
Salt to taste (if required)
To marinate the artichokes (if using regular canned artichokes)
Rinse the mushroom under running water. No need to wipe as we will peel them. Remove the stems and set aside. Peel the mushrooms and place in an oven proof baking dish. Chop the mushroom stems finely. Add the grated cheese to a mixing bowl. Heat oil in a pan and saute the mushrooms stems and chopped onion for 2 to 3 minutes till it softens. Cool the mixture and add to the cheese. Add the bread crumbs, pepper powder and salt and mix. Stuff the mushrooms with this mixture and bake 20 minutes in a moderate oven till tops are golden. Serve immediately as a starter or appetizer.
Delicious Middle Eastern Kabobs – Lebanese style. Superb as appetiser, starter or make a meal of it. And what to say of sandwiches, which are at the heart of middle eastern food and lifestyle. Just slather the pita bread with Toum and pile on the shish taouk kabobs and salads and pickles for a satisfying and delicious snack or meal!
Ingedients
1 Kg. Boneless chicken breasts
6 tbsp. yogurt
1 cup lemon juice, freshly squeezed
1 small slice of lemon with the peel
2 tbsp. apple cider vinegar, if available. If not use regular vinegar
6 tbsp. olive oil
2 tbsp. garlic paste
2 tsp. white pepper or black pepper
1 tbsp. ginger garlic paste
½ tsp. oregano, crushed
1 tsp. chilli powder or paprika
2 tsp. salt, or to taste
1 tsp. tomato paste
Method
Cut the chicken into 1” cubes.
Mix all the ingredients from yogurt to tomato paste and mix well into the chicken cubes.
Marinate for 4 to 6 hours or overnight in the refrigerator.
Heat the grill.
Skewer the chicken and grill till light brown.
Turn over and brown the other side.
Serve with grilled tomatoes, onion, olives, cucumber, olives, etc.
Serve as a appetizer or accompaniment to any main meal.
Toum (Garlic Sauce) usually used as a dip for grilled chicken, meat, etc. So creamy and fluffy and ah the taste… simply lip-smacking, you can just eat and lick it as it is. You would never believe it is homemade! Serve with Shish Taouk, Souvlaki chicken, Crispy fried chicken and any grilled meats or roasted vegetable. Slather on pita bread sandwiches or serve as a regular dip!
Traditional homemade garlic sauce
Ingredients
1 cup garlic
1 tsp. salt
¼ cup lemon juice
1/2 cup iced water
3 cups oil, like canola, sunflower
Method
Peel garlic and remove the germ if desired (makes the taste less sharp) by cutting in half and scooping out the germ in the centre of the garlic. I skipped this step today due to lack of time.
Place the garlic with salt in a blender and process till garlic is smooth, use the lemon juice at intervals to facilitate movement of the garlic.
Add a little water if the lemon juice is not sufficient. Adding more lemon juice may make it too sour.
Once the garlic becomes a smooth paste, start adding the first cup of oil in a continuous drizzle while the blender is running.
Stop the blender to give it a rest.
Then continue adding the remaining oil alternating with the iced water till all oil and water are incorporated.
The paste should be light and fluffy by now.
If not add one egg white and run the blender for 2 minutes to achieve the fluffy consistency.
Transfer to a sterilized glass jar or a container and refrigerate.
Use for a month, if it lasts that long!
This recipe makes a large quantity of toum. So it would be better to try with half or quarter of the recipe.
But bear in mind that if the toum doesn’t become thick and fluffy, the garlic mixture should not be wasted, use it in cooking where garlic paste (with tartness) is required.
This easy and quick breakfast is ready in minutes! Enjoy as a snack or for dinner or supper.
For variation, use chapatis or phulkas instead of tortillas.
Quick Breakfast Tortilla Wrap
Ingredients –
To make one wrap – per person
1 Tortilla
2 eggs
2 slices cheese
A handful fresh baby spinach
2 or more slices of cold cuts (beef, pork, chicken ham, smoked turkey, mortadella, etc.)
A pinch Salt & pepper, or to taste
1 tsp. butter
Method
Break the eggs into a bowl, season with salt and pepper.
Heat a pan, add butter and pour the beaten eggs into the pan.
Immediately place the tortilla over the egg and quickly turn the tortilla over (must use your fingers for this) so it is coated with the egg on both sides.
Now fry for a minute till egg on the underside is light brown.
Flip the tortilla over and place 2 slices of cheese side by side at the end nearer to you.
When cheese melts slightly, top with spinach and 2 or more slices of cold cuts, as per your taste.
Carefully transfer the tortilla to a board and form into a compact roll, beginning from the side with the filling.
Cut diagonally into two halves and serve immediately.
Ketchup, mayonnaise or mustard sauce may be added as per taste.
Extraordinary dishes prepared with ordinary vegetables!!
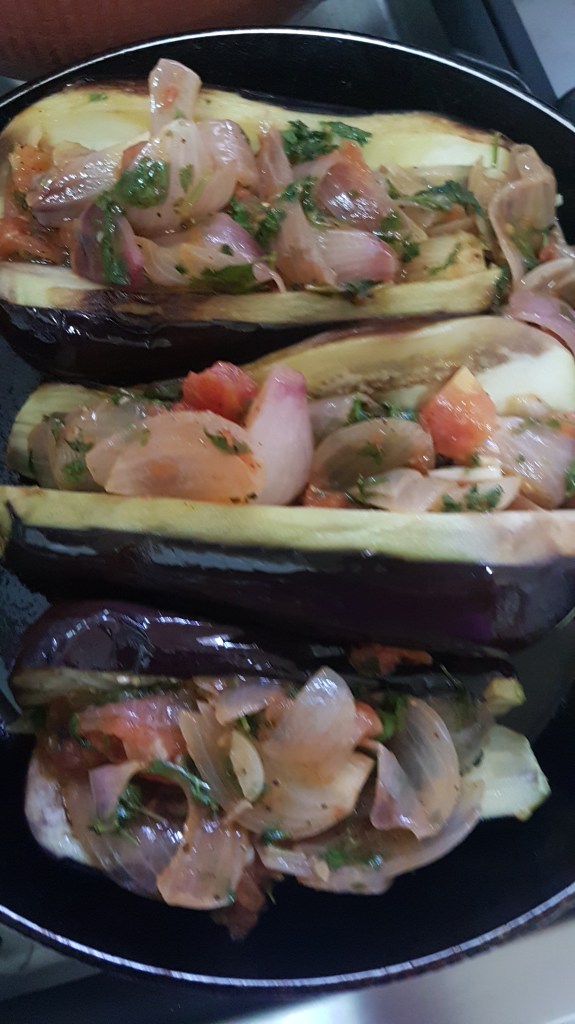
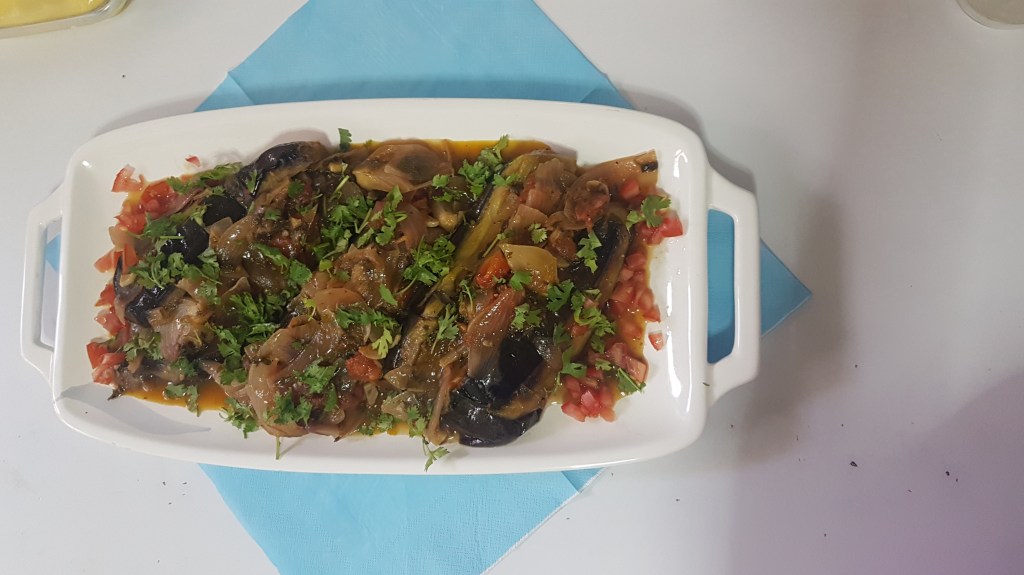
Imam Bayildi translated The Fainting Imam, the name given to this Eggplant (Brinjal/Aubergine) preparation originates from one of the stories on the origins of this dish. It is said that the Imam passed out when he tasted this simple but flavorful dish, although not certain if it was due to the amount of olive oil or from the delicious taste!
Imam Bayildi (The Fainting Imam)
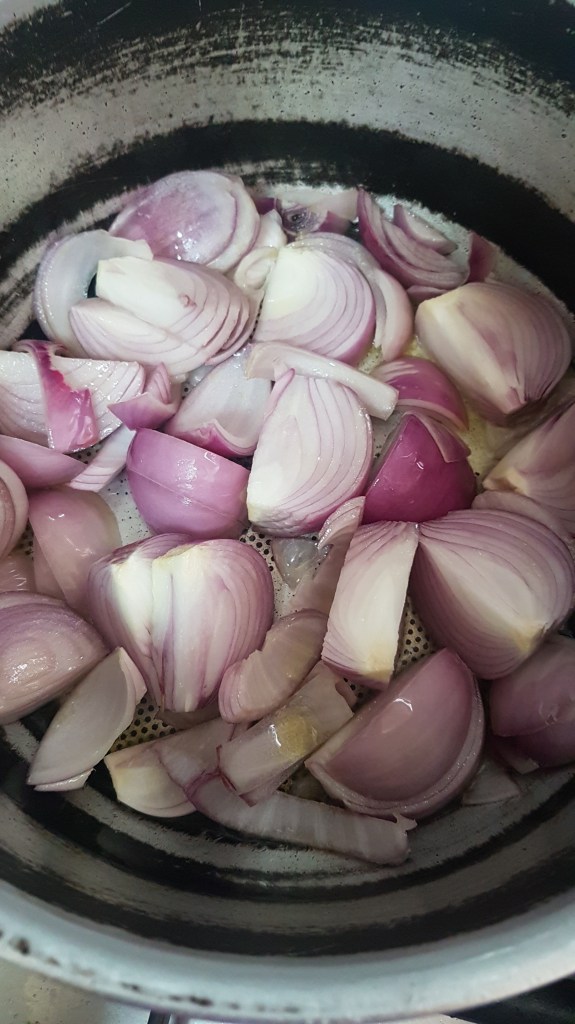
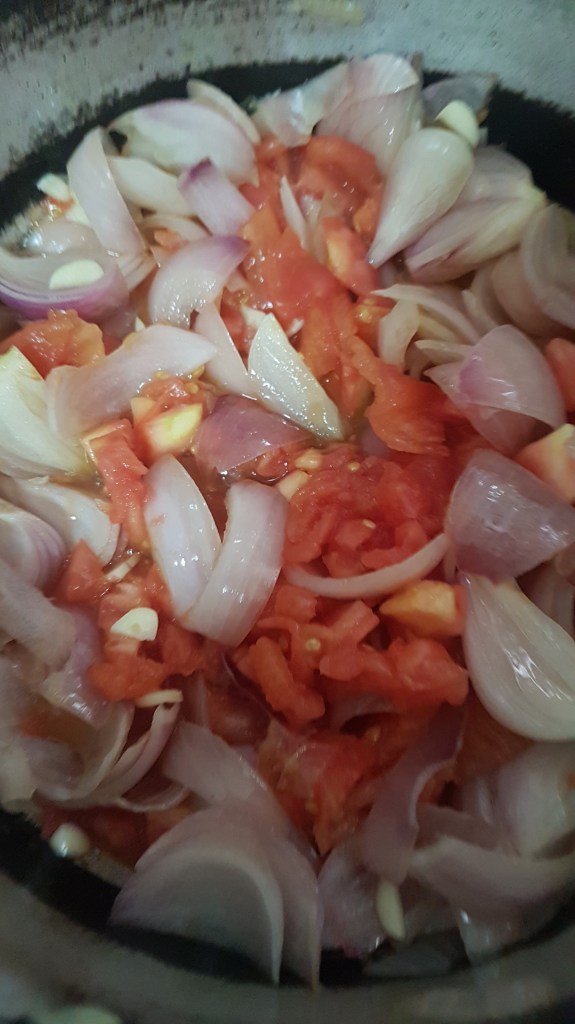
Blanch, peel and chop tomatoes. Chop parsley/coriander leaves. Remove stems and peel strips of skin lengthwise from the brinjals to get a striped effect. Cut lengthwise stopping short of the edge. Place the brinjals in salted water to avoid turning brown. Cut the onions into wedges. Chop the garlic.
Heat half the olive oil and fry the onion till nearly transparent. Add the garlic and fry for a minute. Add the tomatoes and cook over medium-low heat for 5 minutes. Add salt and pepper and sprinkle parsley/coriander leaves all over.
In a frying pan, heat remaining oil over high heat. Drain the eggplants well and fry until lightly brown on all sides but still firm. Cool the eggplants slightly and stuff the onion mixture as much as possible into the eggplants. Place the eggplants over the remaining mixture. Sprinkle the lemon juice, sugar and ½ cup water, cover and place on medium-low heat for 45 minutes.


Recent Comments