
Click here for Laadi Pav recipe
Vada Pav is considered as the quintessential Indian Burger, made famous on the streets of Mumbai and in recent times Vada Pav chains have been launched under the brand Jumboking, Goli Vada Pav, etc. as the vegetarian equivalent to the likes of Burger King, McDonalds, etc.
This simple burger serves as a breakfast & snack to millions of people each day and being reasonably priced, even lunch and dinner to the thousands of poor people and immigrant labor that make Mumbai their home in search of economic sustenance.
However, for us it is always the street Vada Pav that is our go to breakfast the morning we land in Mumbai. Our red-eye flight to Mumbai usually arrives in the wee hours of the morning and after the airport formalities, as we make our way to Malad, in the cool morning breeze and deserted streets at the crack of dawn, when Mumbaites are barely waking up from their slumber, only a very few vada pav vendors would be open to serve those hurriedly heading to catch their train/bus for their morning shift and grab a quick ‘vada pav breakfast’ and chai! We stop at one of these stalls to pick-up a couple of vada pavs each (because one is never enough!), bottled water and milk for our first breakfast upon arrival.
The contentment of sinking our teeth into the warm vada pav, our first in months, satisfies our craving and annuls the ordeal of the preceding travel bringing pleasure, gratification and warmth to our hungry bellys.
With the ongoing COVID-19 Lockdown as our travel to Mumbai seems uncertain and distant, thought why not create our nostalgic experience right where we are!
So you too, go ahead try it and why not make it as your next Sunday brunch rounding it off with some Kulfi or Falooda for a satisfying meal. Making the Vada Pav from scratch including making the green and garlic chutney, baking the Pav (the dough was made the previous day and the pav kept for proving) took me two hours. But, you can plan and prepare the previous day. Gather all your ingredients on the Saturday, make the pav and keep for proving, make the green chutney, garlic chutney, and the potato balls, and refrigerate. Next morning bake the pavs, heat the oil in the kadhai, make the besan batter, fry the batata vadas, assemble and enjoy this delicious treat. Trust me, you will give your favorite Vadapavwalla down the street a run for his money!
Vada Pav
Batata Vada – Ingredients
4 large potatoes
½ tsp coriander, roasted and crushed
¼ tsp mustard seeds
½ tsp. turmeric
Pinch of asafoetida (optional)
½ tsp. cumin
½ tsp chilli powder
2 sprigs curry leaves
1 tbsp. oil
4 tbsp. green chutney * (recipe below)
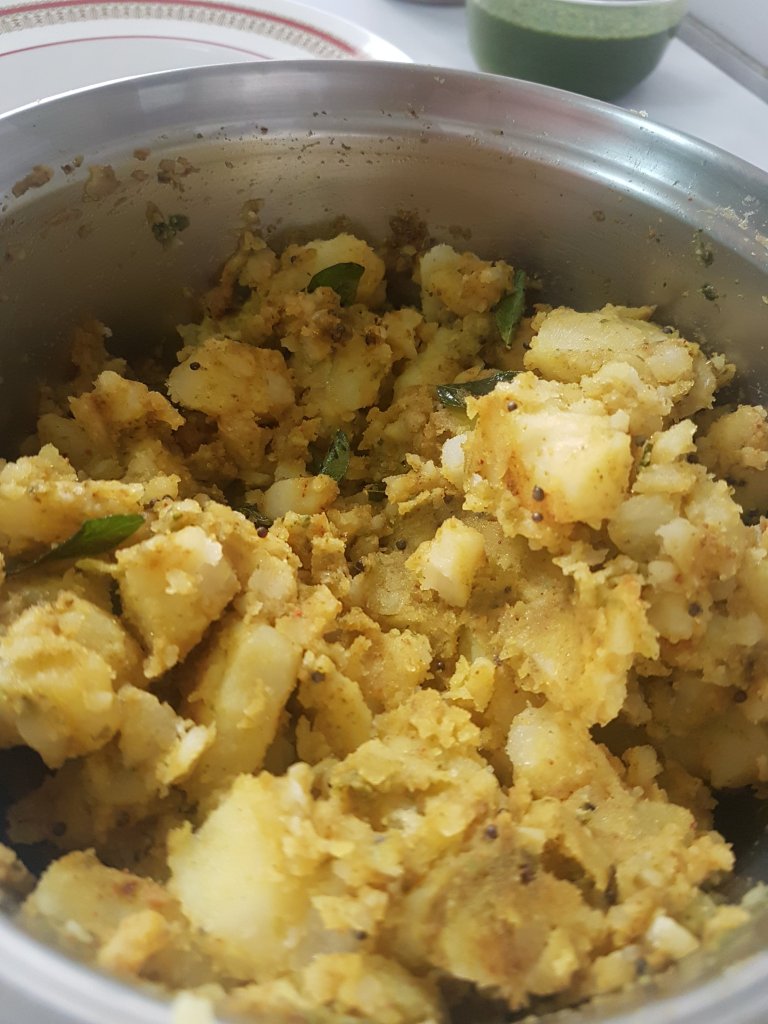
Boil the potatoes, peel and chop. Heat a pan, add the oil and heat, then add mustard seeds. When they crackle add the asafoetida & curry leaves and switch off flame. Immediately add the crushed coriander, cumin powder, turmeric, chilli powder, salt and the boiled potatoes. When mixture is cool add *4 tbsp. of the green chutney and mix well and mash the potatoes roughly while mixing. Make 15 to 20 balls of the potato mixture.


Vada Pav Besan Batter
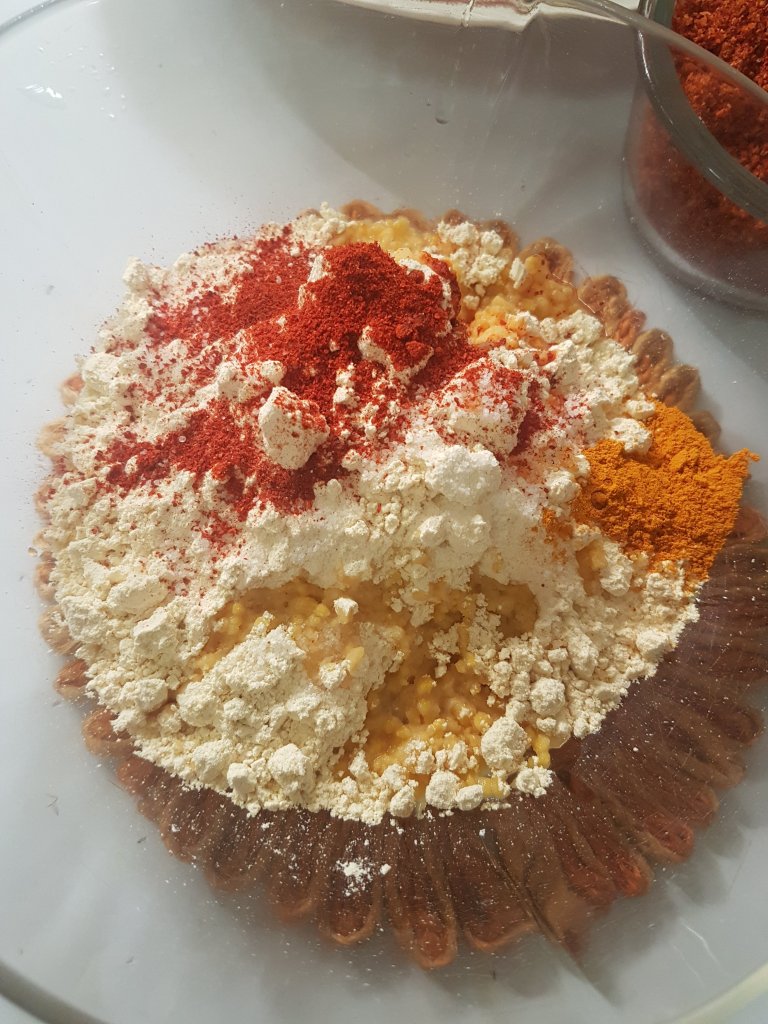
Besan (gram/chick pea flour) Batter – Ingredients
1 1/2 cups gram flour (besan)
1/2 cup water
½ tsp. salt
1 tsp. chilli powder
¼ tsp. turmeric
1 tbsp. hot oil (from the oil you will heat to fry the vadas)
Oil as required for deep frying
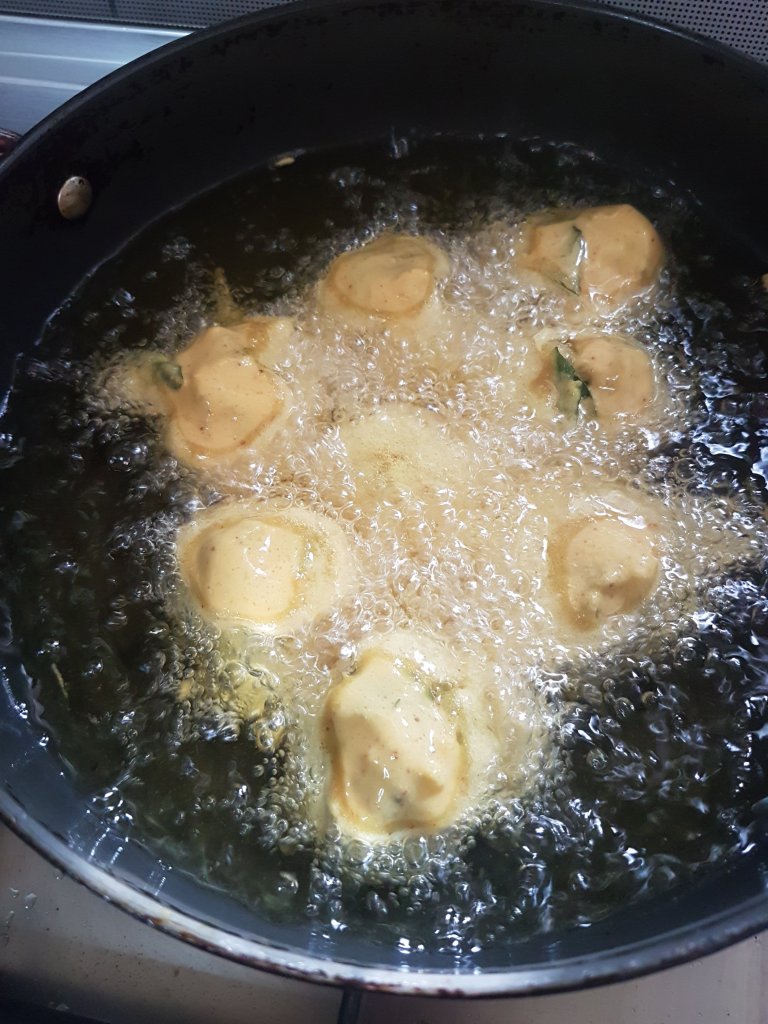
Heat oil in a kadhai.
Mix the besan with the salt, turmeric, chilli powder. Remove 1 to 2 tbsp. of the hot oil and add to the besan batter. The hot oil lends a certain flakiness to the batter. Add the water and whisk to a smooth paste thick enough to coat the vada. Add a tablespoon of water if the batter is too thick but make sure its not runny.
Add a drop of batter to test the oil, which should immediately rise to the surface and turn golden brown.
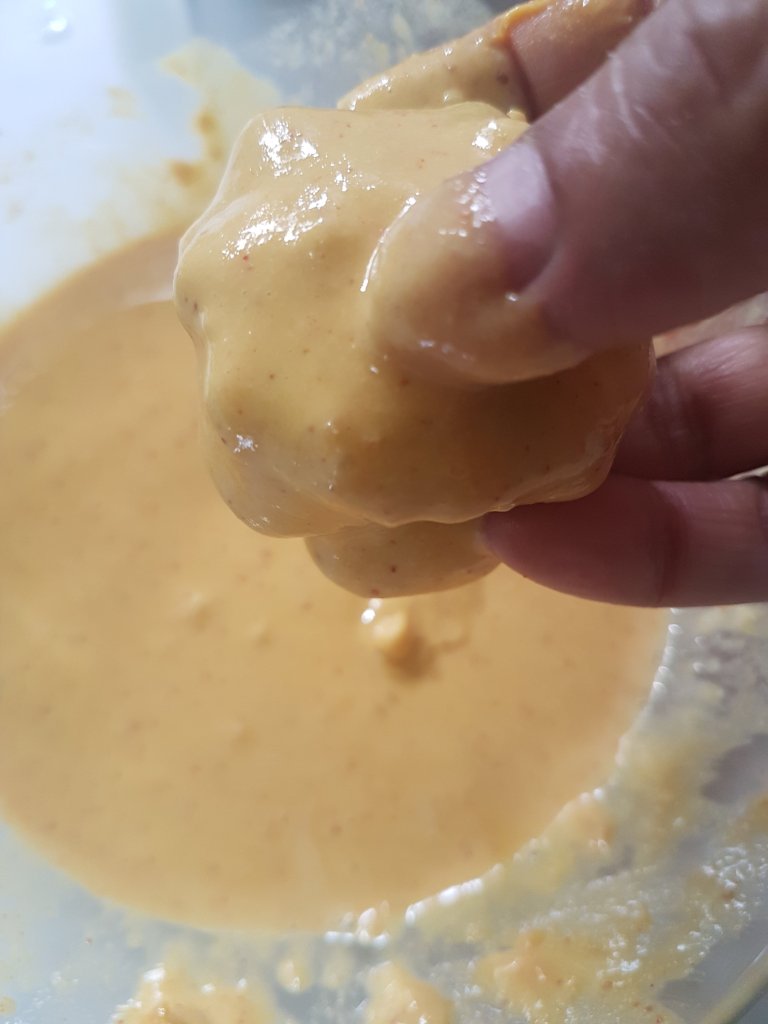
Dip the potato balls in the batter to coat fully and drop gently in the hot oil and deep fry for 5 minutes to golden brown and crisp. Remove and drain on kitchen paper.

Vada Pav Green Chutney
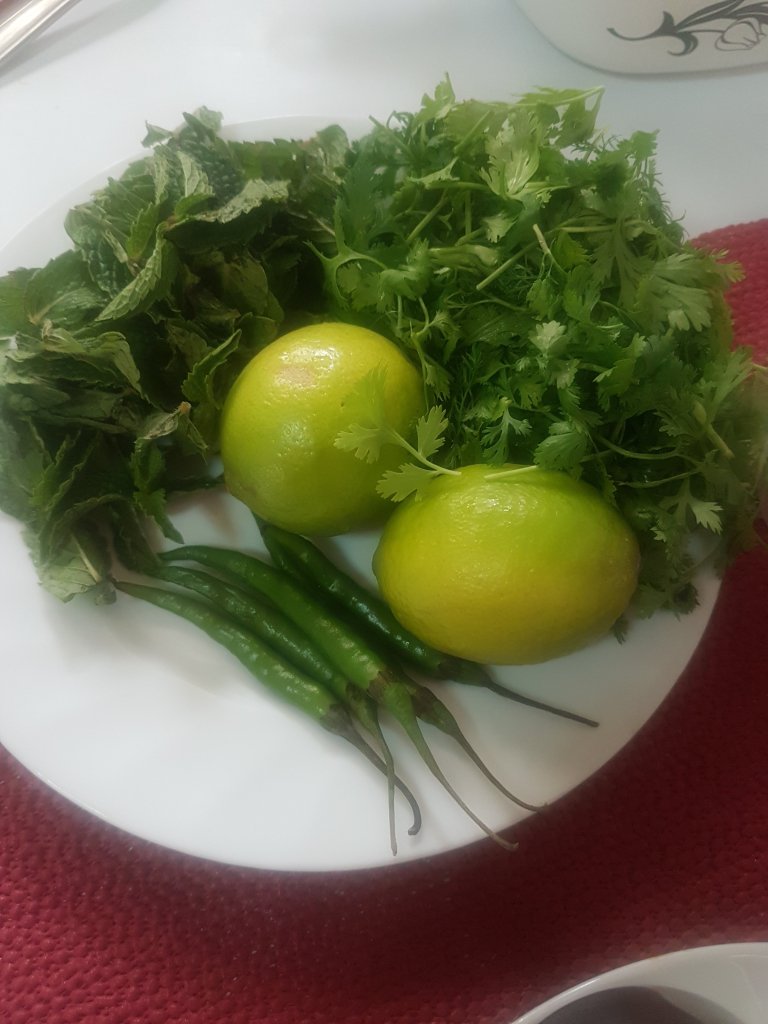
*Green chutney – Ingredients
1 small bunch coriander leaves
1 bunch mint leaves
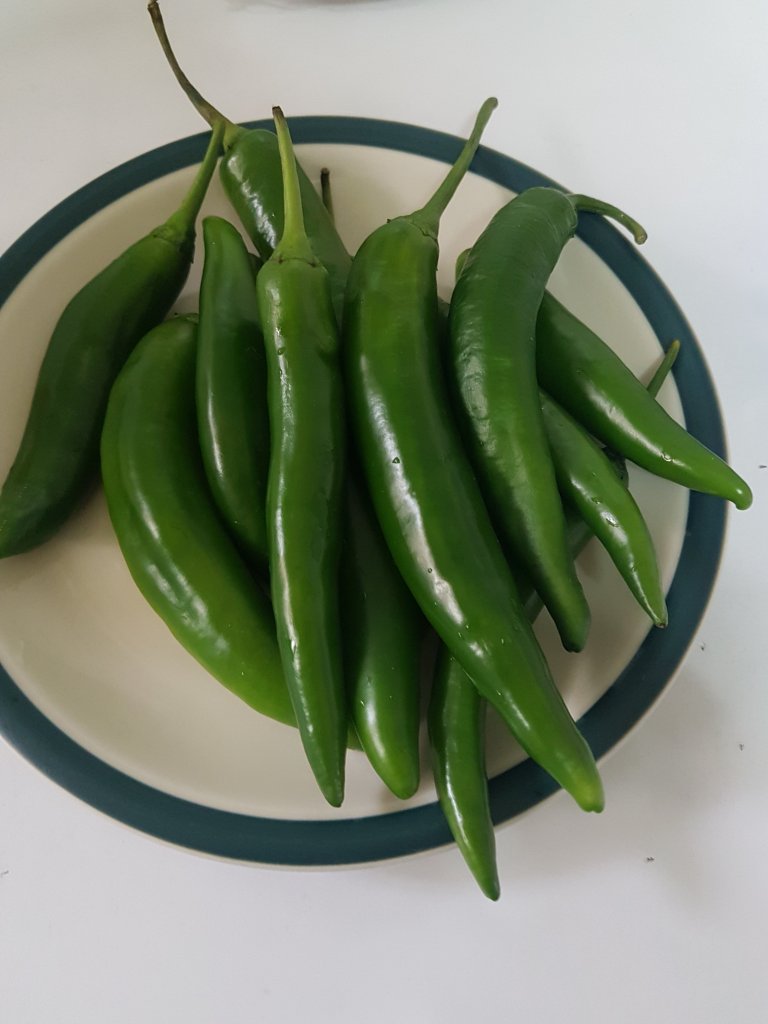
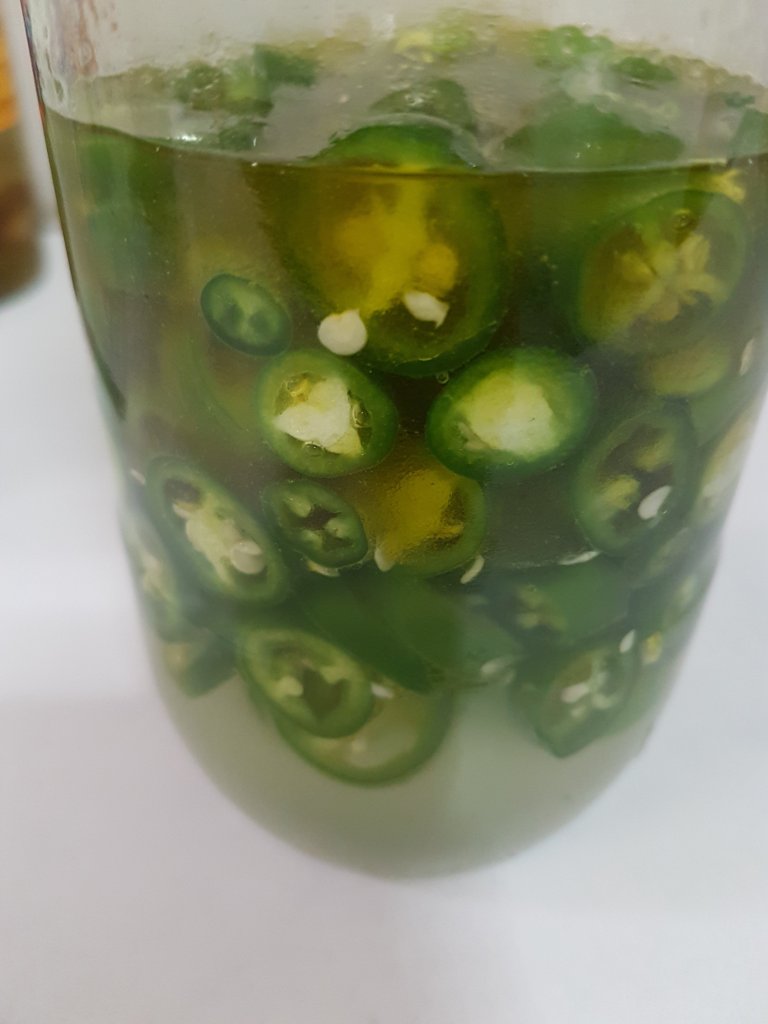
5 green chillies
1 tsp. salt
Juice of 2 lemons
½ tsp. sugar
½ cup water
Blend the above (without the water) till smooth. *Add 4 tbsp. of this paste to the potato mixture. Add the 1/2 cup water to the remaining chutney, mix and reserve.

Vada Pav Garlic Chutney
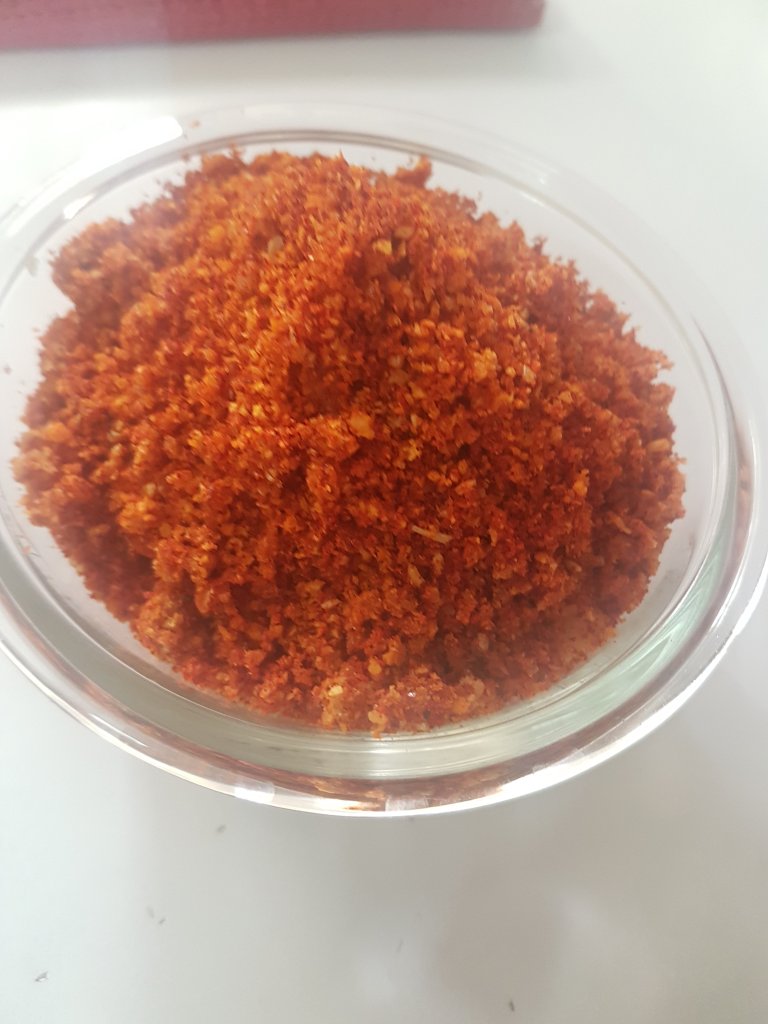
Garlic Chutney – Ingredients
¼ cup garlic
1 tbsp. peanuts
½ cup dry coconut grated or dessicated coconut
1 tbsp. sesame seeds
3 tbsp. Kashmiri chilli powder
Salt to taste
Dry roast the garlic, peanuts, coconut & sesame seeds each separately, till light brown. When cool grind in a dry grinder with the chilli powder and salt to a coarse powder. Cool and store in an airtight jar.


To assemble:
Take a pav and slit horizontally keeping the end intact. Apply the green chutney on the base of the pav, top with garlic chutney, place the vada in the centre of the pav and serve hot.
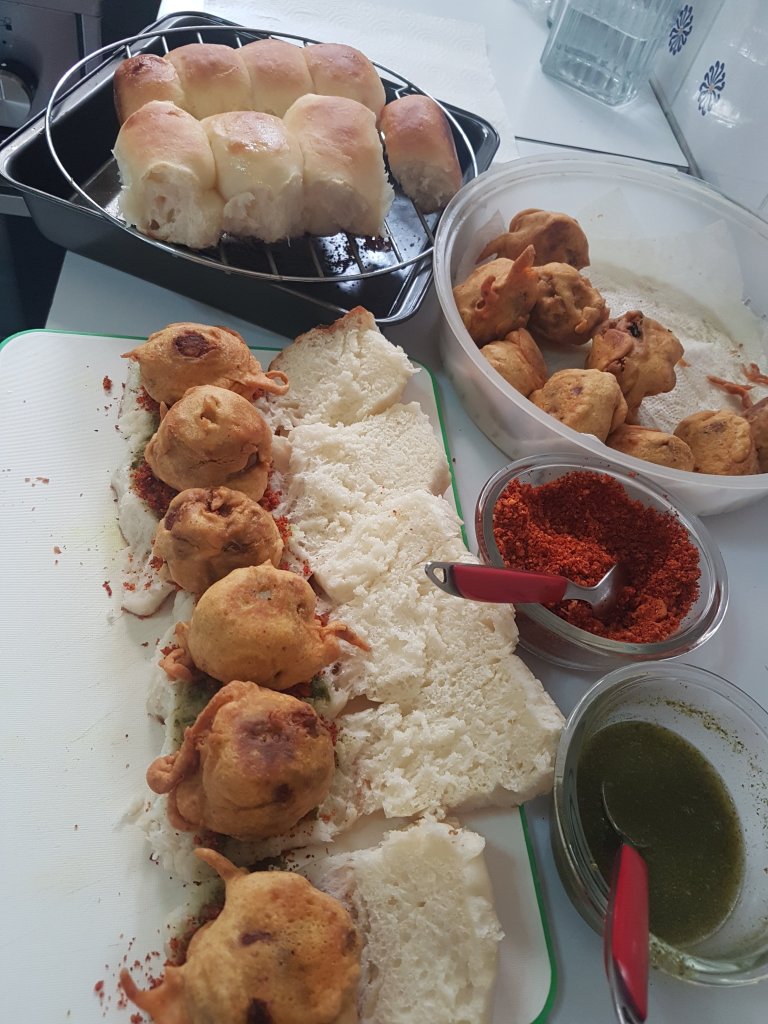

Vada Pav – One is never enough!
Click here for Laadi Pav recipe


Recent Comments