DIY Making your own Chocolate Easter Eggs
In this blog I would like to share my knowledge and the art of ‘How to make Chocolate Easter Eggs’ to demonstrate step-by-step how easy it is to make your own!
Ingredients and accessories
- Chocolate Dark, Milk and White, as required
- Chocolate molds
- Rubber spatulas
- Glass or ceramic bowls
Step 1 Melting plain Chocolate
Microwave method (I use this method)
Break or chop the chocolate and place in a clean dry microwave-safe bowl. A glass bowl is best because it conducts the heat from the chocolate as it melts, and reduces the risk of over-heating. For small quantities it is safest to use a LOW or MEDIUM setting. For larger quantities and once you become experienced, use HIGH . The table below should only be used as a guide because melting times vary according to the brand and type of chocolate, the initial temperature of the chocolate and the size and material of the bowl used. Check the chocolate frequently and prod it with a spoon – it may look solid when in fact it has melted. White chocolate will burn more easily so watch it carefully. A few lumps that appear after microwaving will dissolve upon stirring and help bring the temperature down of the chocolate which is a key to tempering chocolate. The super-market bars of cooking chocolate, also referred to as Baker’s chocolate, do not really require tempering but heating and cooling the chocolate (tempering) is important to avoid the patchy and mottled look, which doesn’t alter taste but wouldn’t give you the glossy professional finish.
Approximate melting times in a 650-watt microwave oven
QUANTITY LOW HIGH
- 50 g (2 oz) 5 mins 2 mins
- 75 g (3 oz) 5 mins 2 mins
- 125 g (4 oz) 5 mins 2 mins
- 172 g (6 oz) 6 mins 2 mins
- 225 g (8 oz) 6 mins 2 1/2 mins
Bain Marie (double boiler) method
Cut the chocolate into small pieces and put it in the top of a double saucepan. The bottom pan should be three-quarters full of gently simmering water. If you haven’t got a double saucepan, put the chocolate in a clean, dry heatproof, preferably glass bowl and set it over a saucepan that’s about one third full of gently simmering water. The bowl should fit snugly over the saucepan so that no steam can escape round the sides. The base of the bowl or top pan should not touch the water below. Heat the water gently but do not allow it to boil. Leave the bowl on the pan until the chocolate looks melted. Remove the bowl or pan from he heat and gently stir the chocolate until it is completely melted. The temperature of the chocolate should not go above 50 deg C (122 deg F). If water or steam come into contact with the chocolate, the texture will be spoilt and the chocolate will ‘sieze’, that is it will turn into a solid mass and will not melt.
Step 2 Filling the chocolate molds
Using cotton wool or soft muslin cloth polish the insides of the Easter candy molds. Place on a tray or counter lined with baking parchment.
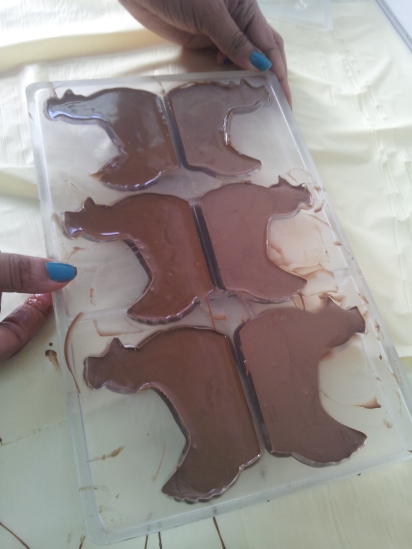
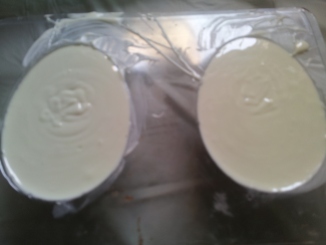
Spoon the chocolate into the molds (do not over fill) and tap the mold lightly to smoothen the surface and remove air-bubbles, if any.
Step 3 Setting the chocolate
Place the molds in the freezer for a few minutes until set and the underside of the mold appears opaque. If it has wet patches on the underside, then it is not fully set. Keep a while longer.
Step 4 Unmolding the chocolate
Remove molds from the freezer and unmold by turning the mold upside-down onto a flat surface. Tap the mold lightly to release the chocolate. Leave to dry.
Step 5 Presentation
Finish by wrapping in colored chocolate paper and decorative boxes and ribbons.
Be creative and make chocolate eggs with fruit and nuts, rice krispies, praline, marzipan, truffles….
To simply order all these and more from Mumbai, check out my sister’s website at Julianz.in
To make Hollow Egg:
Fill the mold with melted chocolate and place in the freezer for a few minutes till the sides are set but the centre is still soft. Remove and pour out the soft chocolate from the centre. Smoothen the interior of the egg with your fingers and place it back in the freezer until completely set. Unmould and when dry join two halves together by applying some melted chocolate around the edges to form a full hollow egg. Prior to sealing the two halves, place some candy or small toy inside for a beautiful surprise for the kids. Wrap and tie bows with colorful ribbons.
To make Chocolate with marzipan eggs:
- Ingredients of Marzipan
- 250 gm. Blanced almonds
- 500 gms. Icing sugar
- Rose water for kneading
To make marzipan Check this link
Powder the almonds and mix with icing sugar. Knead to a soft dough using rose water a little at a time. Make small egg shaped portions depending on the size of the chocolate mold. The marzipan egg must be smaller than the chocolate mold.
Pour a little melted chocolate in the mold. Place the marzipan egg in the centre and press lightly. Pour more chocolate over the marzipan to cover and fill the mold. Put in the freezer to set. Unmold when the underside of the mold turns opaque. Leave to dry, then wrap each half in choclate wrapping paper. Place two halves together and wrap again in decorative paper for a full 3D egg!

Chocolate with marzipan eggs

SONY DSC
Ref: Good Housekeeping
Read my Blog on Easter Eggs for further information on making different types of chocolate and marzipan easter eggs and packaging.
How to make marzipan easter eggs


Recent Comments