Authentic tried and tested simple recipes in mainly Indian cooking, including traditional mangalorean, Goan, East Indian, North Indian recipes and much more…
Prawn Dangar, typically prawn cutlets is a popular and much loved dish in Goa. It can be served as an accompaniment to any main meal or as a snack or appetizer.
Ingredients
1 Cup Prawns, preferable small prawns
2 medium Onions, chopped finely
2 green chillies, chopped
½ cup coriander leaves, chopped
½ tsp. ginger garlic paste3
½ tsp. turmeric powder
½ tsp. chilli powder
½ tsp. coriander powder
1 tsp. salt or to taste
1 tsp. tamarind paste or lemon juice
1 tsp. sugar (optional)
2 tbsp. gram flour (Besan)
1 tbsp. rice flour
2 tbsp. grated coconut
Rawa (semolina) for coating
Oil for shallow frying
Clean, wash and drain prawns. If using large prawns, chop them into small pieces. Squeeze out all the excess water and transfer to a mixing bowl. Add all the ingredients from Onions to coconut. Mix well, squeezing the mixture so that it binds well. Cover and keep the mixture aside for 15 minutes. Form the mixture into golf sized balls, flatten a bit and coat with rawa. Shallow fry for 5 minutes on each side, till golden brown and crisp. Serve as an accompaniment to a main meal or as a snack or appetizer with ketchup or green chutney.
Cold grilled meats are the basis for this salad, be it tandoori chicken, Kastoori kabab, chicken tikka, etc. The salad is so delicious, I could eat it everyday! Stuff it into pita bread or chapati or roti, for a tasty and sumptuous sandwich. Leftover grilled chicken works well for this salad. I simply love this salad and so will you!! Oh so colorful too……
Ingredients
500 gms. approx. Grilled chicken
1 Large tomato
1 Large onion
2 green chillies
¼ cup coriander leaves
Dressing
3 tbsp. lemon juice
2 tsp. chaat masala
¼ tsp. green cardamom powder
6 tbsp. olive oil or any preferred oil
Salt if required
Garnish
2 Tomatoes
1 Lemon
2 tbsp. ginger
2 tbsp. lemon juice
Cool the roasted chicken or use leftover chicken. Debone (if on the bone) and cut into ¾” chunks. Refrigerate. Peel and cut onions in larges dices. Wash and cut tomatoes into quarters, deseed and cut into ½ “ pieces. Clean and wash chillies and coriander and chop finely.
To make the dressing: In a bowl, mix lemon juice, chaat masala, cardamom powder and oil and adjust seasoning.
Garnish: Slice or cut lemon into wedges, tomatoes into slices or quarters. Scrape and cut ginger into juliennes and soak in the lemon juice.
To serve the salad – Mix the onion and tomatoes in the chicekn, add the chopped coriander leaves and chillies, pour over the dressing and toss well. Garnish with lemon, tomatoes and ginger juliennes and serve chilled.
Full of flavour, a great salad for artichoke lovers, like moi! The addition of herbs and abundance of vegetables makes it a hearty sumptuous salad and could easily double-up as a meal paired with crusty bread and some warm soup! Adding roasted peppers and sun dried tomatoes, rather than fresh would certainly take it a notch up. Must try it myself….. Fell free to add your choice of vegetables like asparagus, cucumbers, shredded carrots, olives, sliced fennel, etc.
Artichoke Salad
Marinated Artichoke Salad
Ingredients
1 Can artichokes (400 gms), preferably marinated
1 can chick-peas (400 gms)
1 capsicum (or roasted peppers)
1 Onion
1 cup cherry tomatoes
1 cup lettuce
1 tbsp. honey or maple syrup
Salt to taste (if required)
To marinate the artichokes (if using regular canned artichokes)
Grind the corn coarsely, leaving some whole. Add the chilli, garlic and ginger paste. Alternatively, grind 2 green chillies, 3 flakes garlic and 1” pc ginger with the corn. Add the gram flour, lemon juice, salt, sugar and coriander leaves. Drop tbsp. full into hot oil or form into kababs and deep fry. May be shallow fried if preferred. Serve hot with ketchup or green chutney. Great as a snack, appetizer or into as a sandwich.
Delicious Middle Eastern Kabobs – Lebanese style. Superb as appetiser, starter or make a meal of it. And what to say of sandwiches, which are at the heart of middle eastern food and lifestyle. Just slather the pita bread with Toum and pile on the shish taouk kabobs and salads and pickles for a satisfying and delicious snack or meal!
Ingedients
1 Kg. Boneless chicken breasts
6 tbsp. yogurt
1 cup lemon juice, freshly squeezed
1 small slice of lemon with the peel
2 tbsp. apple cider vinegar, if available. If not use regular vinegar
6 tbsp. olive oil
2 tbsp. garlic paste
2 tsp. white pepper or black pepper
1 tbsp. ginger garlic paste
½ tsp. oregano, crushed
1 tsp. chilli powder or paprika
2 tsp. salt, or to taste
1 tsp. tomato paste
Method
Cut the chicken into 1” cubes.
Mix all the ingredients from yogurt to tomato paste and mix well into the chicken cubes.
Marinate for 4 to 6 hours or overnight in the refrigerator.
Heat the grill.
Skewer the chicken and grill till light brown.
Turn over and brown the other side.
Serve with grilled tomatoes, onion, olives, cucumber, olives, etc.
Serve as a appetizer or accompaniment to any main meal.
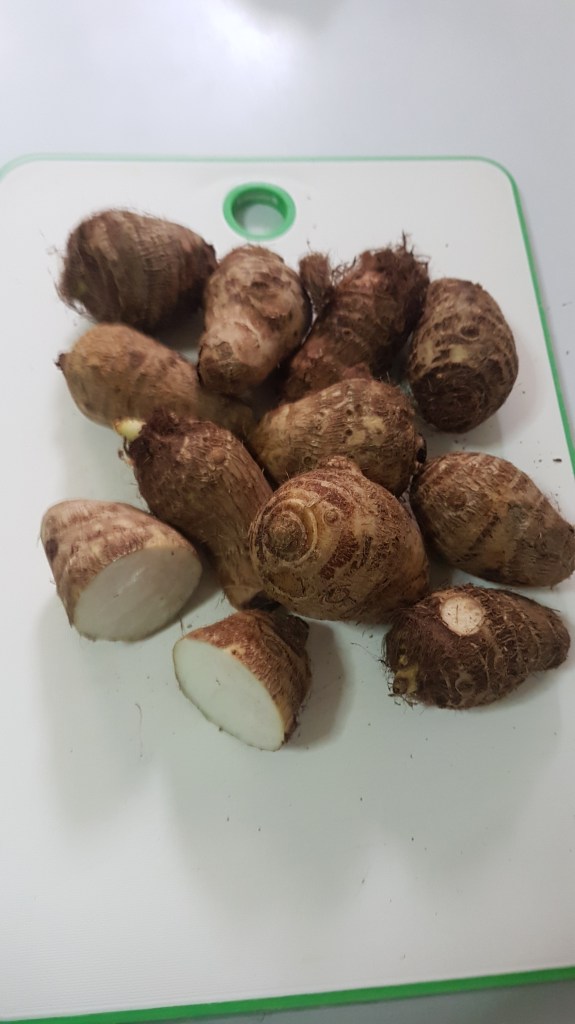
Taro croms (root) is also known as Arbi, Ghuiya, Colacasia root. The leaves are called colacasia leaves, Alun leaves, Pathra leaves. The root, stems and leaves are edible but should not be consumed raw as it containes toxic substances which are neutralised by cooking.
Taro is a tropical plant and consumption of both its root and leaves have many benefits namely, reduces infammation, controls cholestrol, boosts immunity amongst other benefits.
Available in abundance during the monsoons in India. It is also grown in African, Oceanic, Pacific and South Asian countries throughout the year. It is easily available in Indian, East Asian and Latin American Markets around the world and comes in various sizes from small to medium to large. When choosing Taro croms, pick those that seem heavy for their size, are firm and the hairy skin looks somewhat moist.
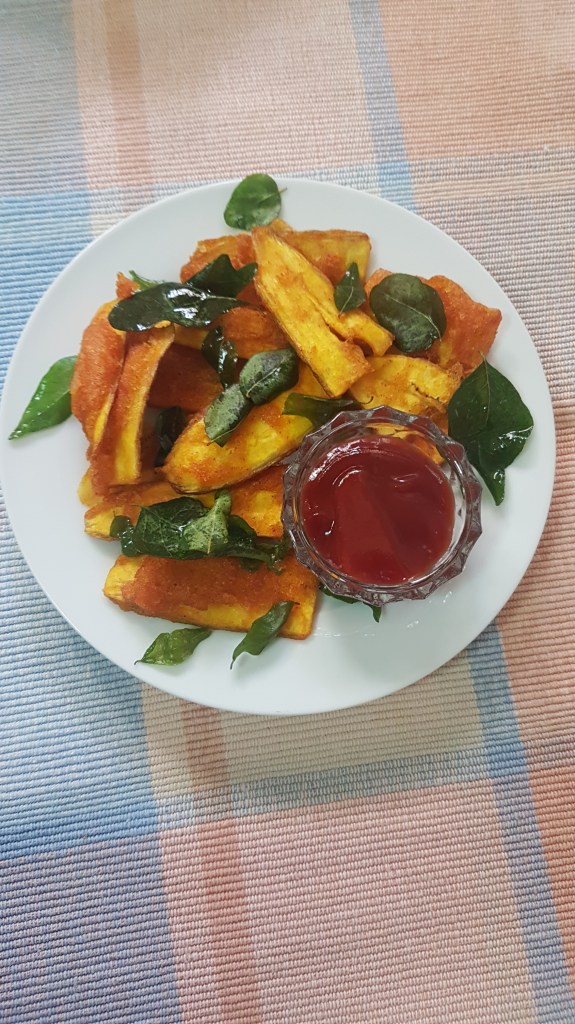
Taro Roots or Arbi can be prepared into various tasty snacks and vegetables, a few of which are mentioned below. Apply some oil on your hands when handling Arbi or wear gloves as it leaves a sticky liquid.
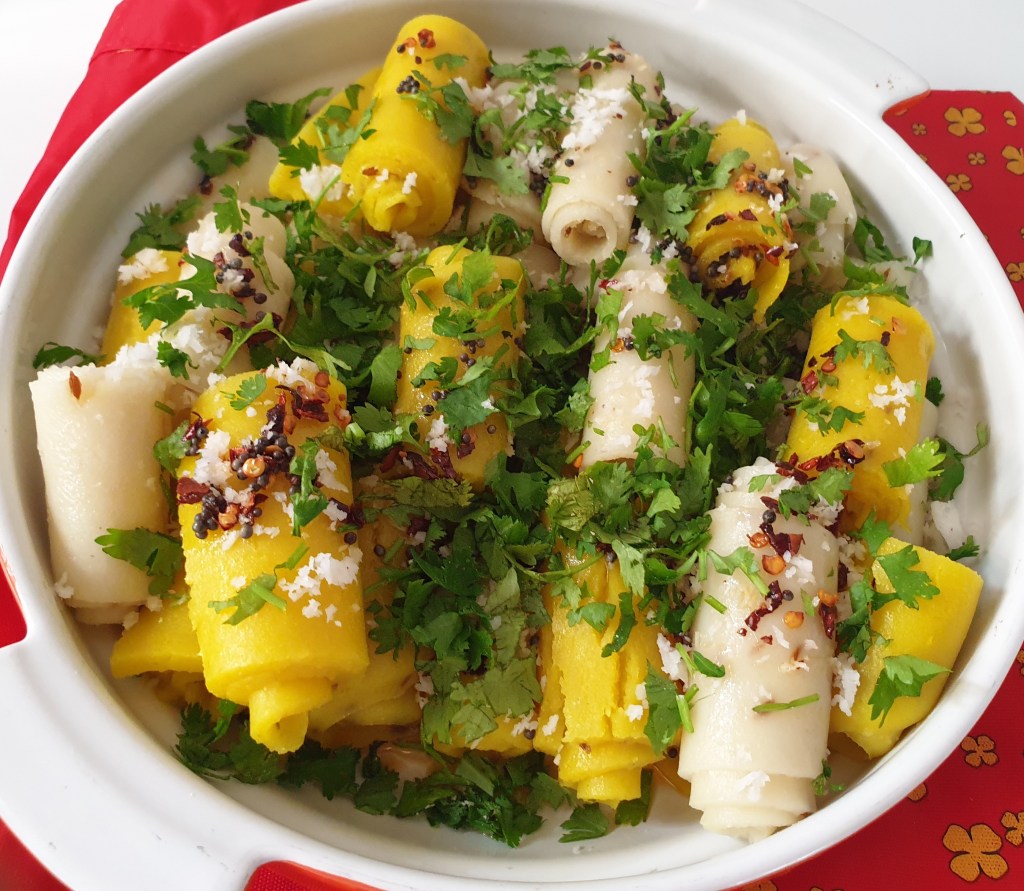
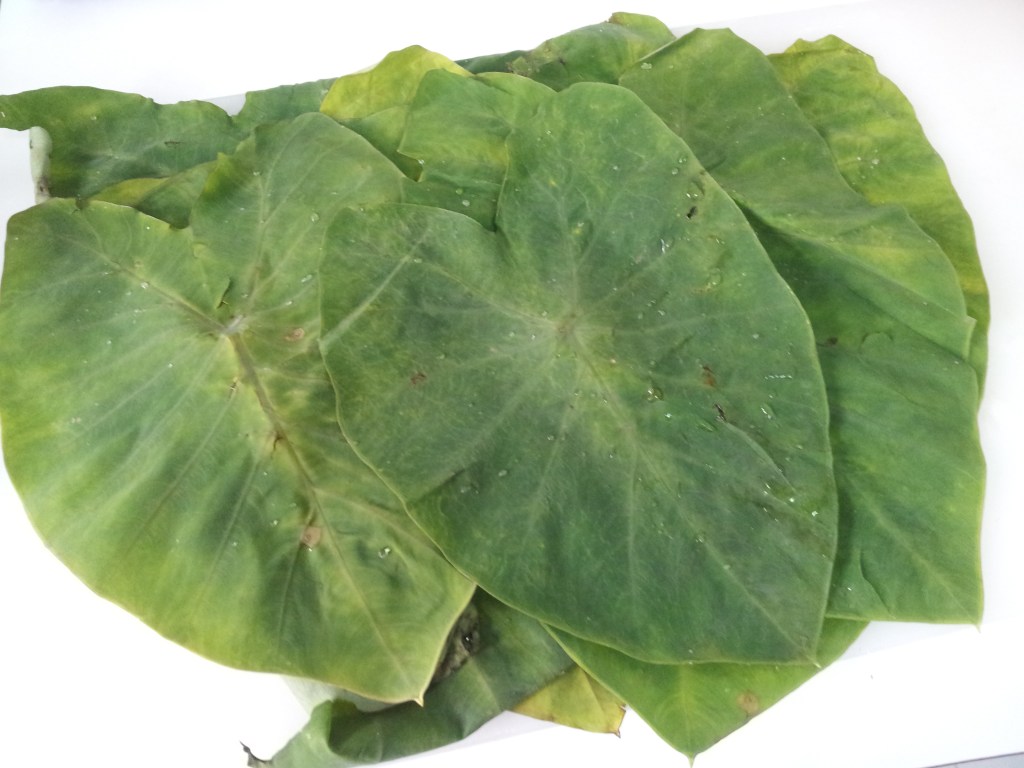
Taro or Colacasia leaves – also known as Colacasia leaves, Alun leaves, Pathra leaves, have an abundance of benefits and are most commonly used in the traditional mangalorean Pathrode and the famous gujarati snack Pathra (Alu Vadi). The stems of the leaves are also used in cooking and we usually make a curry by adding some legumes, etc.
It is beneficial to eat local and seasonal produce. Not only is it cheaper but also fresh as it is grown in local farms and the supply does not require transportation over days and weeks to long distances therefore the produce reaches markets quicker thereby preserving its nutritional value. Besides the nutrients lost due to contamination from pesticides etc. is eliminated as most local produce is grown organically. Any seasonal produce is naturally good as it supports the body’s nutritional requirements. Buying local produce also supports the local farmer.
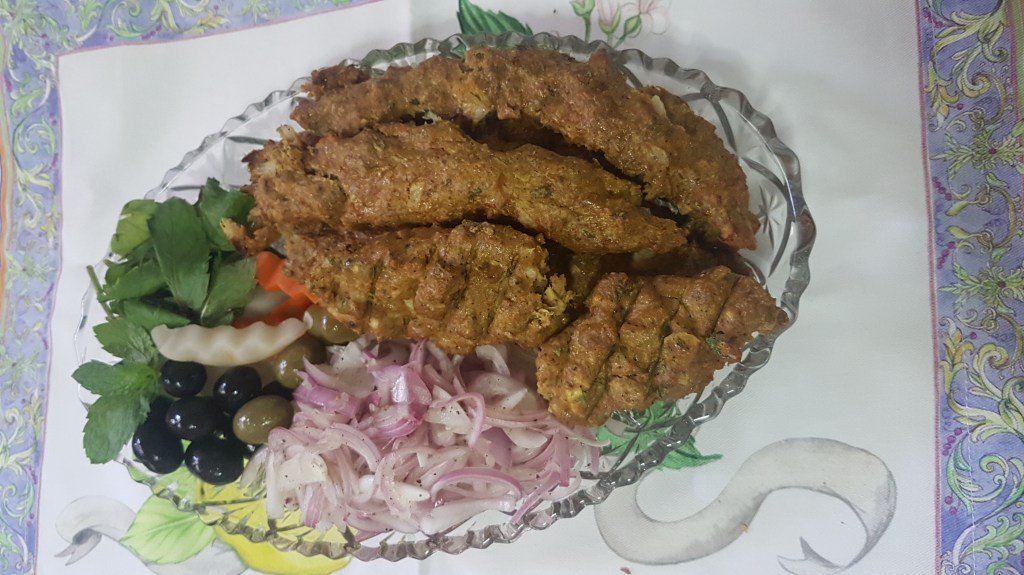
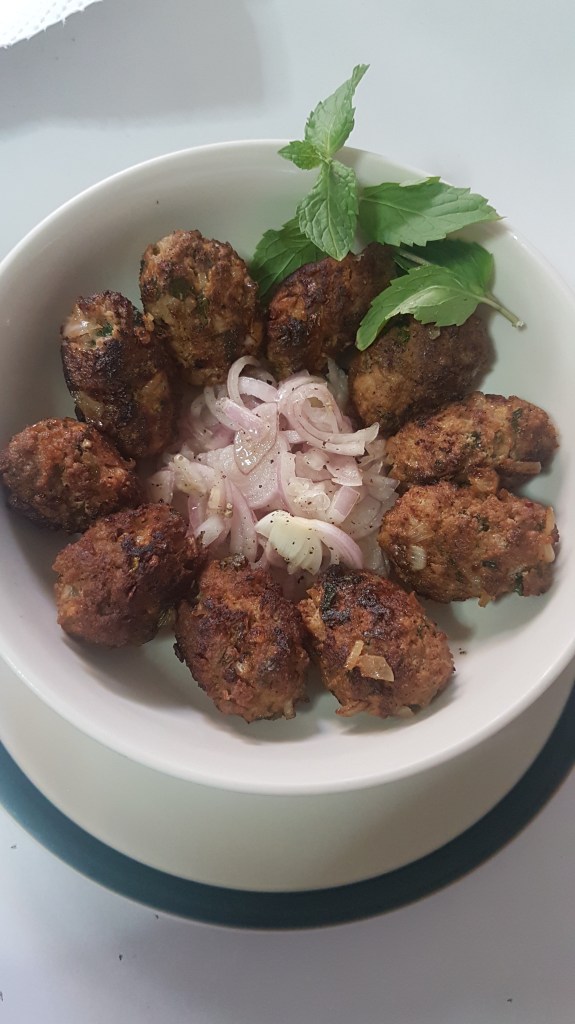
Kebabs are various grilled or baked meats cooked on skewers or may also be shallow fried on a pan. The meats typically used are lamb which is very common but chicken and beef are also used. Kebabs for vegetarians would include a variety of roasted or grilled paneer or vegetables on skewers or the Hara Bara Kabab.
Here are three additional varieties of kebab using minced lamb/Beef and chicken which includes the delightful seekh kabab! The seekh kebabs are best roasted in an open outdoor grill, but can be roasted in a closed oven as well, as I have done. Besides, due to the Covid-19 lockdown there was no way we could venture outdoors!
The quintessential Seekh Kebab typically made of lamb or beef mince.
A crispy and delicious hot snack to provide some warmth on a wet rainy day or cold weather or simply when relaxing at home wth a nice hot cup of tea or coffee!
To get crisp and crunchy edges, make sure the batter is thick and dry. Batter should not be of dropping consistency. You can achieve this by heating gradually in the microwave after grinding the dals, till you get the right consistency. Mix and then add the rest of the ingredients. When frying take a teaspoon of batter and slide with another spoon into the oil. Avoid making balls with your hand as that would give you smooth edges, you want uneven edges for these vadis to add to the crispiness and crunchiness!!
I owe my gratitude to our dear family friend Anita Martins for this easy and simply delightful recipe. Would never have know the ‘mayonnaise’ trick that really takes the taste to another level. Yes, absolutely, you add some mayonnaise to the tuna mix!!
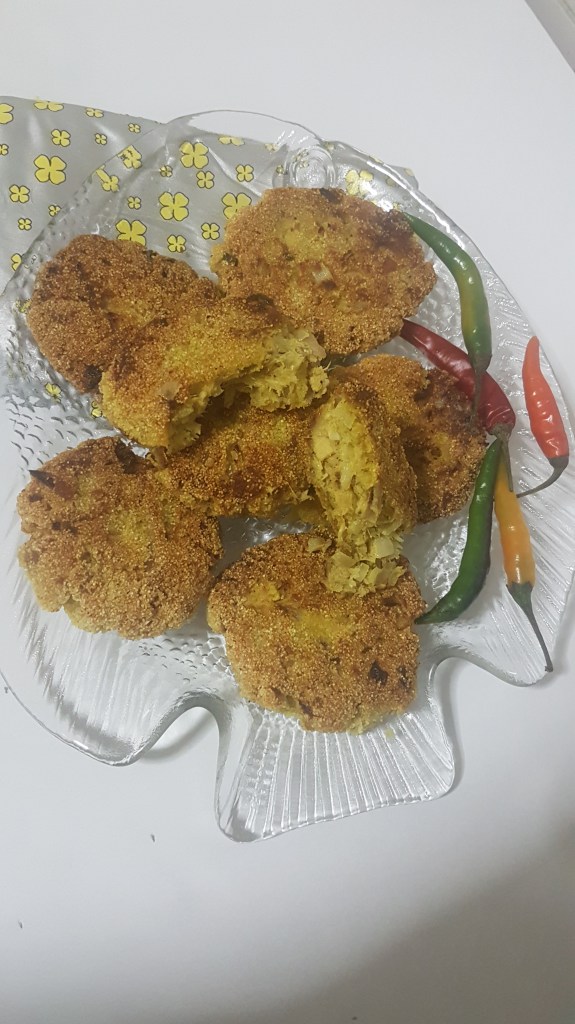
This recipe is a hit at our home and made almost on a weekly basis as it is one of my childrens’ favorite. Even though they hardly eat fish, except for shrimp, they are game anyday for Tuna cutlets provided the tuna is out of a can! Moreover, since it is so quick and simple it is a go to recipe if short on time or out of options on what side dish to make. Goes very well with Dal or Moghe Sar, Vegetable curry,Kuwalo Bafad, etc.
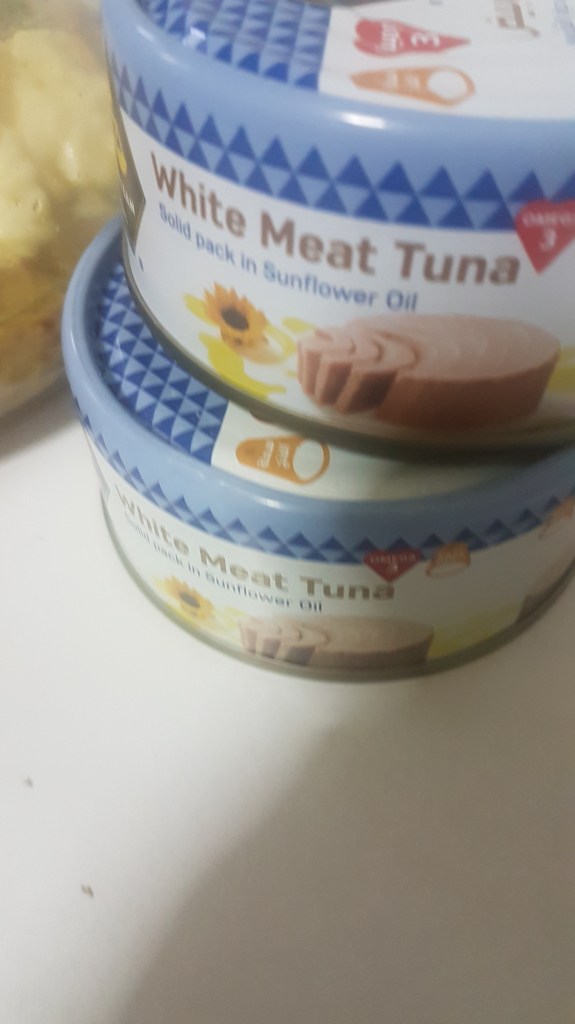
I prefer using the “White Meat Tuna in Sunflower Oil” and also add the oil to the mixture. This really adds to the taste and texture of the cutlets. Although making the cutlets would be a little difficult to handle due to the wet mixture, but once you roll in the semolina it becomes easier to shape.
Fry the cutlets as soon as the mixture is ready otherwise the onions may begin leaving moisture and as the mixture already has the fish oil it will tend to become too wet to handle. If there is a gap between preparation and frying, just put all the ingredients in the bowl and mix just before frying. Also making the cutlets and keeping them aside before frying will tend to break them. Just roll the ball of mixture in semolina and keep aside and form the cutlets when you are ready to place on the frying pan.
½ tsp. black pepper powder (use white peper instead, if available)
Small bunch fresh coriander (optional)
1 tsp. salt
Rava (Semolina) to coat the cutlets
Oil for shallow frying
Method
Empty the contents of the fish tins in a bowl alongwith its oil. Don’t be tempted to discard the oil as it adds to the flavor.
Chop the onions, chillies, ginger & coriander leaves finely and add to the fish.
Add the egg, mayonnaise, lemon juice, turmeric, garam masala & pepper powder and salt. Mix everything well.
Heat a frying pan on medium low and add 4 tbsp. oil.
Take a portion of the mixture the size of a lemon and roll in semolina.
Form the balls into cutlets on the palms of your hand and gently place on the frying pan and shallow fry on medium low till crisp and brown on both sides.
P.S.: The mixture will be quite wet but when rolled in the semolina will be easier to handle and will set when frying. Do not put too much oil, just fry in enough oil on medium low. The cutlets may break if fried in too much oil.
I have been making Foccacia over and over since few years but I don’t know why it did not occur to me to post it sooner. My family just loves this bread and more than half of it gets gobbled up no sooner it comes out of the oven while still warm and crisp.
Top it with chopped olives, roasted tomatoes, roasted peppers, caramalized onions, etc. Foccacia is best eaten alone as a snack, but you can use it for sandwiches or pair it with dips for a delicious appetizer.
Here are the step-by-step pictures and method.
Mix flour, salt and active dry yeast in a large bowl. Add the water and with a wooden spoon or whisk, mix till all the flour is incorporated. Cover the bowl and keep in the refrigerator for 8 hours upto 24 hours. Alternatively, if you wish to bake the same day, leave to rise at room temperature for 2 hours.
After the dough has risen, add the Italian seasoning and knead the dough to incorporate the seasoning.
Take two rimmed trays 9” x 12” each and pour a tbsp. of olive oil in the centre of each. Divide the dough into two pieces and place each on the pan.
Cover with plastic wrap and leave to rise for two hours or more till the dough spreads and covers most of the pan.
Preheat oven to 220 deg C or 425 deg F. With your fingers make depressions all over the bread, drizzle with olive oil and sprinkle with flaky sea salt.
Bake for 25 minutes, until tops are golden and edges and underside are brown and crusty.
Mix all the above together and keep to infuse until required. I have used dried herbs, use fresh if available. Secondly, you may omit one or the other as per availability, but increase the quantity propotionately so the bread is well seasoned. You may also use chopped olives.
Method
Mix flour, salt and active dry yeast in a large bowl.
Add the water and with a wooden spoon or whisk, mix till all the flour is incorporated.
Cover the bowl and keep in the refrigerator for 8 hours upto 24 hours. Alternatively, you can also keep to rise for two hours, if you plan on making it the same day.
After the dough has risen, add the Italian seasoning and knead the dough to incorporate well.
Take two rimmed trays 9” x 12” each and pour a tbsp. of oil oil in the centre of each.
Divide the dough into two pieces and place one on each pan.
Cover with plastic wrap and leave to rise for two hours or more till the dough spreads and covers most of the pan.
Preheat oven to 220 deg C or 425 deg F.
With your fingers make depressions all over the bread, drizzle with the remaining olive oil, use more oil if required and sprinkle with flaky sea salt.
Bake for 25 minutes, until tops are golden and edges and underside are brown and crusty.


Recent Comments