I have been making Foccacia over and over since few years but I don’t know why it did not occur to me to post it sooner. My family just loves this bread and more than half of it gets gobbled up no sooner it comes out of the oven while still warm and crisp.
Top it with chopped olives, roasted tomatoes, roasted peppers, caramalized onions, etc. Foccacia is best eaten alone as a snack, but you can use it for sandwiches or pair it with dips for a delicious appetizer.
Here are the step-by-step pictures and method.
Mix flour, salt and active dry yeast in a large bowl. Add the water and with a wooden spoon or whisk, mix till all the flour is incorporated. Cover the bowl and keep in the refrigerator for 8 hours upto 24 hours. Alternatively, if you wish to bake the same day, leave to rise at room temperature for 2 hours.
After the dough has risen, add the Italian seasoning and knead the dough to incorporate the seasoning.
Take two rimmed trays 9” x 12” each and pour a tbsp. of olive oil in the centre of each. Divide the dough into two pieces and place each on the pan.
Cover with plastic wrap and leave to rise for two hours or more till the dough spreads and covers most of the pan.
Preheat oven to 220 deg C or 425 deg F. With your fingers make depressions all over the bread, drizzle with olive oil and sprinkle with flaky sea salt.
Bake for 25 minutes, until tops are golden and edges and underside are brown and crusty.
Foccacia with garlic and herbs
Ingredients
- 4 cups flour
- 2 tsp salt
- 2 ¼ tsp active dry yeast
- 2 cups warm water
- 4 tbsp. olive oil
- Italian seasoning, as mentioned below
- Flaky sea salt
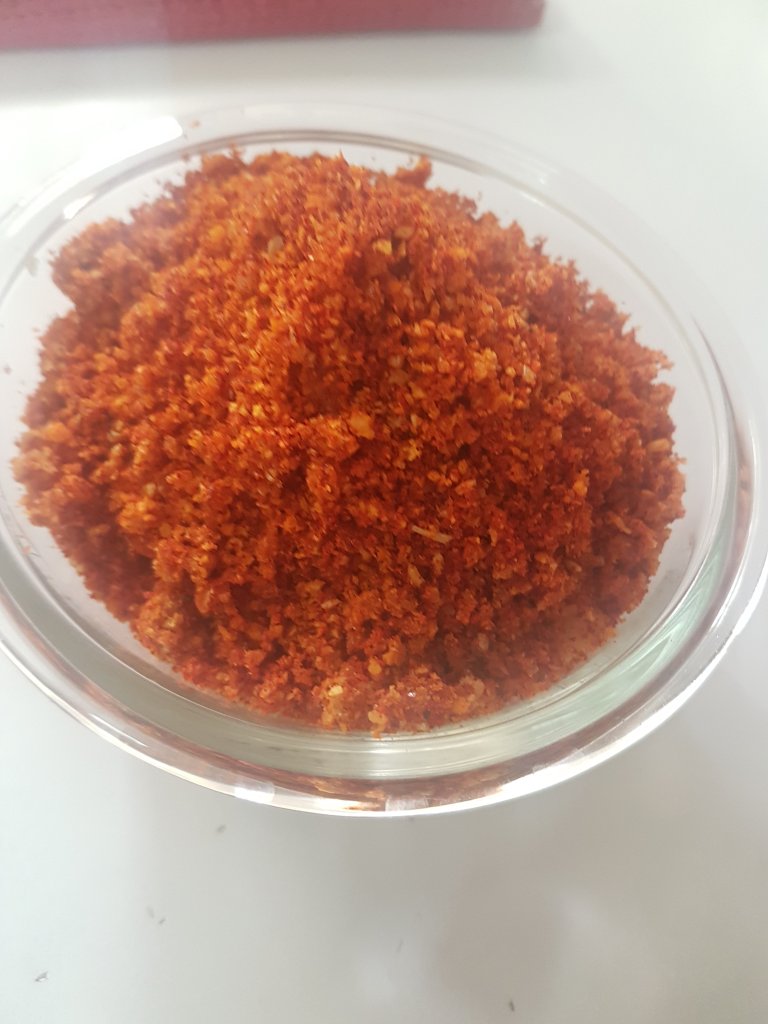
Italian seasoning
- 2 tbsp. chopped garlic
- 2 tbsp. Olive Oil
- 1/2 tsp. Oregano
- 1/2 tsp. Thyme
- 1/2 tsp. Basil
- 1/2 tsp. Rosemary
- 1/2 tsp Chilli flakes
- 1 tsp. Salt
- Mix all the above together and keep to infuse until required. I have used dried herbs, use fresh if available. Secondly, you may omit one or the other as per availability, but increase the quantity propotionately so the bread is well seasoned. You may also use chopped olives.
Method
- Mix flour, salt and active dry yeast in a large bowl.
- Add the water and with a wooden spoon or whisk, mix till all the flour is incorporated.
- Cover the bowl and keep in the refrigerator for 8 hours upto 24 hours. Alternatively, you can also keep to rise for two hours, if you plan on making it the same day.
- After the dough has risen, add the Italian seasoning and knead the dough to incorporate well.
- Take two rimmed trays 9” x 12” each and pour a tbsp. of oil oil in the centre of each.
- Divide the dough into two pieces and place one on each pan.
- Cover with plastic wrap and leave to rise for two hours or more till the dough spreads and covers most of the pan.
- Preheat oven to 220 deg C or 425 deg F.
- With your fingers make depressions all over the bread, drizzle with the remaining olive oil, use more oil if required and sprinkle with flaky sea salt.
- Bake for 25 minutes, until tops are golden and edges and underside are brown and crusty.


Recent Comments