Authentic tried and tested simple recipes in mainly Indian cooking, including traditional mangalorean, Goan, East Indian, North Indian recipes and much more…
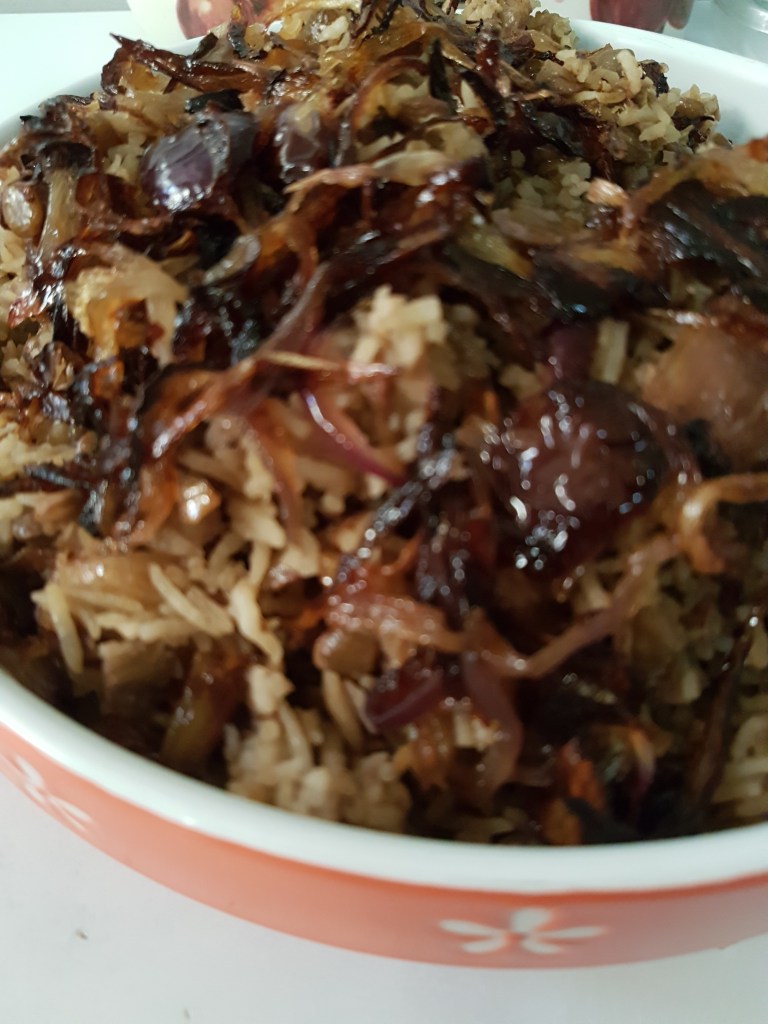
Mujadara is a one pot meal, made with just three ingredients, onions, rice & whole green/brown lentils. Olive oil, pepper powder and salt are the other necessary ingredients. Having stayed over 45 years in Kuwait, it is just natural that I have learnt to cook some of their cuisine.
This dish however is one I tried recently and instantly took a liking to it, not only because it is so simple and easy but turns out delicious, with very little spices and the brown onions taking it to another level!
Serve it with sour cream or yogurt. If you wish to add the Indian touch, make a dahi curry or raita instead.
Ingredients
1 ½ cups whole Green lentils (full masoor)
1 ¼ cups rice
4 large onions
1 tsp. pepper powder
1 tsp. salt
2-3 tbsp. olive oil
4 ½ cups water
Method
Wash rice and soak for 15 mns. to half hour.
Pick and wash the lentils and cook in 4 1/2 cups water.
Meanwhile, heat the olive oil in a pan and fry the sliced onions.
The onions need to be fried golden brown so will take a while.
When the lentils are cooked, add the salt, mix and add the drained rice, pepper and half the onions (doesn’t matter if they are not browned yet).
Add a cup of hot water (as most of the water would have been absorbed by the lentils), mix, cover and cook on medium low till done.
Continue frying the remaining onions to a golden brown.
After 10 minutes check the rice & seasoning. If the water is dried and rice is still uncooked, add a cup of hot water over the rice, cover and leave to cook till done.
Serve hot, garnished with the remaining fried onions and top with mint or coriander leaves if you wish.
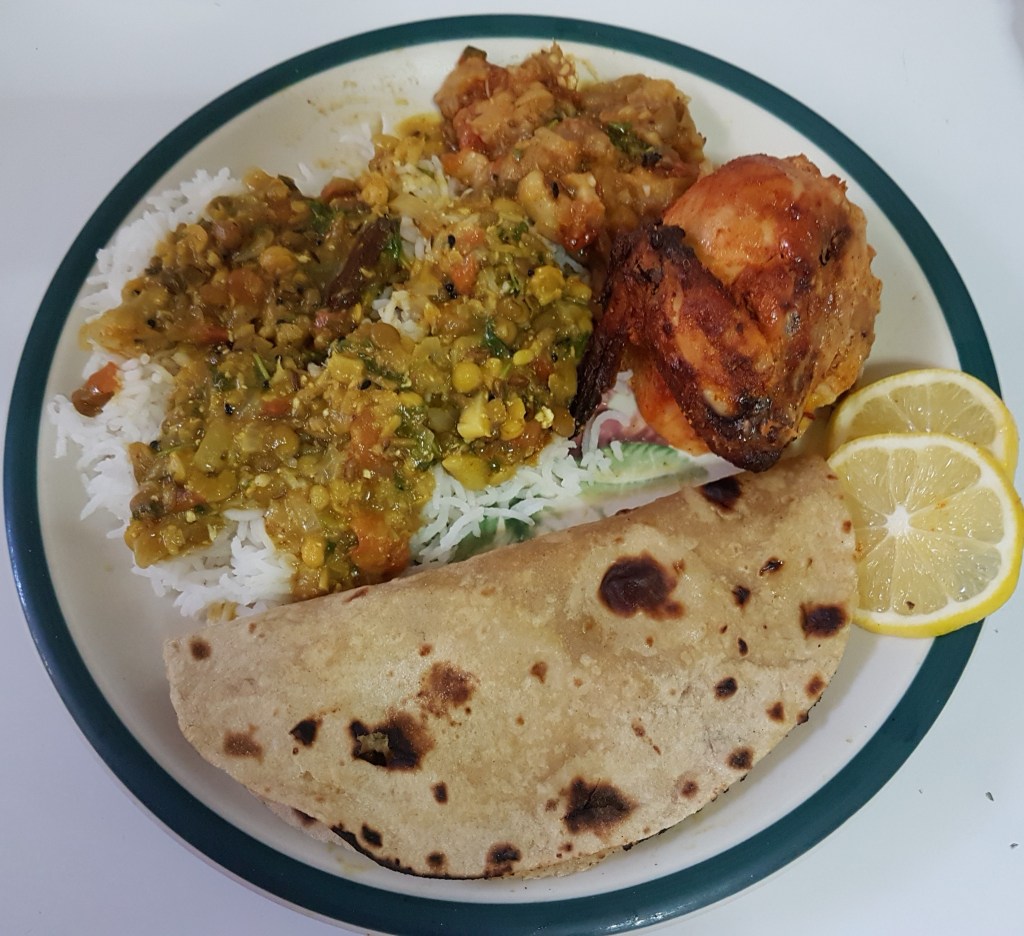
The most common bread consumed all over India, and a staple in the Northern parts. It is handmade on a special griddle for the purpose called ‘tawa’ and baked fresh on a stove top as and when required. It is made from whole wheat flour by binding the flour into a dough and rolling out into thin discs and roasting/baking on a ‘tawa’. It’s eaten with breakfast, lunch, dinner or as a snack.
Ingredients
3 cups whole wheat flour
1 tbsp. vegetable oil
Salt to taste
Water for kneading
Ghee for applying on the parathas
Sieve flour and mix with the oil thoroughly.
Add salt, required water and knead to a soft dough for 10 minutes. Cover and set aside for 15 minutes.
Make 15 round balls of the dough. Roll out each ball into a circleas thin as possible.
Heat a tava or non-stick pan and place the chapati on it and cook till you see small bubbles, flip and cook the other side on medium flame till small brown spots appear.
Using tongs take the chapati off the tawa and leave to puff over direct flame on both sides.
Remove and apply a little ghee, keep in a casserole, covered so it remains hot and soft.
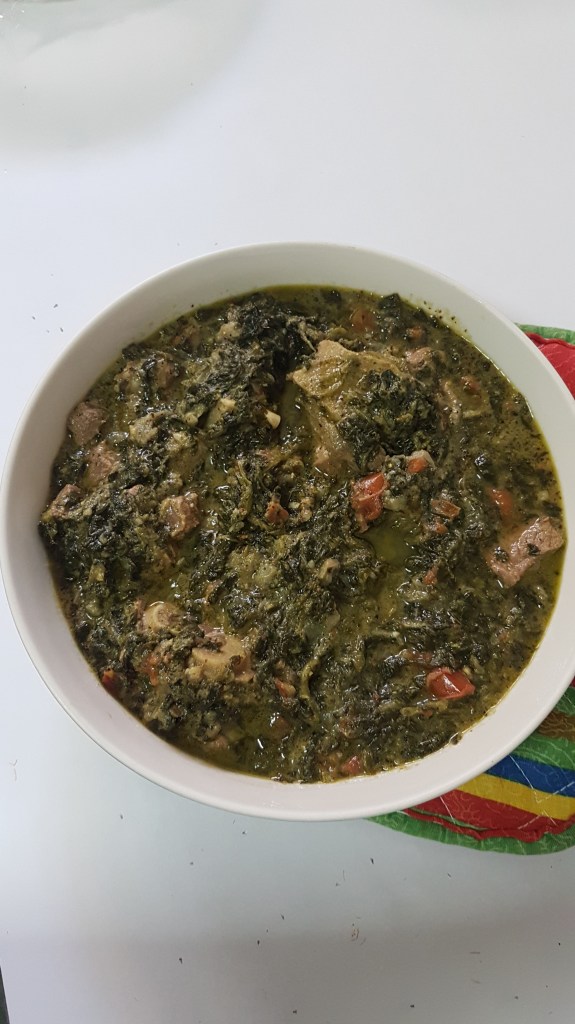
This is a traditional Mangalorean dish typically served at Roce ceremonies. The Lunch or dinner at Roce ceremonies is either fish curry or mutton polov alongwith the other main items of the menu like chone tendli sukhe, sannas, vorn etc.
In Mangalore in old times, “Korpo” was used for this preparation i.e. fresh coconut and sliced onion would be put out to dry in the sun and used with the spices for the masala paste. I am sure this is still being done when cooking is done on a large scale for weddings, etc. For home cooking, we would go with the quicker method of roasting the coconut and onion on a pan!
Clean and cut mutton into cubes, wash and drain well.
Clean the ash gourd, cut into wedges, remove the seeds, peel and cut into ½” cubes. Wash and drain.
Slice one onion and fry in a little oil to light brown
Add the mutton pieces and cook till they change color and most of the water that is released evaporates.
Add sufficient hot water to the mutton, bring to a boil and cook for about 60 minutes. If using a cooker, it will be quicker.
Stir in between and add salt half way through cooking.
When the mutton is tender remove to another dish and set aside.
In the same vessel add a cup of water, the ash pumpkin cubes, 3 bay leaves, 1 tsp. salt (or to taste) and cook the vegetable adding a cup of thin coconut milk.
When half done, add the cooked mutton alongwith the stock.
Bring to a boil and simmer 5 minutes.
Then add the ground masala paste, adjust the curry by adding the masala water.
Cook on medium till oil surfaces.
Test seasoning and add salt if required.
Meanwhile, take a frying pan add a tbsp. of coconut oil and fry the sliced onion till golden brown.
Garnish the curry and serve hot with rice or sannas, etc.
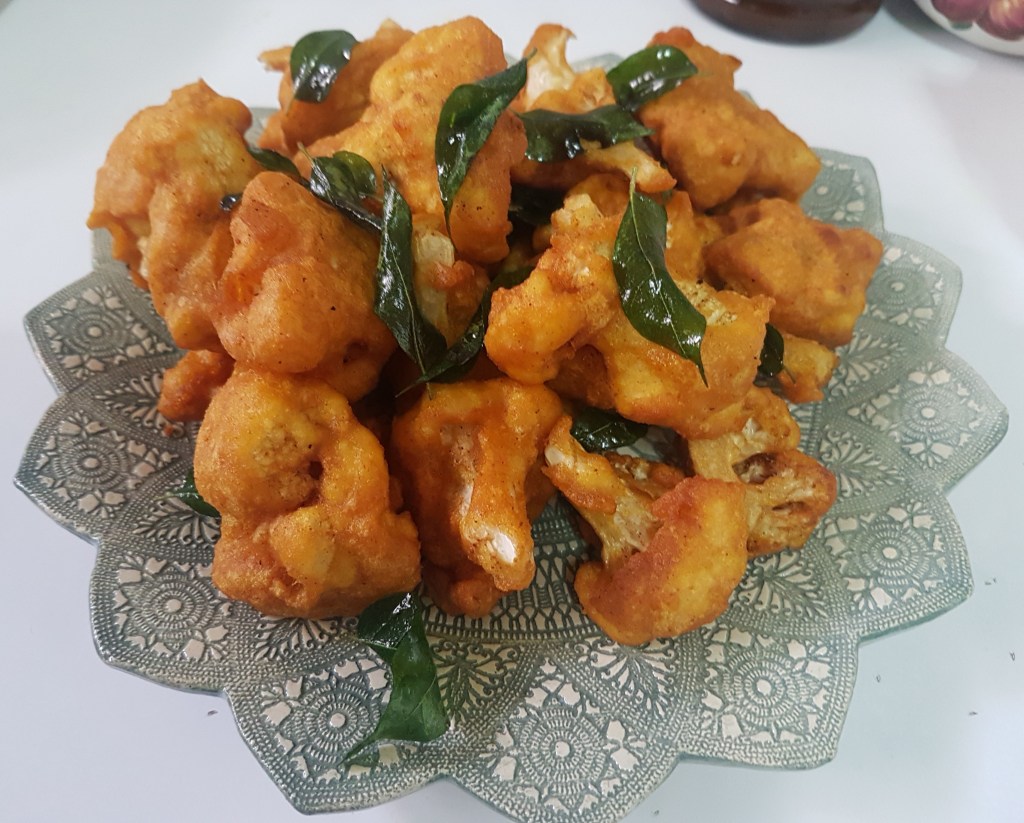
This recipe is similar to the Raw Banana Fry (Cooking with raw Bananas) that I posted, but the method is different. Here the cauliflower is marinated in the spices and vinegar/lemon solution, then dipped in the batter prepared with the marinade and flours.
Has anyone tried marinating the florets prior to coating with batter and frying? Just takes it to another level as the cauliflower absorbs the subtle spicy, and tart flavors so you taste it right through the vegetable itself and not just the coating.
Ingredients
1 medium Cauliflower
1 tsp. ginger garlic paste
2 tbsp. Vinegar or Lemon juice, or to taste
½ tsp. turmeric powder
1 tsp. chilli powder or to taste
1 cup water, approx.
½ cup all purpose flour
¼ cup rice flour
¼ cup corn flour
¼ tsp. soda bicarb (optional)
Salt to taste
¼ cup curry leaves for garnish
Oil for frying
Method
Cut the Cauliflower into large florets and soak in hot boiling water with 2 tsp. salt for 15 to 20 minutes.
Mix the ginger garlic paste, chilli & turmeric powder, salt with the vinegar/lemon juice and water.
Add the florets to this marinade and leave for 15 to 20 minutes.
Can be prepared and left overnight if preparing for an occasion.
Remove the florets and set aside.
To the marinade, add all purpose flour, rice flour, corn flour, soda bicarb and make a thick paste.
If you wish to achieve a deeper color, add few drops of red food color to the batter. I have avoided it.
If it’s too watery add some more of the flours (rice & maida). It must form a coating that adheres to the cauliflower floret when dipped and lifted from the batter.
Test salt and add if necessary.
Heat oil in a kadai. Do this while making the batter, so it is heated when the batter is done.
Dip the florets in the batter to cover well and deep fry in small batches till crisp and golden on medium flame.
Drain on kitchen towel.
After the last batch is fried, fry the curry leaves in the hot oil for a minute and remove.
Garnish the fried cauliflower with the curry leaves and serve as a side with a main meal or with tomato ketchup or chilli sauce as a snack or appetizer.
Extraordinary dishes prepared with ordinary vegetables!!
Potatoes stuffed with paneer and cooked in a tangy chutney gravy, sure to leave your palates tingling!
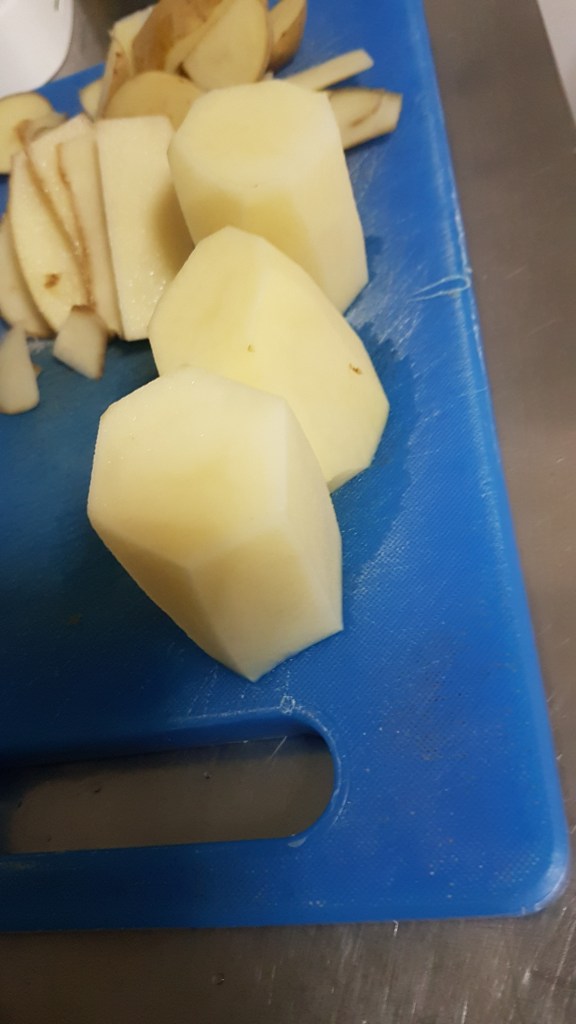
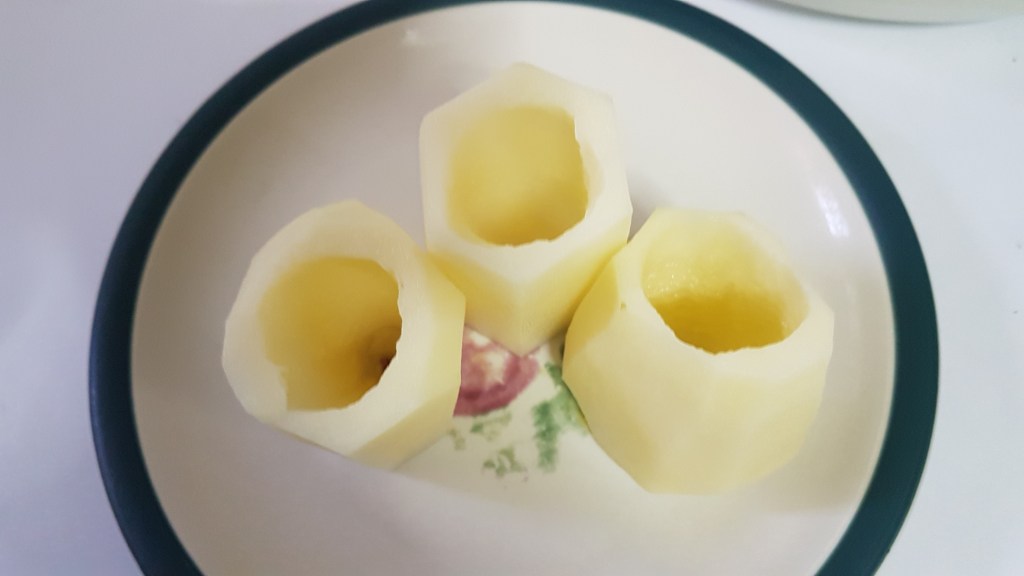
Clean the potatoes and trim the sides to make barrel shapes. Scoop out the centre to form a hollow leaving ¼ inch around. Deep fry in oil till light brown.
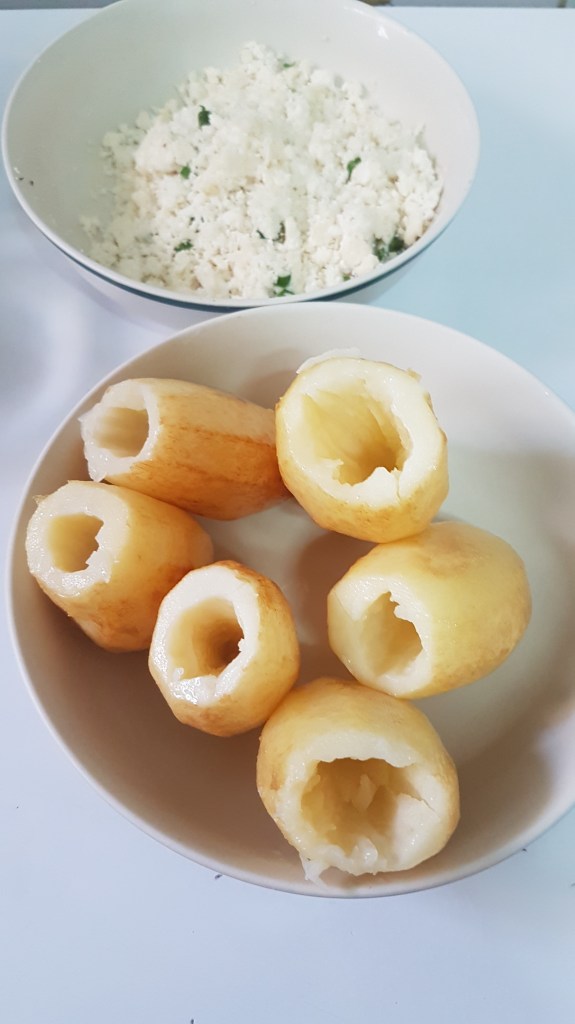
Grate paneer and mix with the chopped chillies and cashewnut pieces. Stuff the potatoes with this filling. Keep aside.
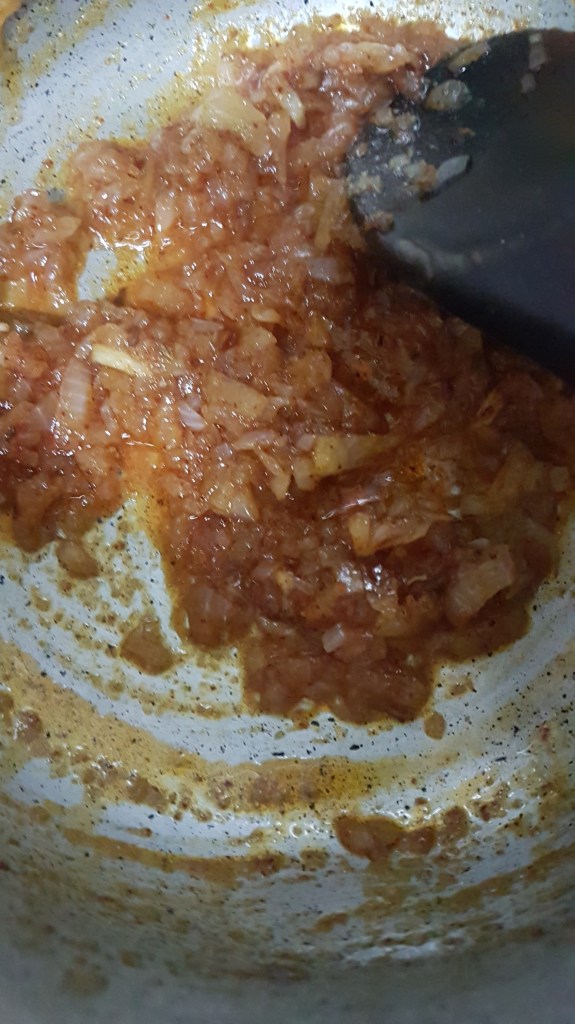
Grind the chutney ingredients to a paste. Whisk yogurt in a bowl. Wash and chop tomatoes. Heat ghee in a vessel, add cumin and finely chopped onions or the ½ cup boiled onion paste and sauté for a minute. Boiled onion paste will give you a smoother gravy. Add the ginger garlic paste with ¼ cup water and stir till fat leaves the masala. Add the chutney masala and red chilli powder, sauté for few seconds. Add yogurt and 1 cup water, mix, bring to a boil, reduce heat to low and simmer till fat leaves the masala.
Add the whole stuffed potatoes and simmer for few minutes until fully cooked. Add tomatoes and simmer for a minute, add cashewnut paste and stir carefully. Sprinkle the garam masala and bring to a boil.
2 medium onions, chopped finely or ½ cup boiled onion paste –To make boiled onion paste: Peel, wash and roughly chop onions. Place in a vessel, add 1 bay leaf, 1 black cardamom and ½ cup water. Bring to boil and cook on low till onions are transparent and liquid has evaporated. Grind to a paste.
2 tbsp. ginger garlic paste
1 tsp. cumin
1 tsp. red chilli powder
1 cup yogurt
½ cup tomatoes
3 tbsp. cashewnut paste – To make cashewnut paste: Soak the cashewnuts in water for 30 minutes and grind to a paste.
2 tsp. garam masala
Salt
Method
Wash the potatoes and trim the sides to make barrel shapes.
Scoop out the centre to form a hollow leaving ¼ inch around.
Deep fry in oil till light brown.
Mash the paneer and mix with the chopped chillies and cashewnut pieces.
Stuff the potatoes with this filling. Keep aside.
Grind the chutney ingredients to a paste.
Whisk yogurt in a bowl.
Wash and chop tomatoes.
Heat ghee in a vessel, add cumin and finely chopped onions or the ½ cup boiled onion paste and sauté for a minute. Boiled onion paste will give you a smoother gravy.
Add the ginger garlic paste with ¼ cup water and stir till fat begins to separate.
Add the chutney masala and red chilli powder, sauté for few seconds.
Add yogurt and 1 cup water, mix, bring to a boil, reduce heat to low and simmer till fat leaves the masala.
Add the whole stuffed potatoes and simmer for few minutes until fully cooked.
Add tomatoes and simmer for a minute, add cashewnut paste and stir carefully.
Sprinkle the garam masala powder and bring to a boil.
Adjust seasoning. Cook in and open vessel, do not cover.
To serve, cut the potatoes carefully in half to reveal the stuffing.
Extraordinary dishes prepared with ordinary vegetables!!
This recipe has been in my book since I was in school in the early 70’s, which was shared by Irene Vaz. In those days “Dalda” a brand of hydrogenated vegetable oil, was an household name for an affordable ‘ghee’ substitute, made famous by Lintas the company responsible for their advertising. One of their vigorous campaigns was a recipe contest and the winning recipes were published. A must ingredient in every recipe was Dalda! Have your ever seen a recipe calling for ‘Parachute’ rather than ”Coconut Oil’? But with Dalda it was the brand that was made famous rather than the product (vanaspati). Vanaspati is a thick vegetable oil NOT Ghee, but was commonly used instead of ghee.
Musallam Phool Gobi is from this recipe contest. Although I had it since the 70’s I tried it only in the 90’s when we invited two of our friends and their families over for Lunch as their parents were visiting Kuwait. The parents were strict vegetarians and wanting to impress them I prepared this dish, but they didn’t believe that it was home-cooked and kept insisting that it was certainly ordered from a restuarant. So that’s how delicious it turns out!
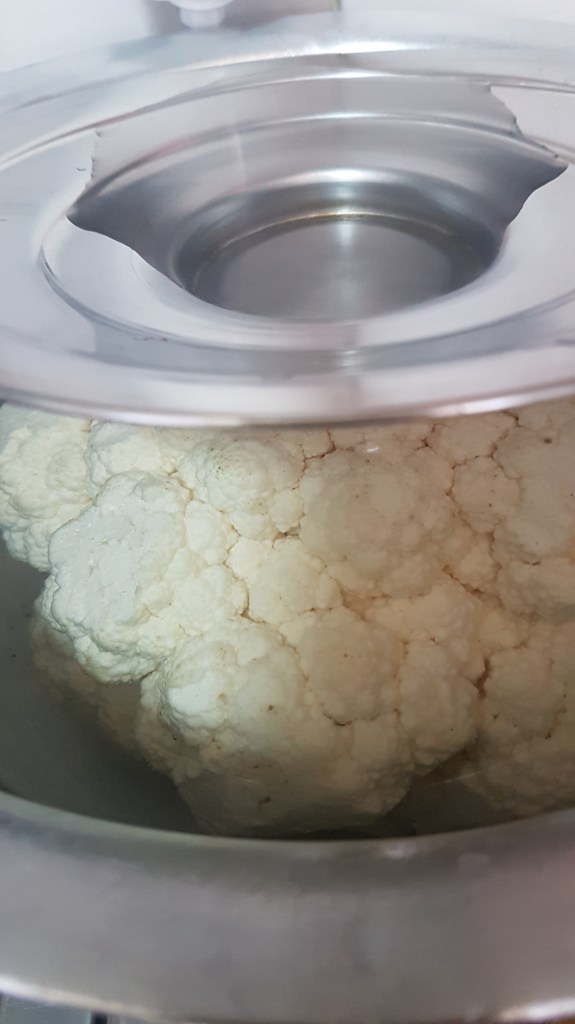
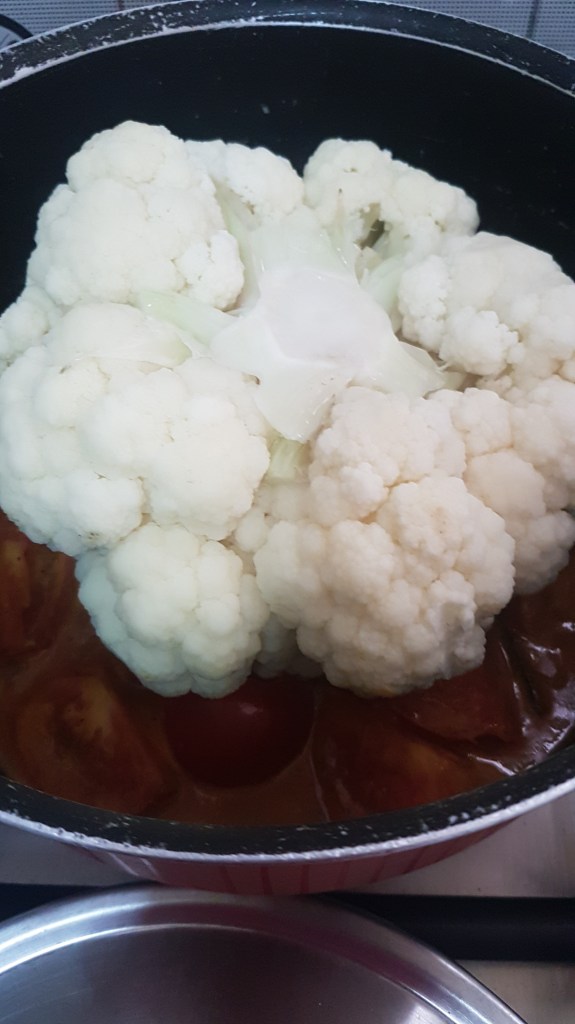
To prepare Musallam Phool Gobi, clean cauliflower and remove the leaves. Wash whole flower well and soak it in warm salted water to 10 to 15 minutes. Drain and rinse.
Immerse in salted water
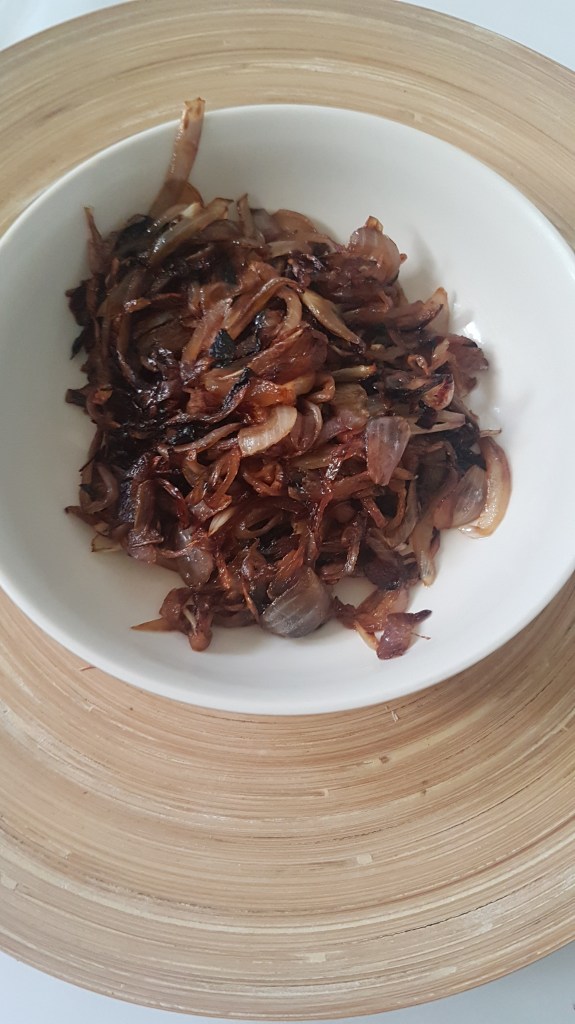
Wash and cut tomatoes into fours. Slice onions finely. Grind the ingredients from garlic to salt. Heat 2 tbsp. ghee in a pan and fry the onions till golden brown, remove and set aside.
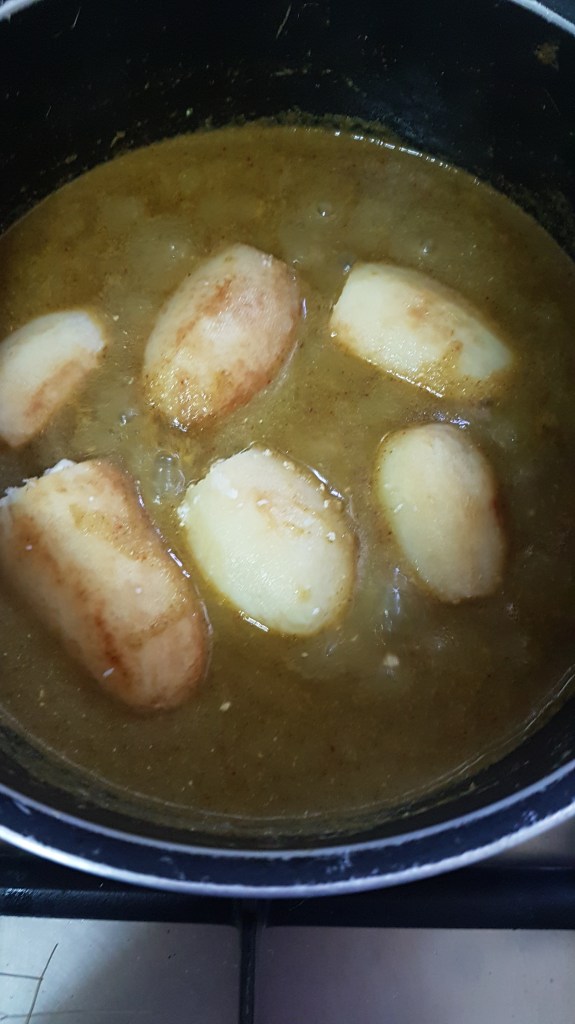
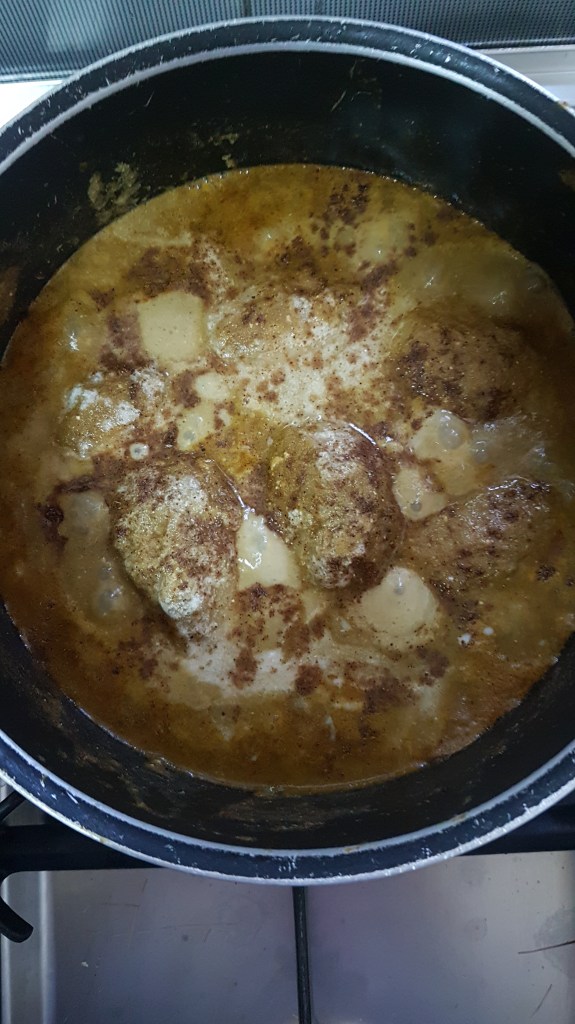
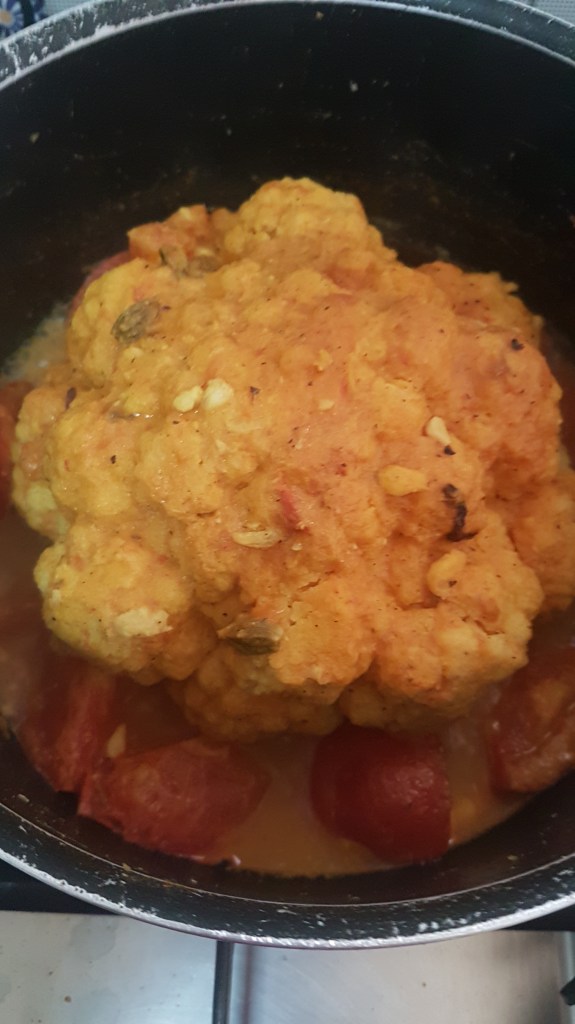
While the onions are frying, take a deep broad vessel and add 2 tbsp. ghee, when hot, add the cardamoms, cinnamon and bay leaves. Add the ground paste and fry for a few minutes. Add the tomatoes and cook for five minutes. Then add the whole cauliflower, stem side up.
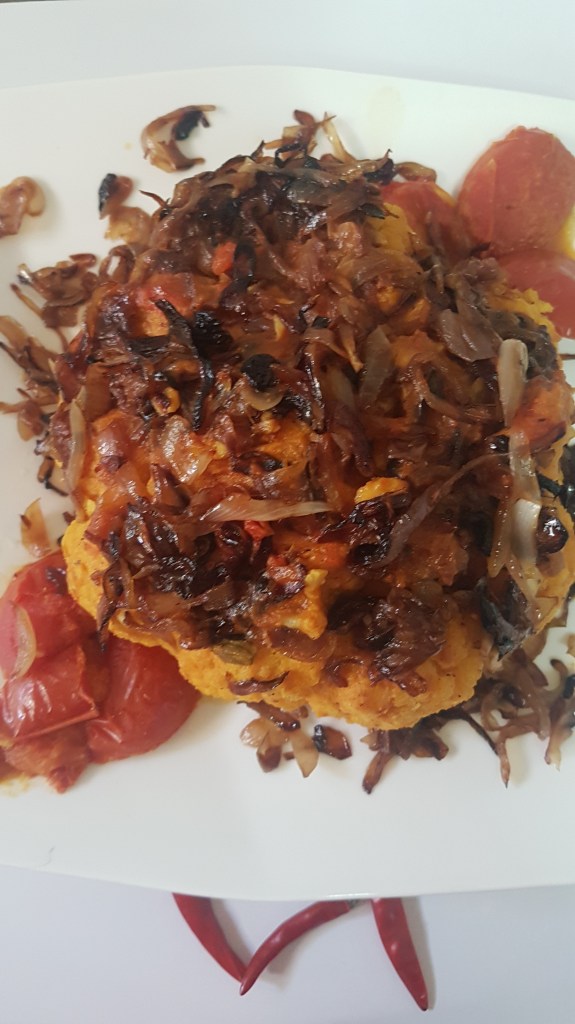
Cook on low heat till half done. Turn over and cook till tender and light brown. Do add any water. Garnish with the browned onions and serve hot with parathas or chapaties or any Indian bread of your choice.
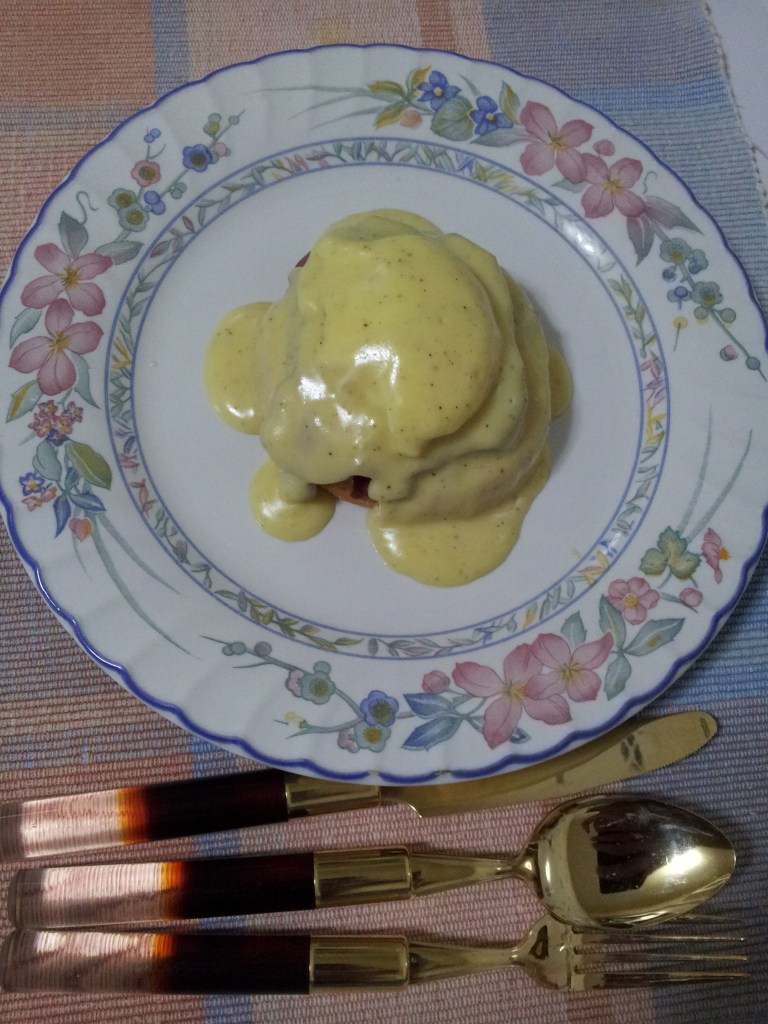
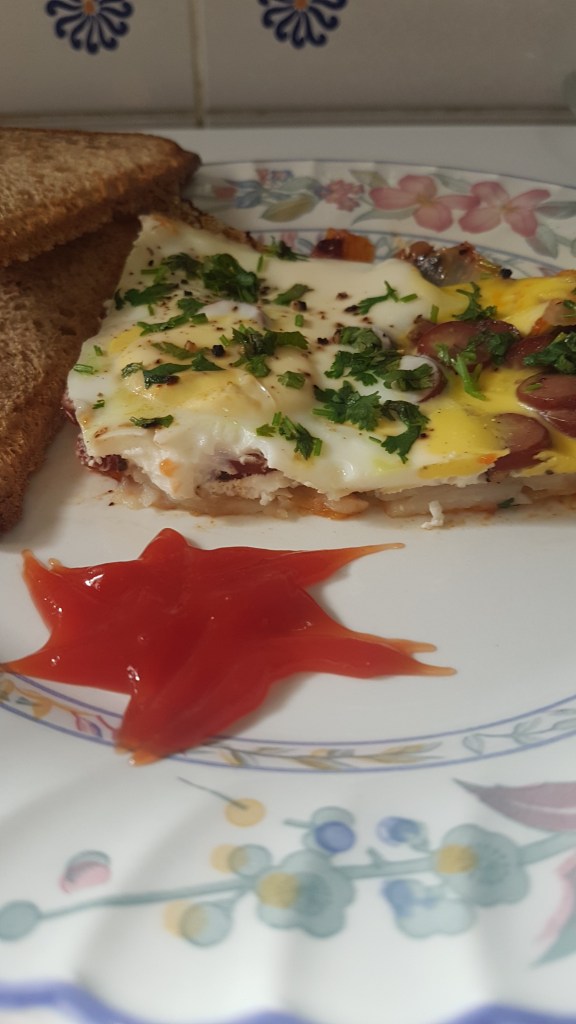
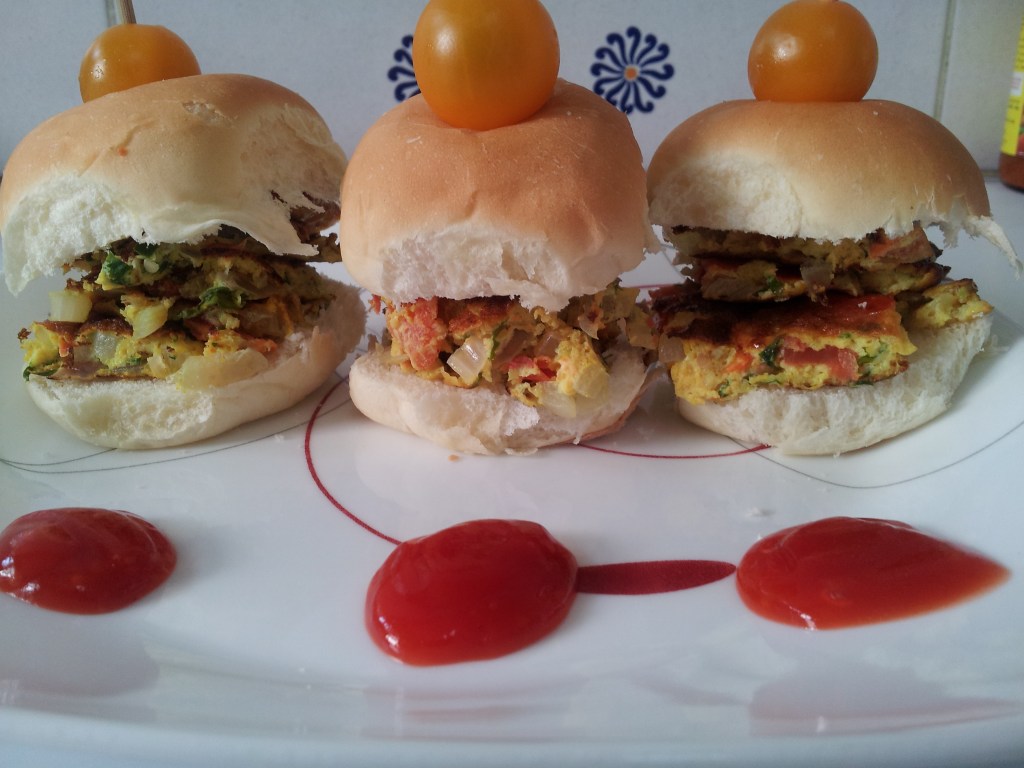
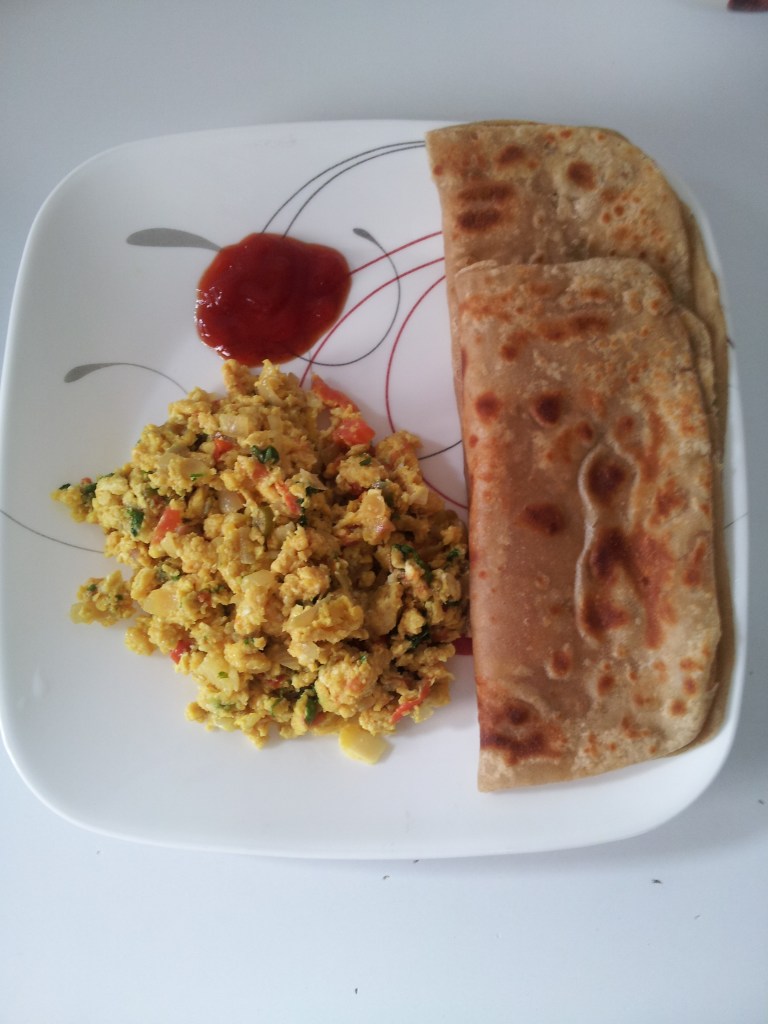
Eggs form an essential part of our diets providing us with quality nutrients like protein, iron, vitamins, minerals and carotenoids and is a powerhouse of disease-fighting nutrients like lutein and zeaxanthin.
Eggs should also be cooked in the right manner to benefit from the nutrients. For perfectly boiled eggs check out my post on Think you know how to boil an egg.
For those who love eating eggs, here are several options to enjoy this nutrient dense food for breakfast or even as lunch or dinner.
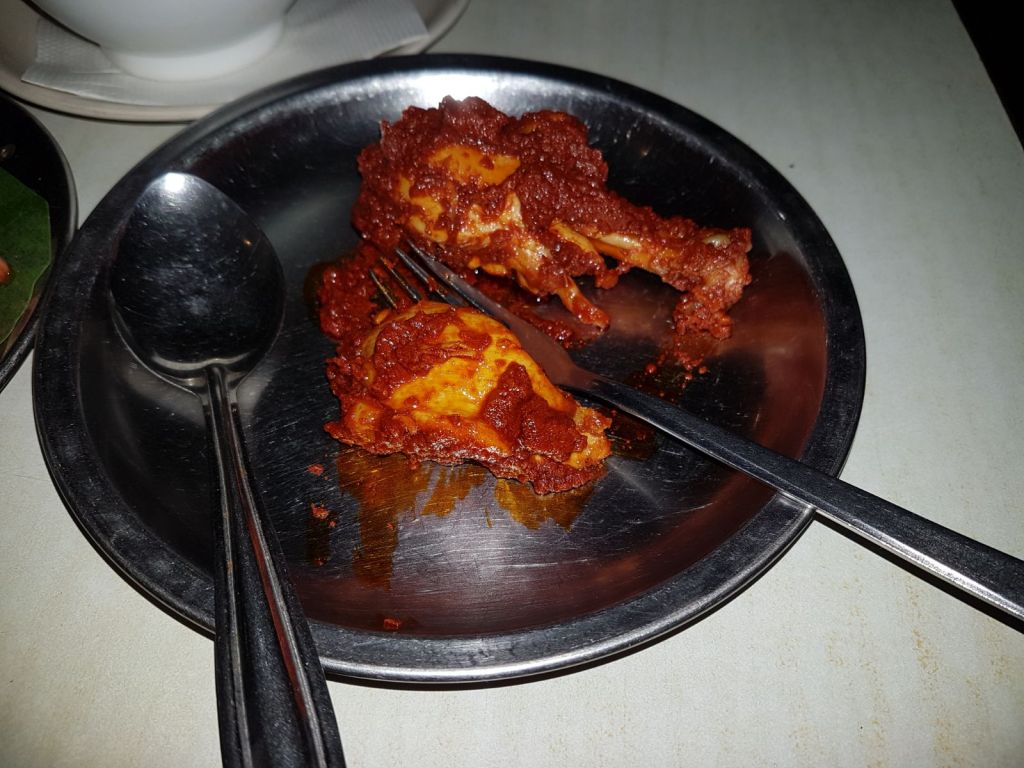
Chicken Ghee Roast is a popular Tuluva Mangalorean Chicken recipe whose origins go back to a small town, Kundapur, close to Mangalore. Chicken Ghee Roast is fiery red, tangy and spicy with a flavor of ghee roasted spices. Chicken ghee roast is pan roasted with spices and generous use of ghee. Source : Wikipedia
I am presenting the Chicken, Mutton (Lamb) and Prawn Ghee roast recipes. Although the spices are similar but there is some variation in the ingredients and preparation for each of the recipes. Click on the title for the recipe –
A typical speciality of the Bunt community made popular at Shetty restaurants, the first time I had ‘Ghee Roast’ was in Mangalore on our last visit about two years ago, at Guthu Restaurant. We had Kori Roti, King Fish fry and Chicken Ghee Roast. The fiery Chicken Ghee Roast which immediately hit our head on the first morsel and had fire coming out of our ears had our eyes, nose watering and our mouth burning. Although it was exciting, we just could not handle the spice level, with the result we could not enjoy the meal.
Guthu Chicken Ghee Roast
King Fish Fry
Kori Roti
The advantage of creating traditional dishes at home, is you can adjust the recipe to suit your taste to get maximum satisfaction from the meal. Our spice level is always medium spicy, hence the Prawn, Chicken and Mutton Ghee Roast does not have the usual number of chillies. Secondly, Baydagi and Kashmiri chillies are both used, but I have used only Kashmiri as I did not have Baydagi chillies. You may increase the chillies according to your taste.
P.S.: Any leftover ghee roast (if at all any remains of these delicious dishes) can be reinvented the next day. Just add some water when re-heating to make a curry and you have a Kundapur Curry to go with freshly steamed rice!
Consuming foods that are cooling to the body help with heat exhaustion, indigestion, sleeplessness and other ailments associated with hot weather.
Hear are a few desserts made from foods that have a cooling effect on the body, while also providing the essentional nutrients and nourishment.
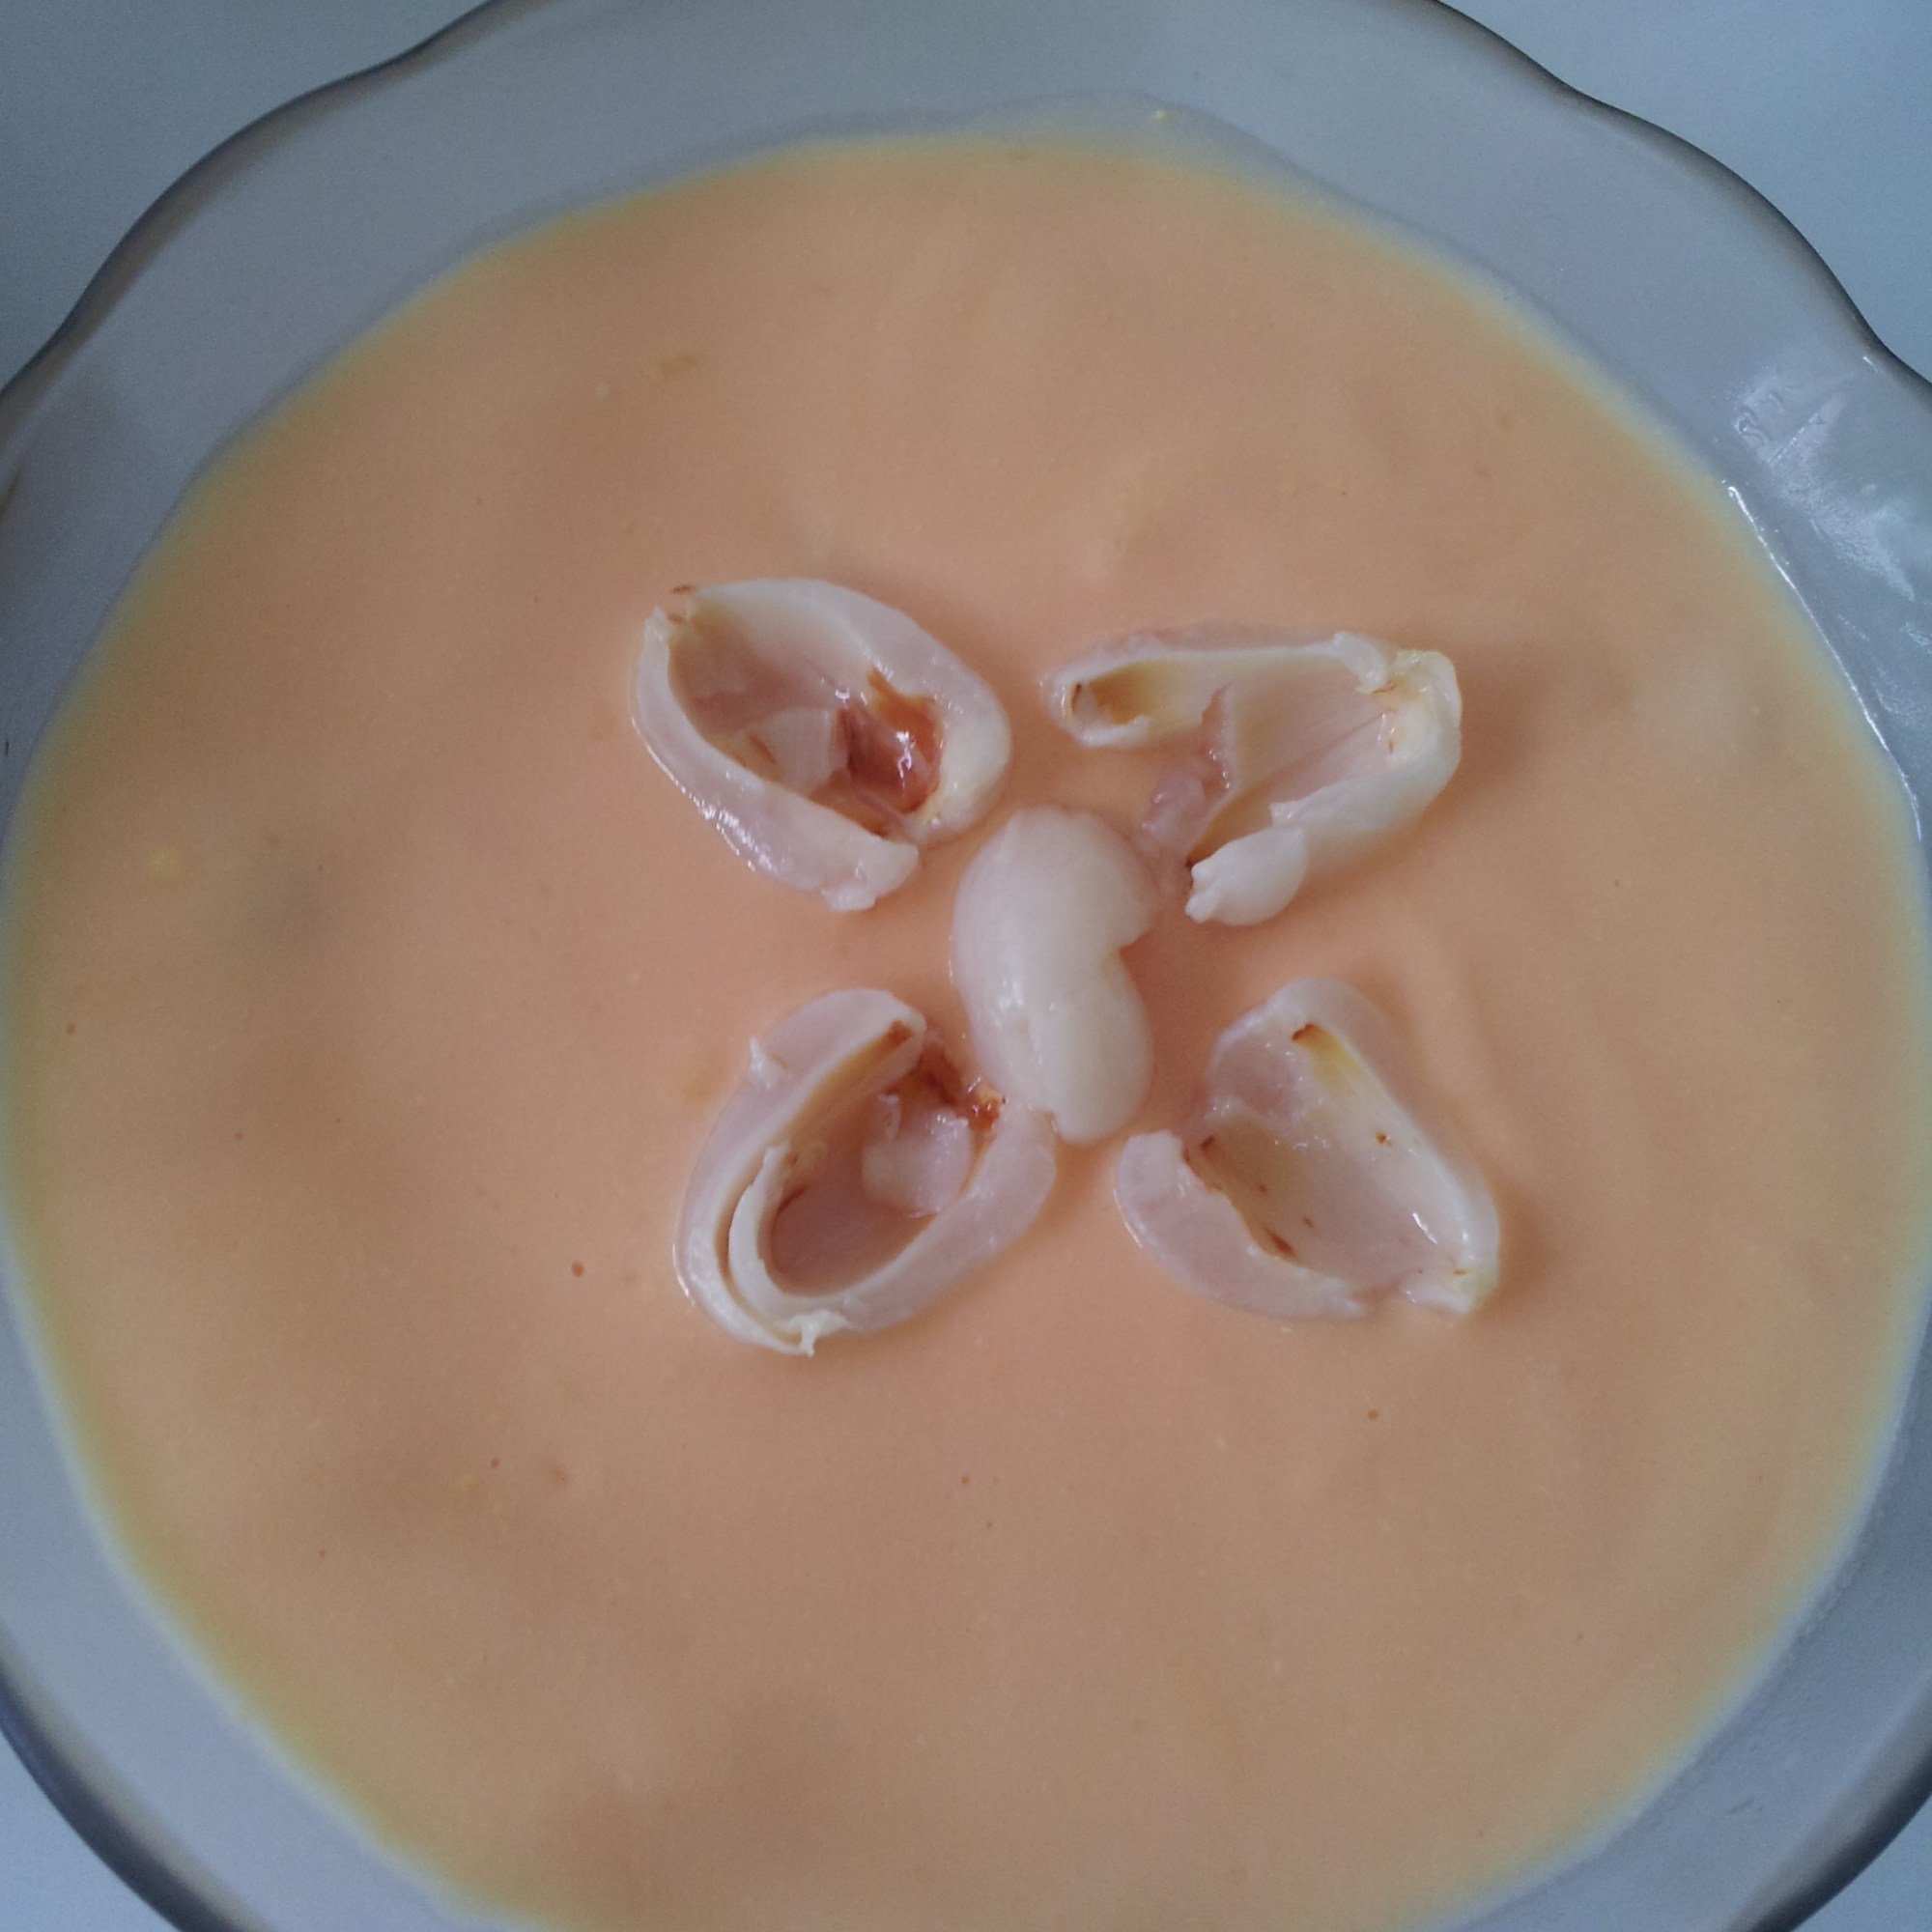
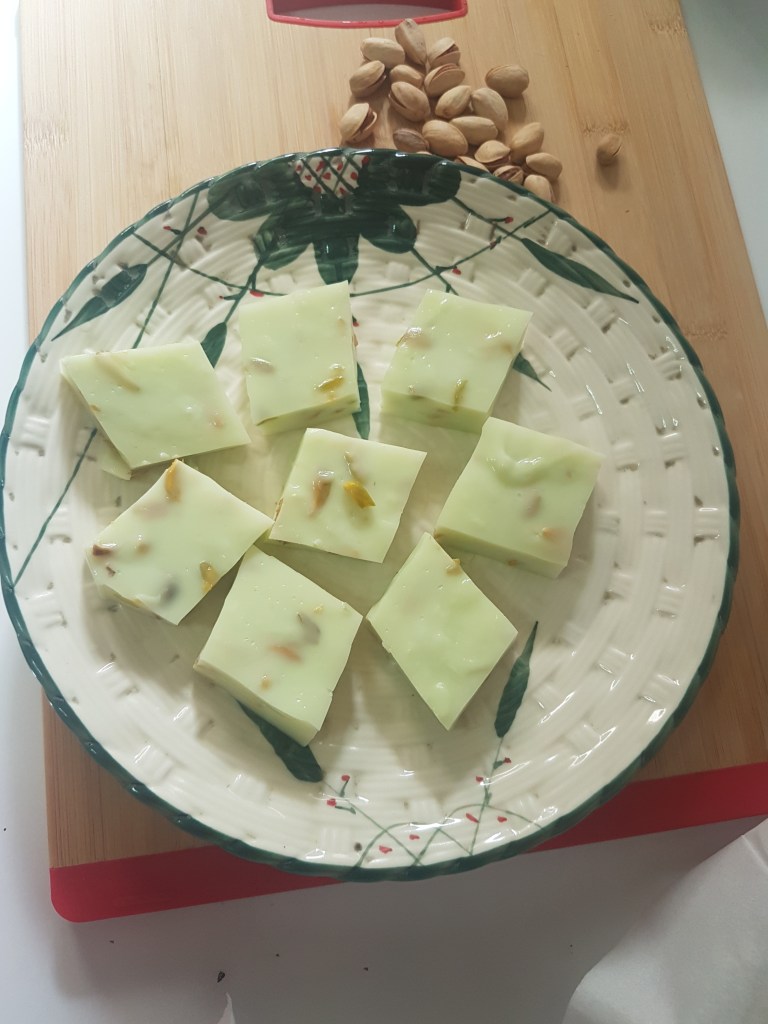
Pistachio Arrowroot Pudding
Pistachio Arowroot Pudding
Arrowroot powder: Gluten free, has a cooling effect on the body and helps in digestion.
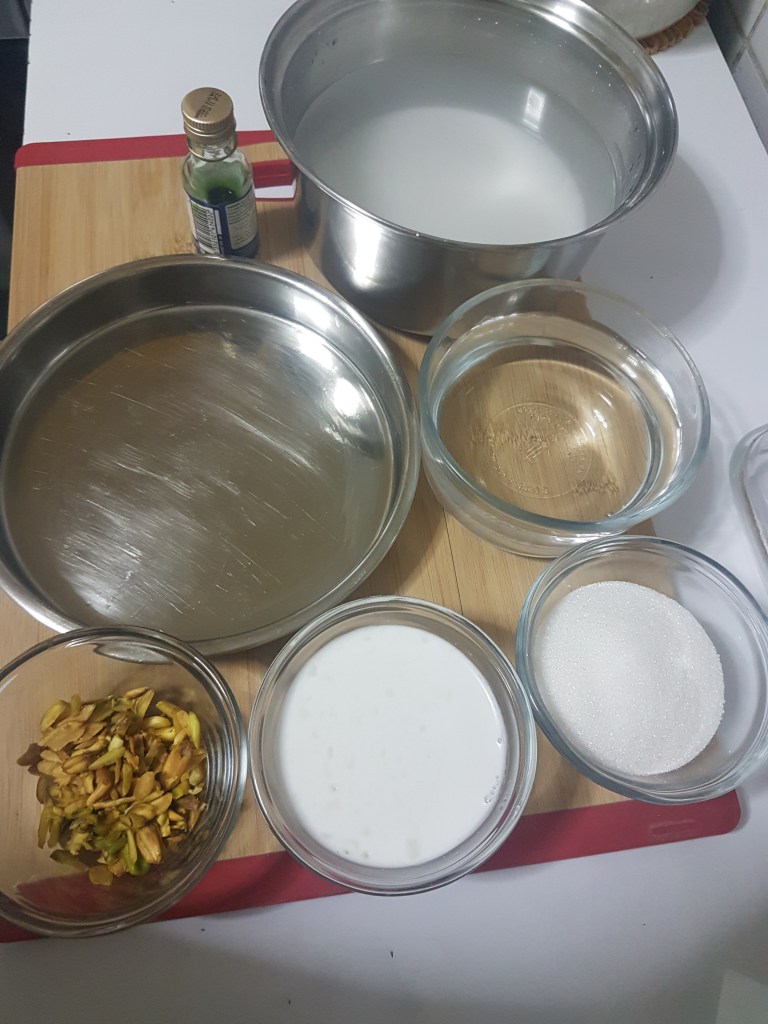
Ingredients
½ cup Arrowroot powder
½ cup sugar
½ cup coconut milk or regular milk
1 ½ cups water
¼ cup Pistachios, shelled
A pinch cardamom powder
2 to 3 drops green food colour
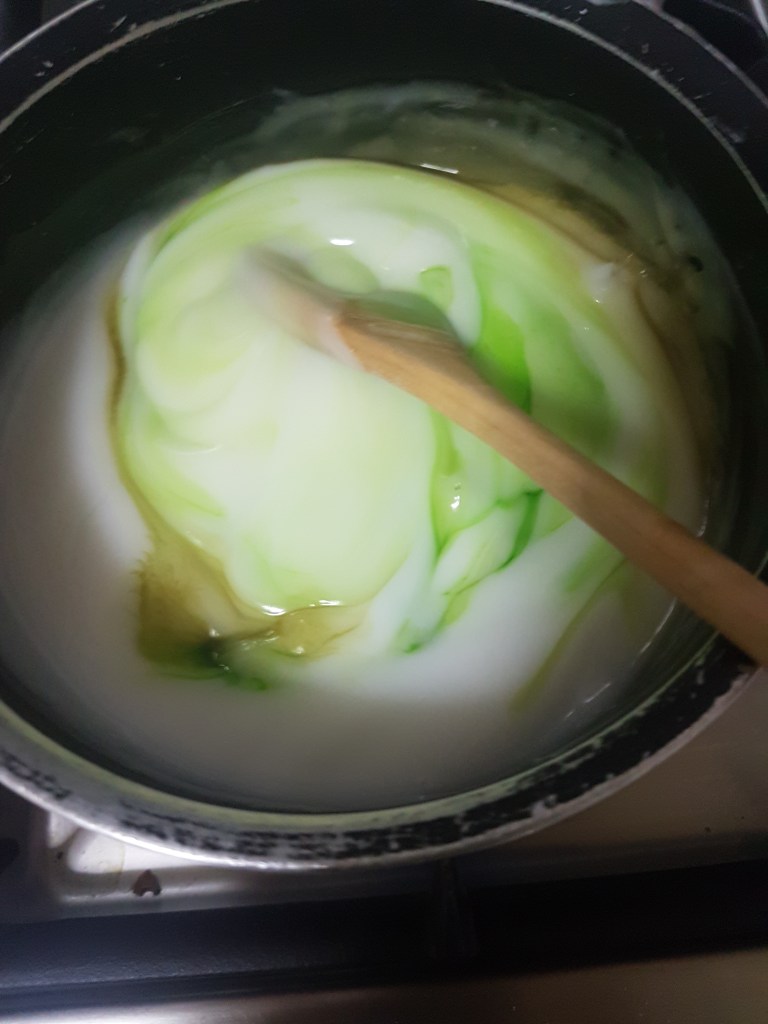
Put the arrowroot powder in a large bowl and mix it with 2 cups of water and leave it aside for 2 to 3 hours. The powder will settle to the bottom. After 2 to 3 hours discard the water carefully without disturbing the arrowroot paste. Meanwhile, soak the pistachios in water for half an hour. Peel the skins and slice thinly. Grease a plate with ghee and set aside.
Add the 1 ½ cup water to the arrowroot paste and dilute it. Take a saucepan and add the arrowroot mixture to the saucepan alongwith the sugar and coconut milk, mix and keep on medium low flame and cook till the mixture thickens, about 5 to 8 minutes, stirring continuously. Add the green food coloring and mix well. Once thick and glossy, add the cardamom powder and sliced pistachios. (I have added vanilla essence instead of cardamom) Cook, stirring till the mixture turns translucent and begins leaving the sides of the pan. Total cooking time should take 10 to 15 minutes. Overcooking will cause the mixture to thin.
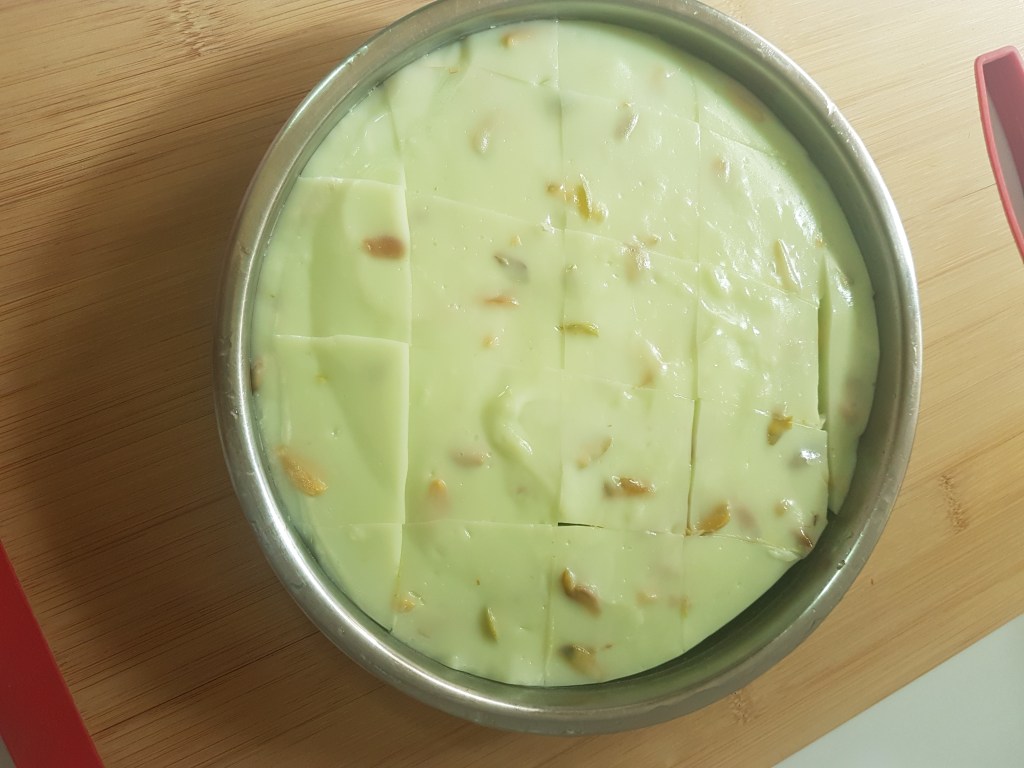
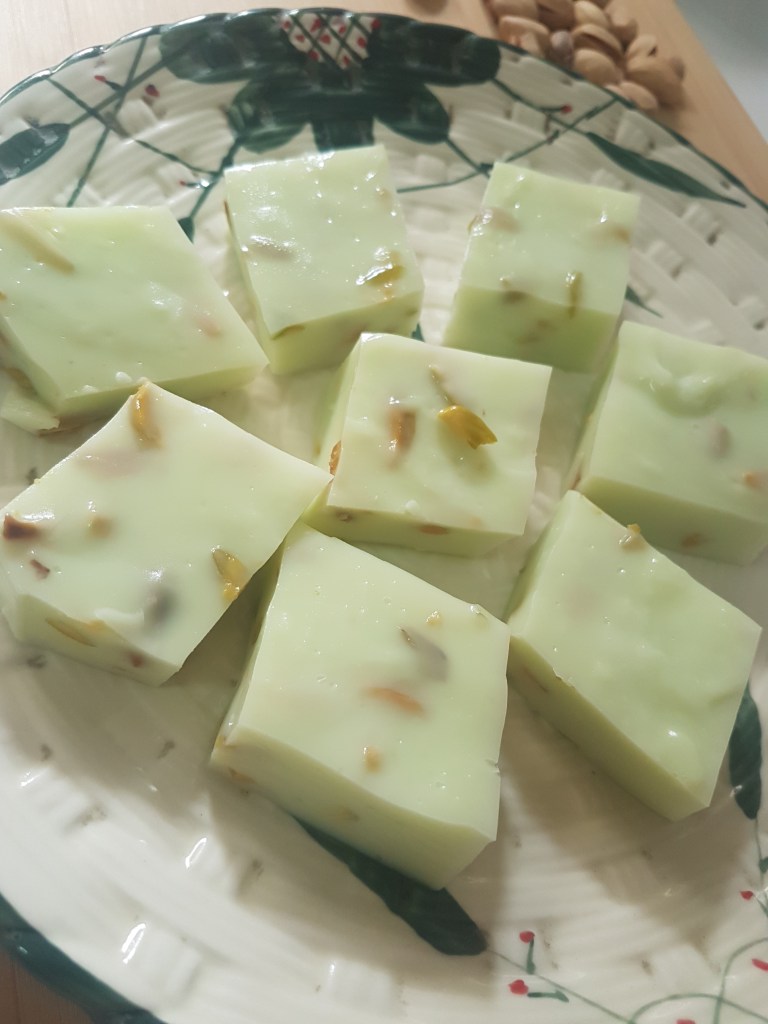
Take off flame and pour into the greased plate and tap the plate so the mixture spreads evenly. Cool completely and refrigerate for atleast 6 hours. Cut into cubes or triangles and serve.
Variations in flavoring: Keep the pudding white and add a i) few saffron strands with chopped cashews or ii) toasted coconut flakes with sliced almonds.
P.S.: Arrowroot powder may be substituted with corn flour.
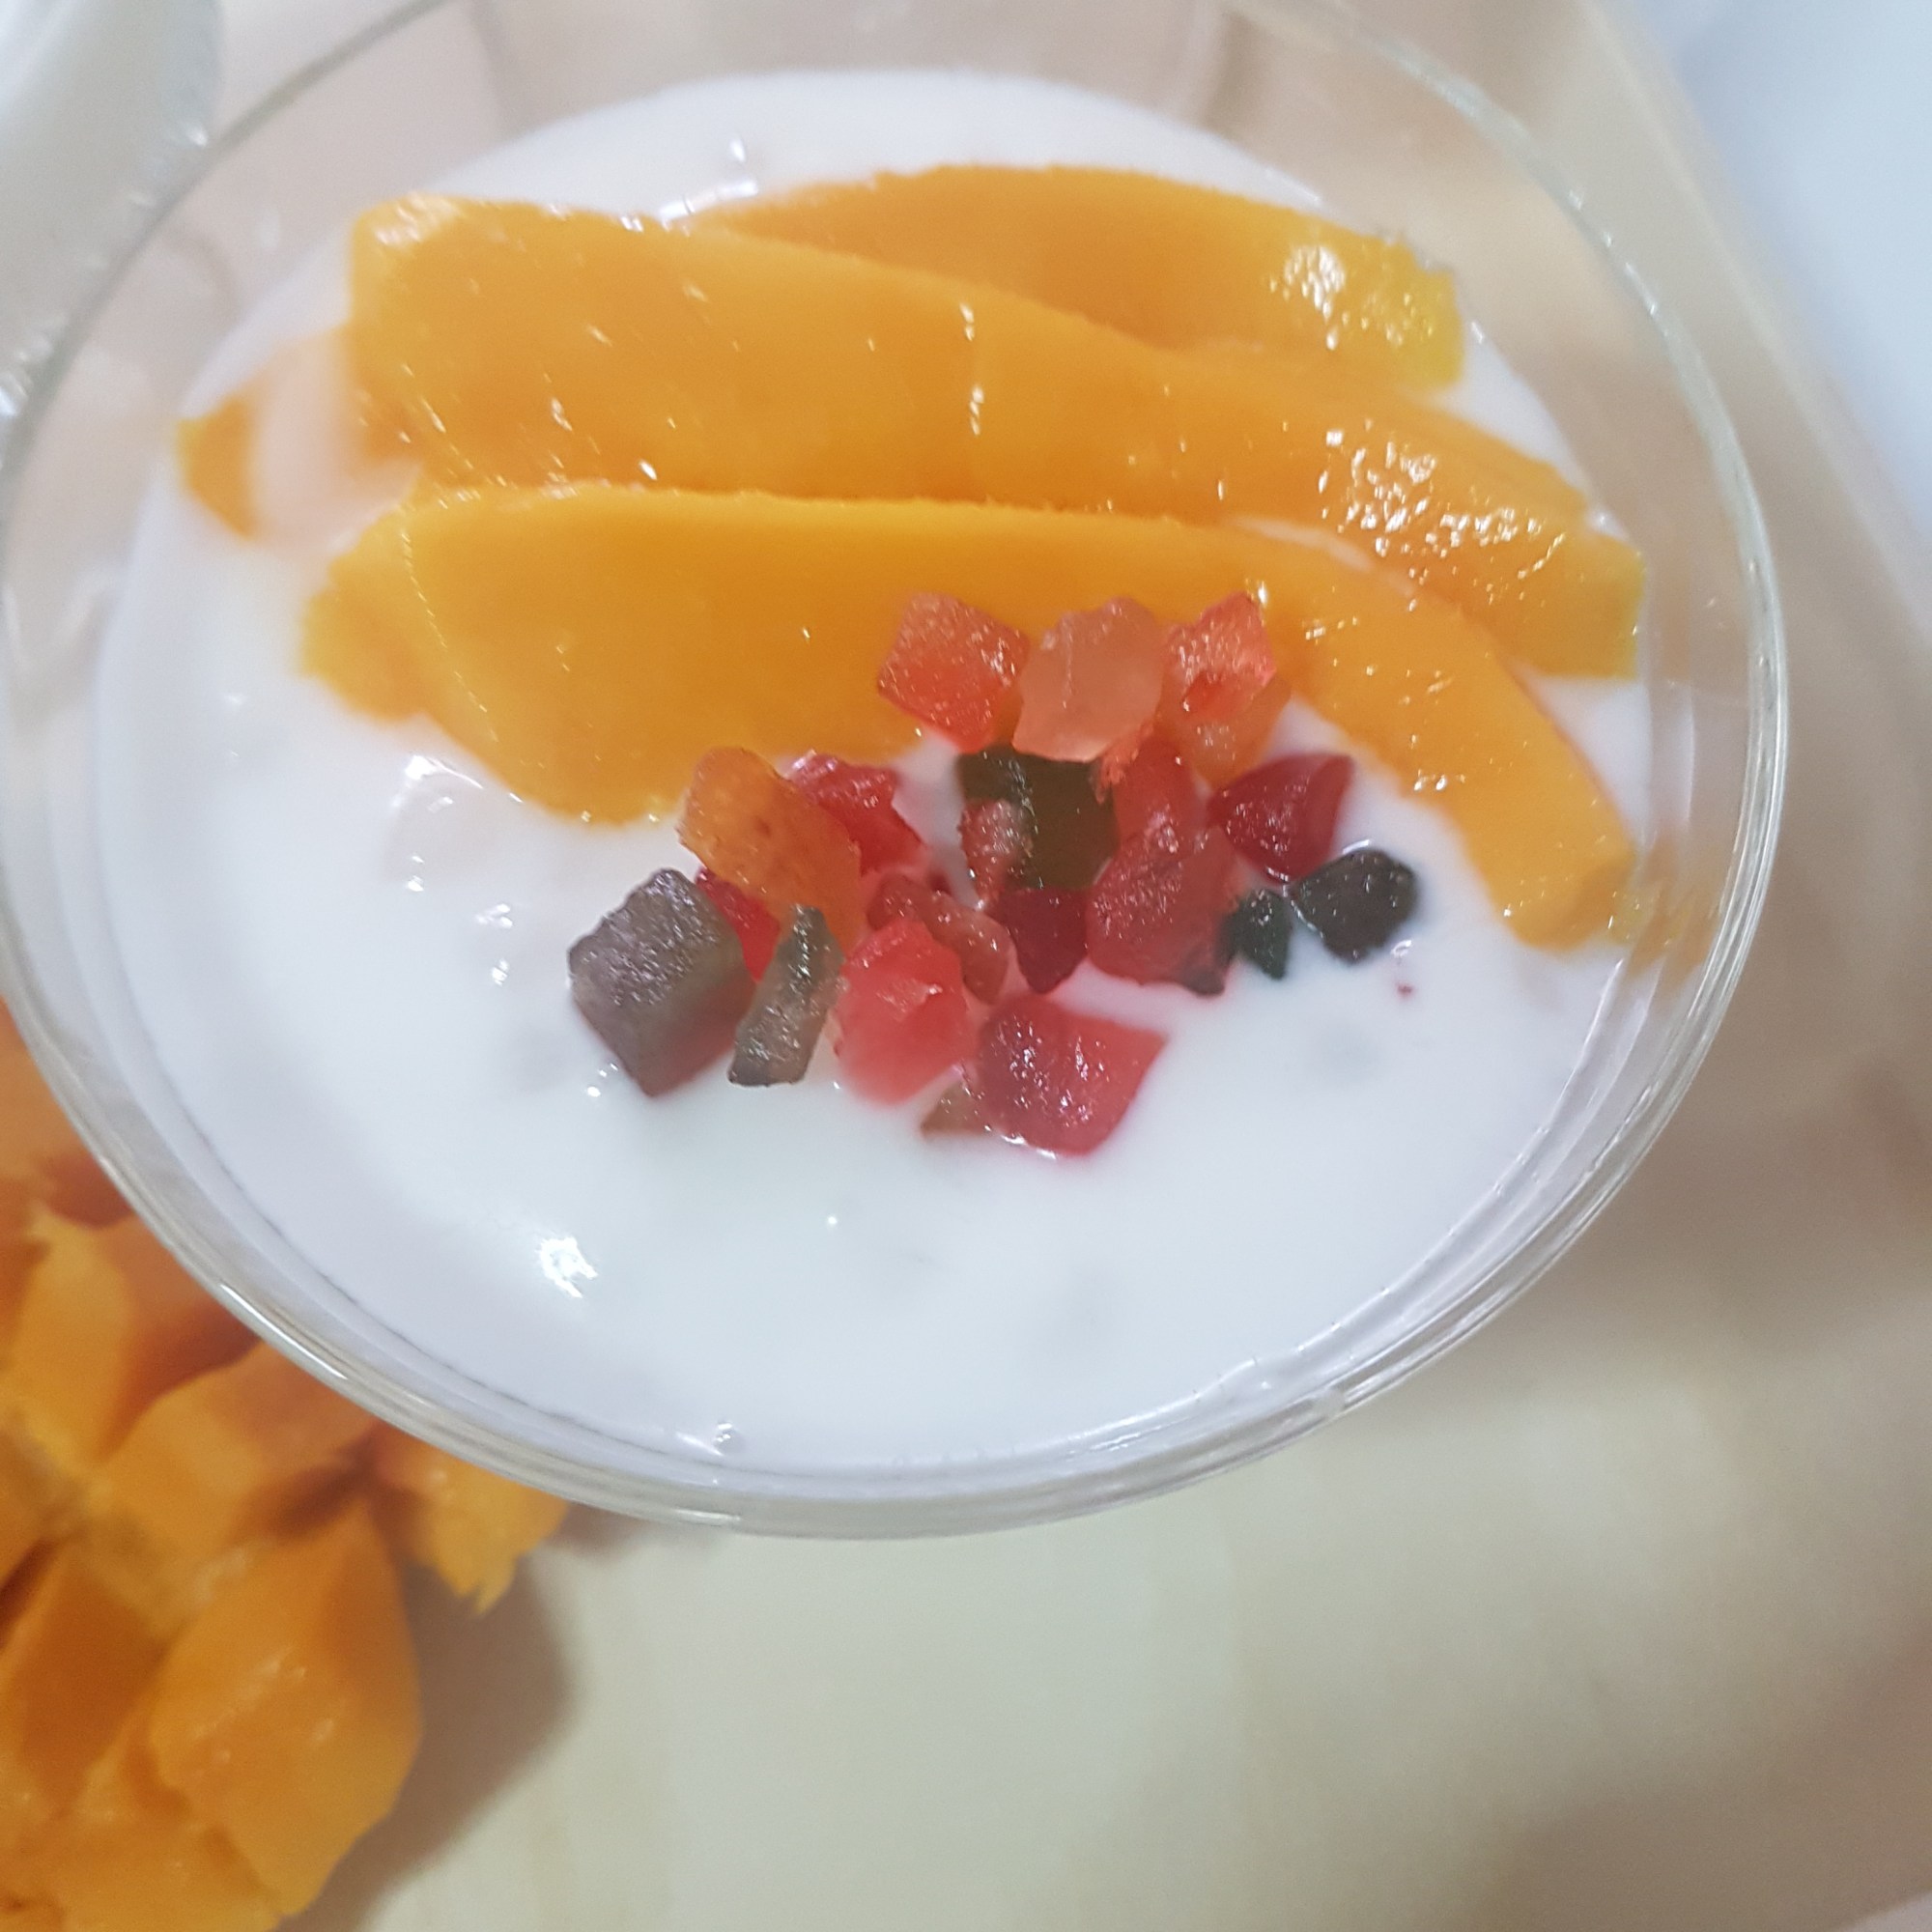
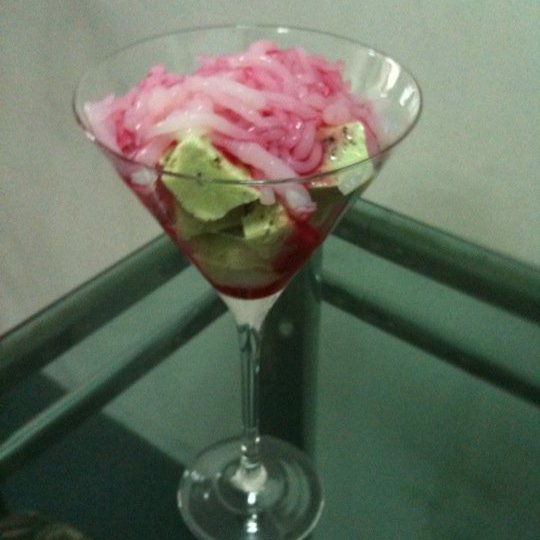
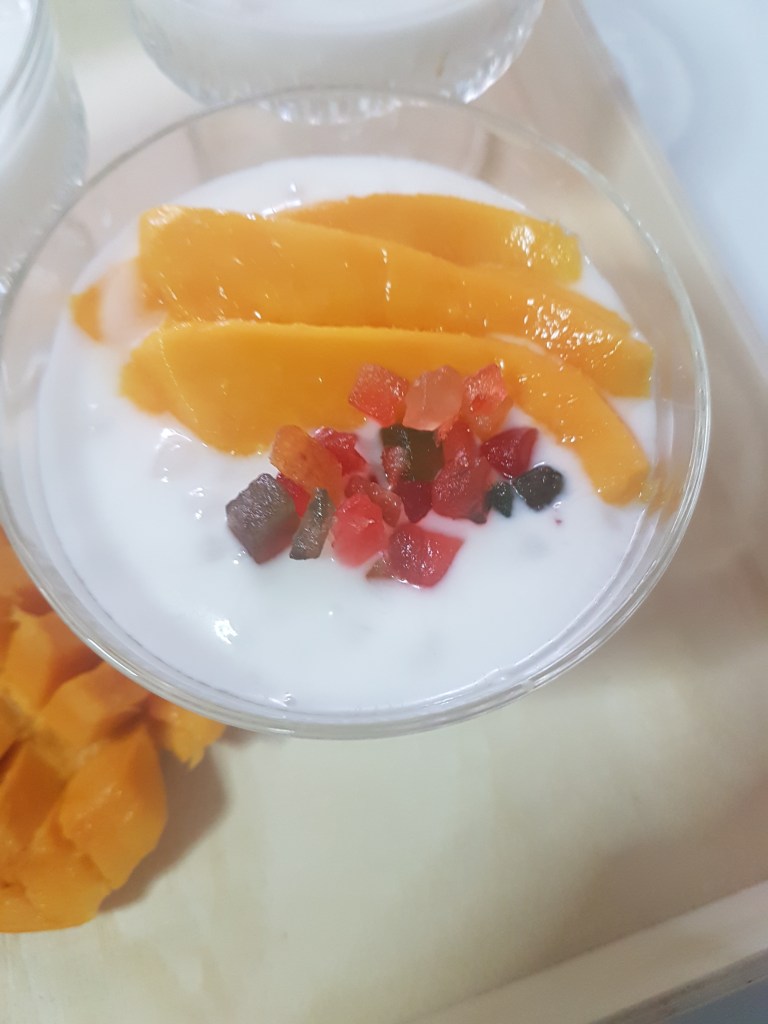
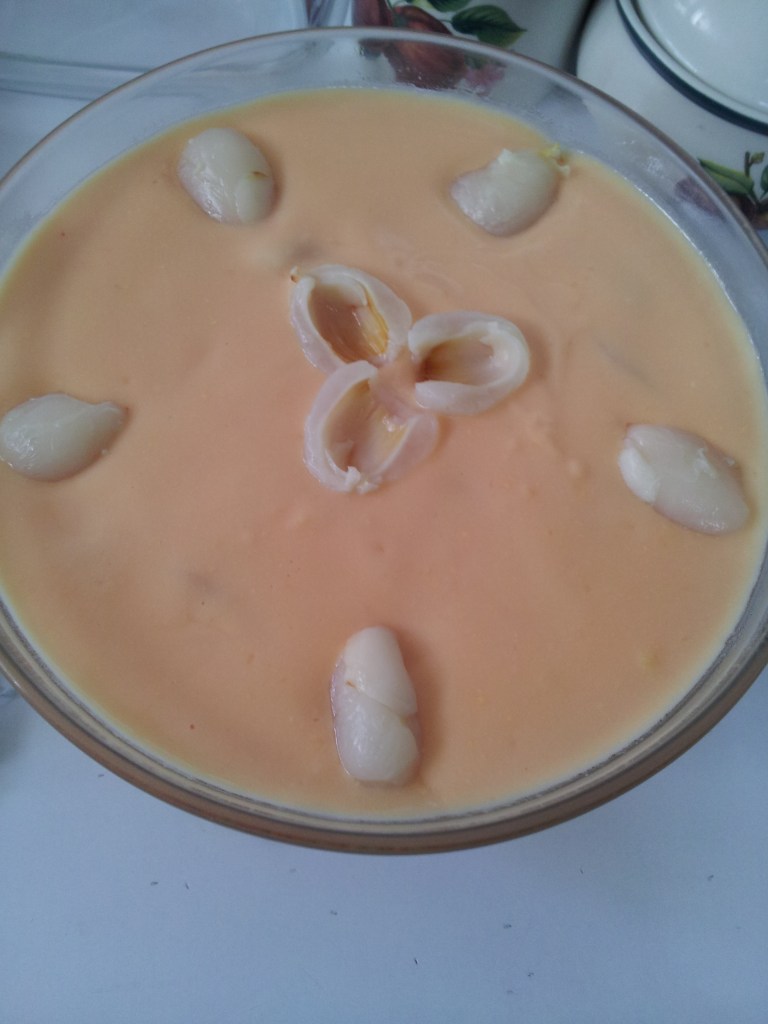
2. Mango Sago Pudding
Sago Mango Pudding
With mangoes in abundance this season, enjoy the goodness of this nutritious fruit with the cooling effects of sago pearls
Mango: High in Vitamin C, folate & beta-carotene in addition to variety of nutrients.
Sago: Gluten free, cooling and antioxidant, reduces inflammation and improves immunity.
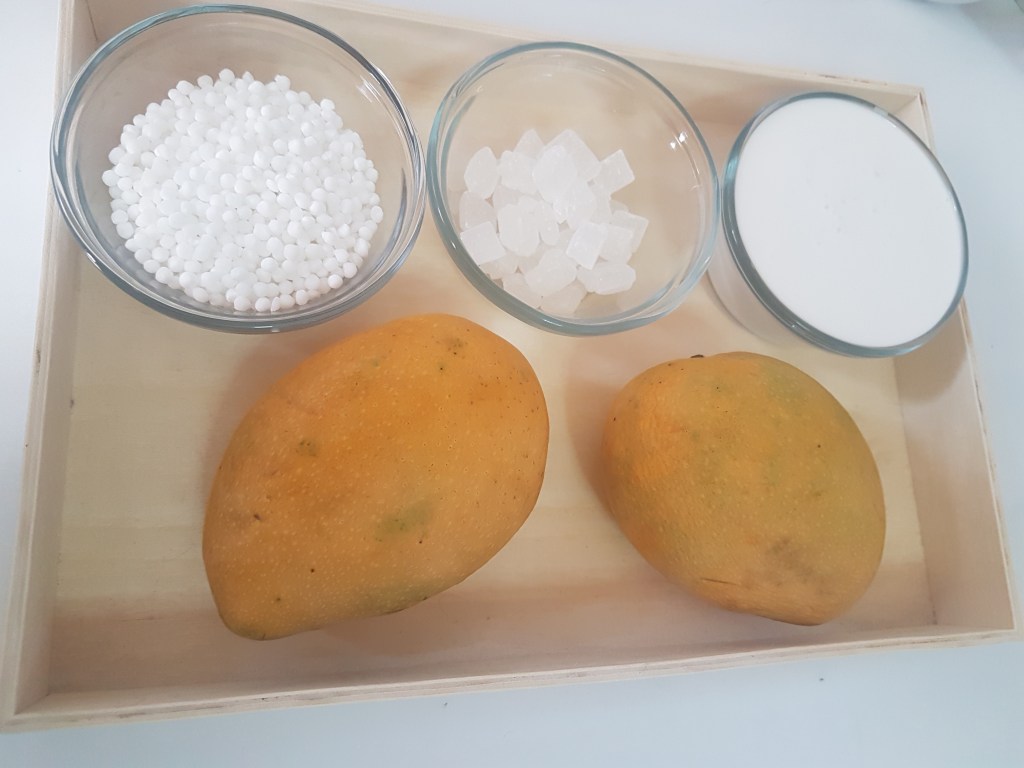
Ingredients
2 Mangoes
½ cup sago
1 cup coconut milk
1 cup water
¼ cup crystal sugar
¼ tsp salt optional
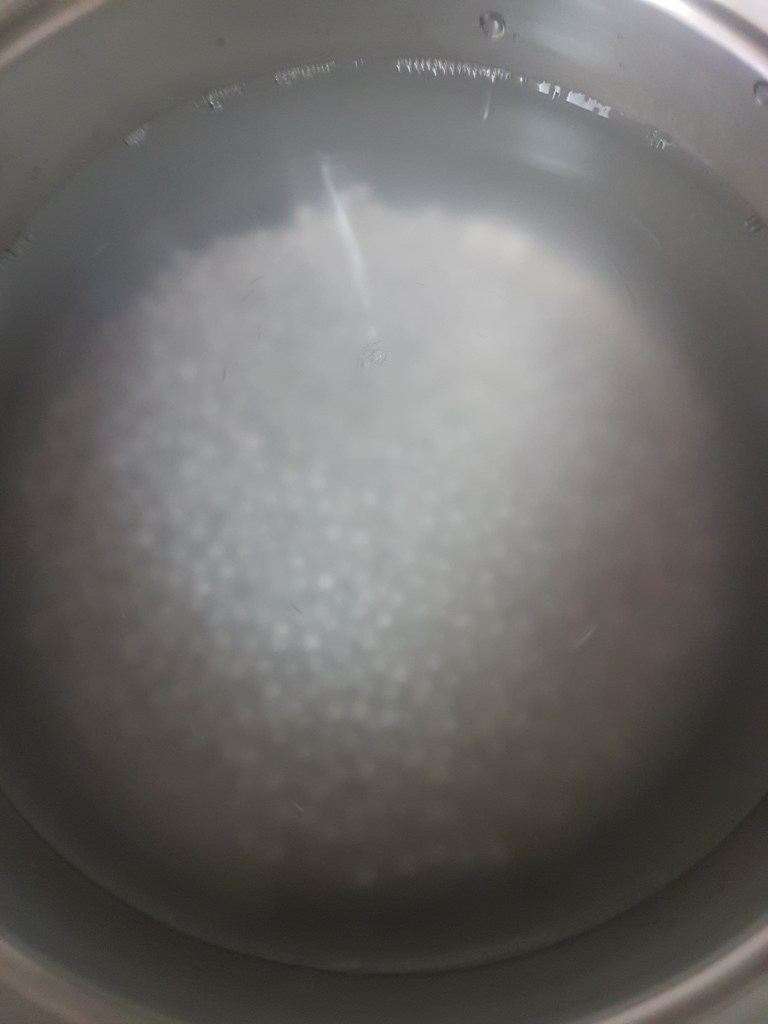
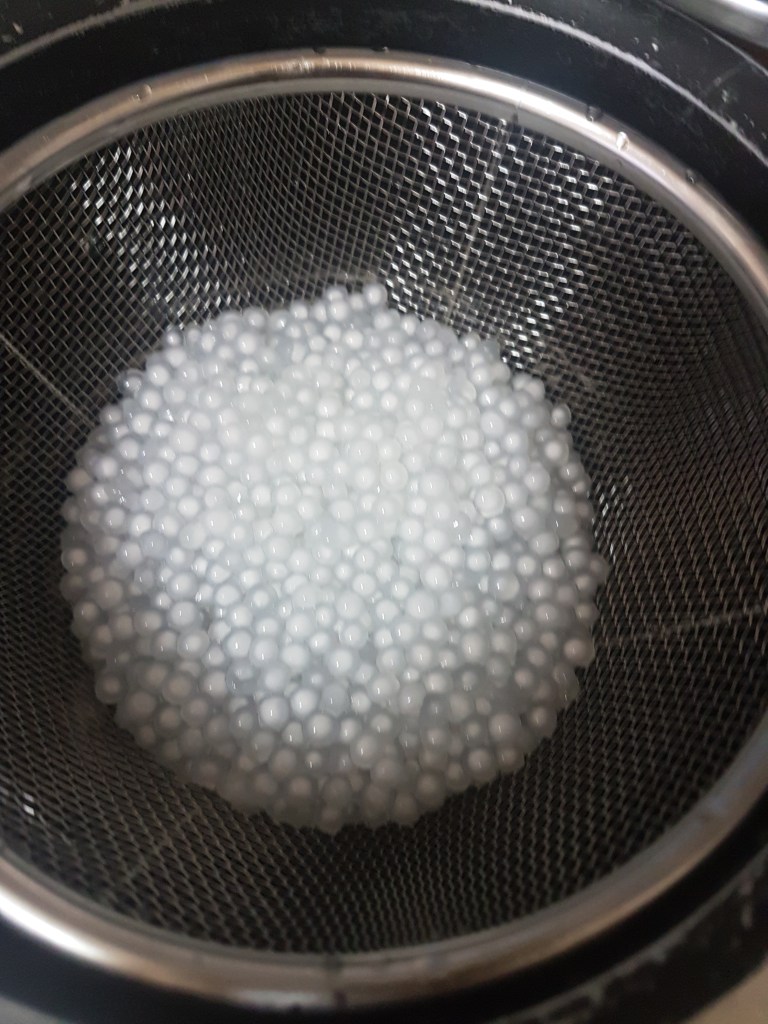
Bring 2 cups water to boil in a saucepan, add the sago and cook for ten minutes. Switch off the flame and leave covered for ten mintes. Drain and add the sago to a bowl of cold water to rinse. Drain.
Add the sago pearls alongwith the coconut milk, 1 cup water and crystal sugar and salt to a pan and cook on medium flame till sugar dissolves and mixture thickens a little. Remove from flame and leave to cool. Chill till ready to serve.
Chop or slice the mangoes and reserve, before serving top with mango slices or pieces. If you wish, puree some mango pieces and add the puree to the sago pudding and mix, top with chopped or sliced mangoes. Garnish with candied fruit if desired.
Sago Mango Pudding
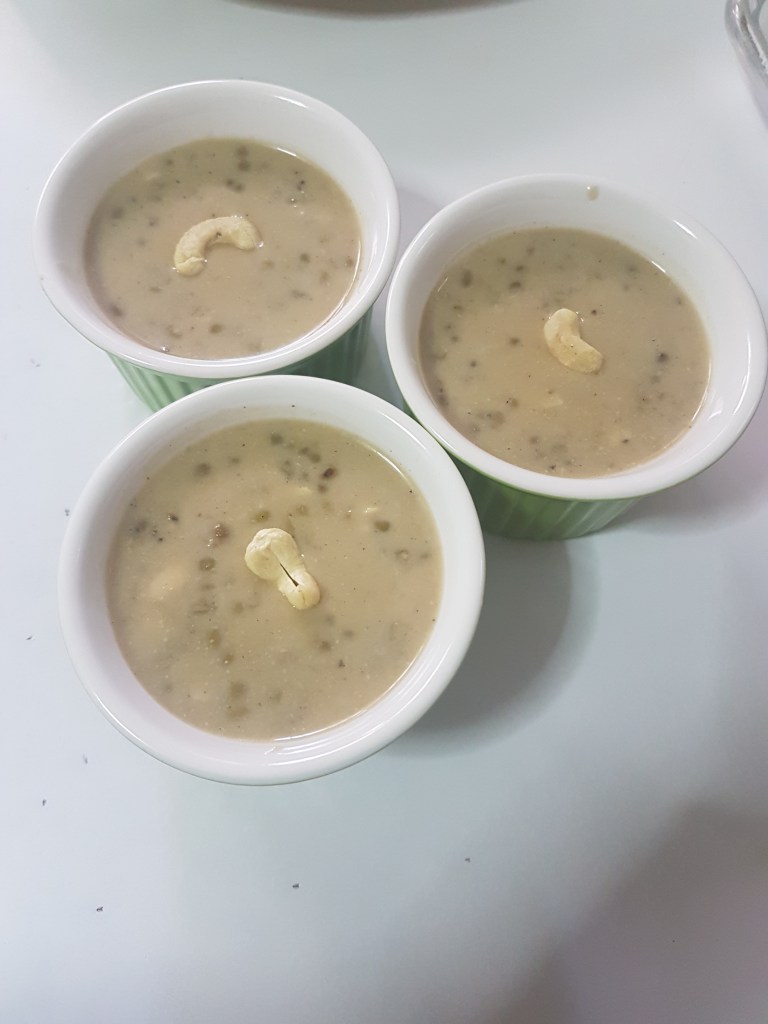
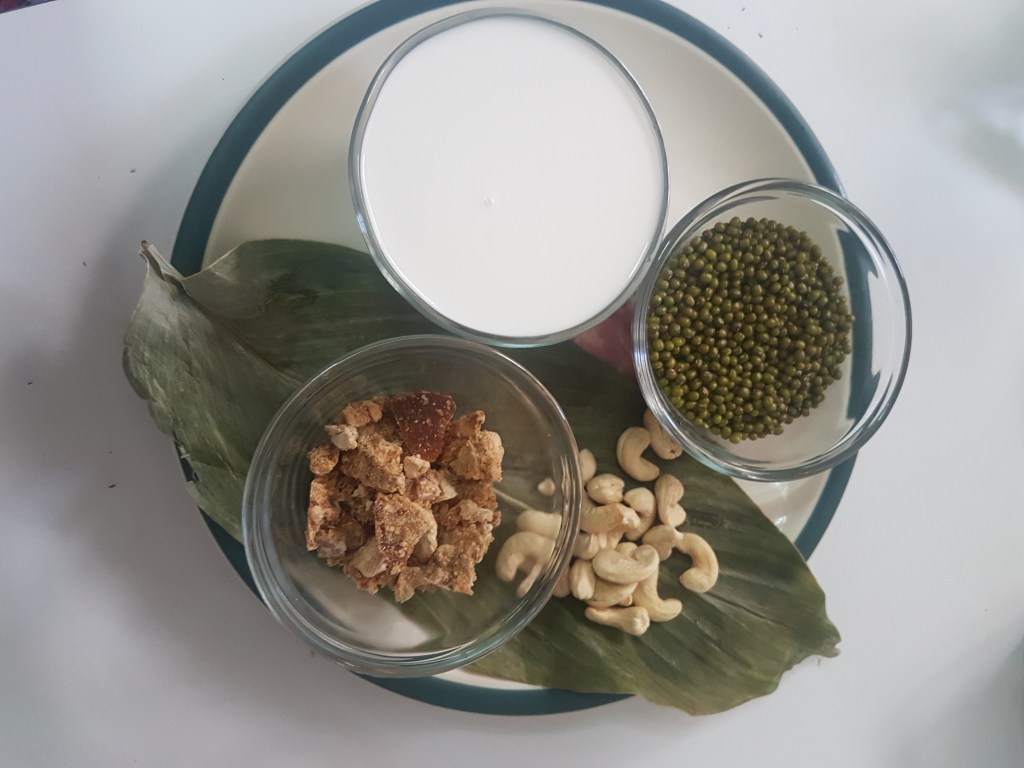
3. Moong Kheer (Godshem)
Moong Kheer (Godshen)
I remember my mother making this often as an evening tea-time snack.
Moong bean: Rich source of protein and nutrients, cooling effect on the body
Ingredients
½ cup whole moong beans
1 cup coconut milk
1 cup water
¼ cup jaggery or to taste
¼ tsp salt (optional)
¼ cup cashewnuts, broken into bits (optional)
Flavoring : Saffron or pandan leaf or a large pinch cardamom powder.
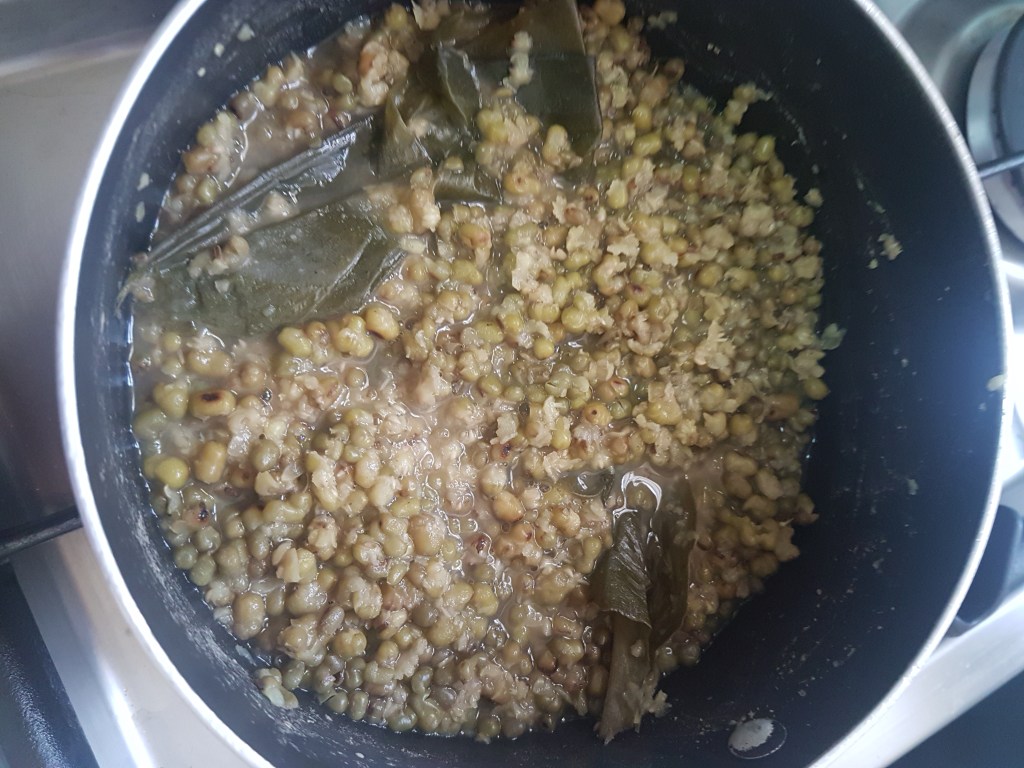
Wash the moong and bring to a boil in 2 cups water alongwith the salt and the saffron or pandan leaf (if using). Reduce flame and cook till the moong is tender and fully cooked. The water should be almost absorbed.
Add the coconut milk, 1 cup water, jaggery and cook till the jiggery dissolves and the mixture thickens. Remove the leaf and discard, add the cashewnuts and simmer for 5 minutes.
Garnish with cardamom powder, if using. Serve warm or cold as a dessert. Can also be served hot as a tea-time snack.
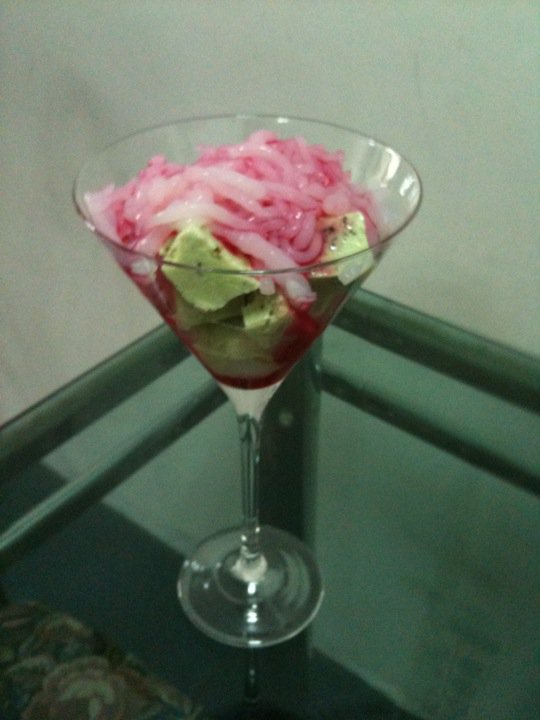
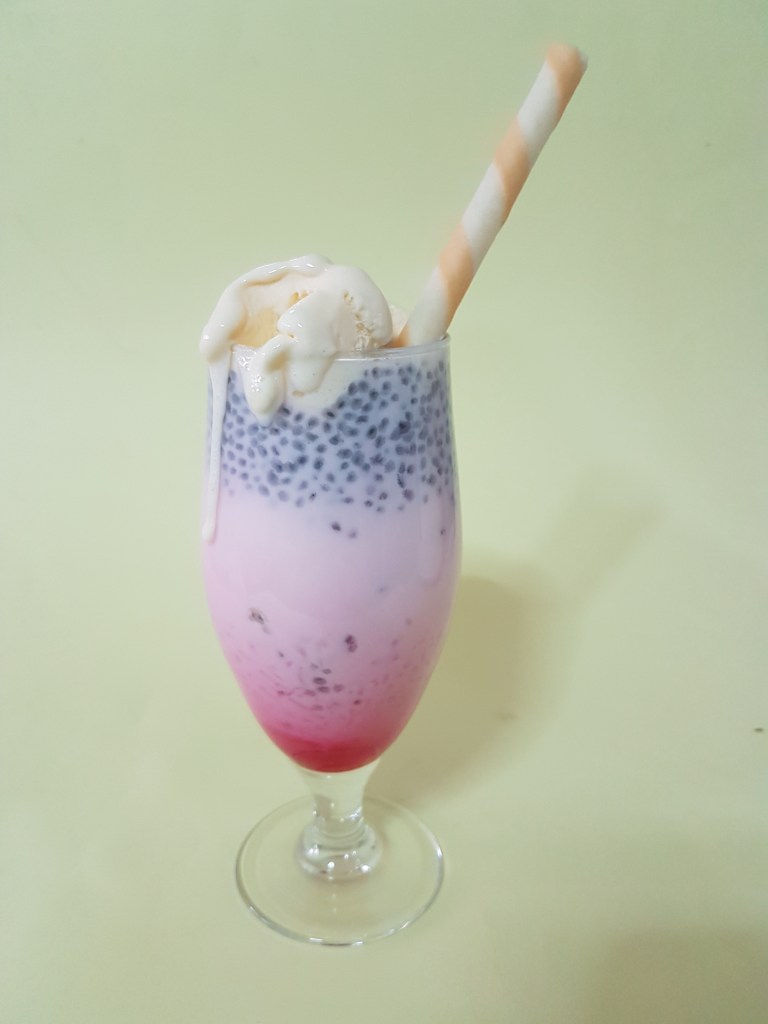
The following two recipes have been posted earlier and can be accessed by clicking on the recipe title.
Rose syrup: has a cooling effect and promotes restful sleep as it reduces stress and anxiety and calms the mind, anti-oxidant and anti-inflammatory.
Sabja (Basil seeds): Also called Tukmaria, they resemble chia seeds. Immunity boosting, rich in anti-oxidants, fibre and omega-3 fatty acids, reduces body heat and relieves constipation.
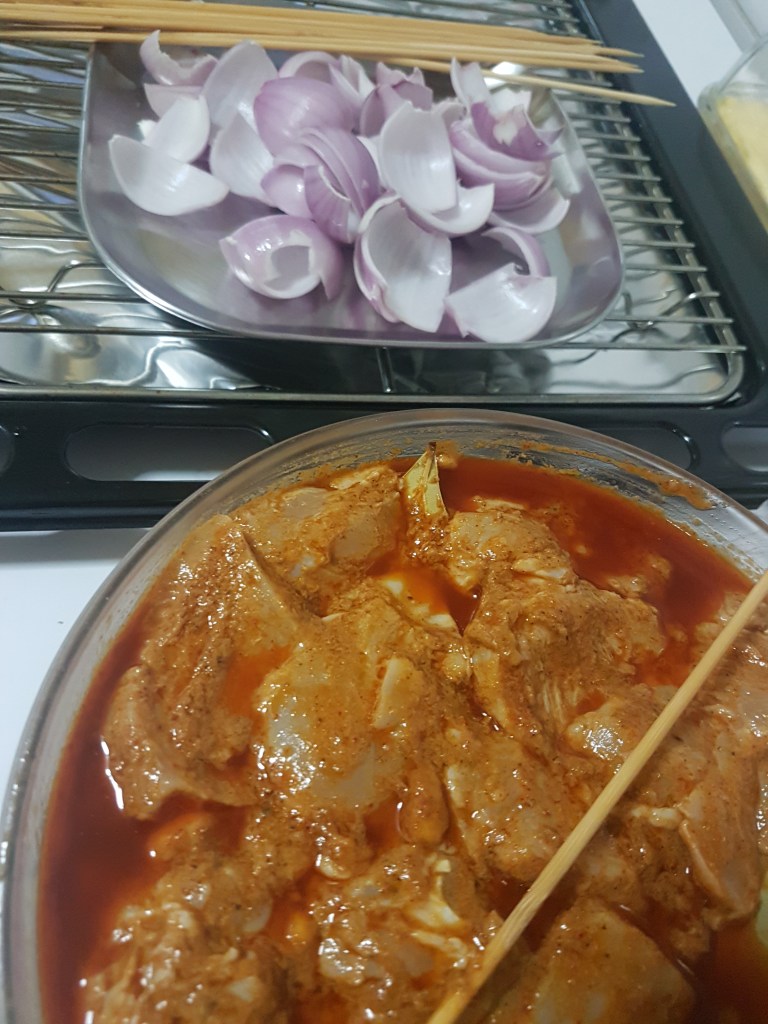
Souvlaki is a popular Greekfast food consisting of small pieces of meat and sometimes vegetables grilled on a skewer. It is usually eaten straight off the skewer while still hot. It can be served with pita bread, fried potatoes, lemon, and sauces, but the souvlaki itself is eaten on its own, with the side dishes eaten subsequently. The meat usually used in Greece and Cyprus is pork, although chicken, beef, and lamb may also be used. Source: Wikipedia
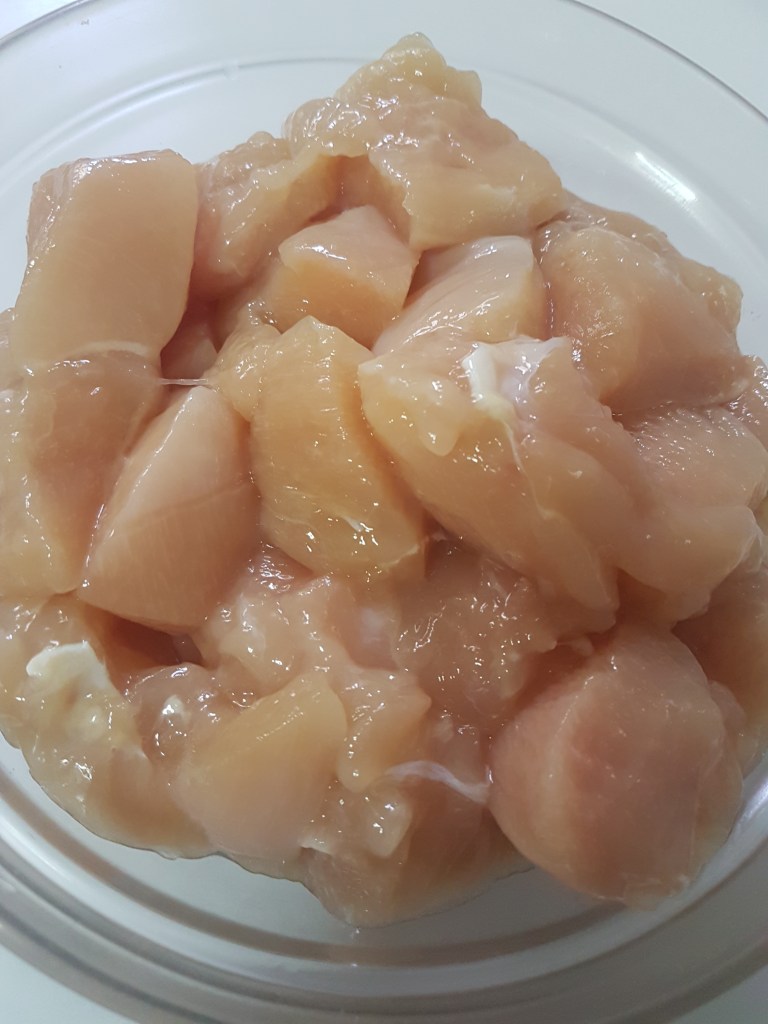
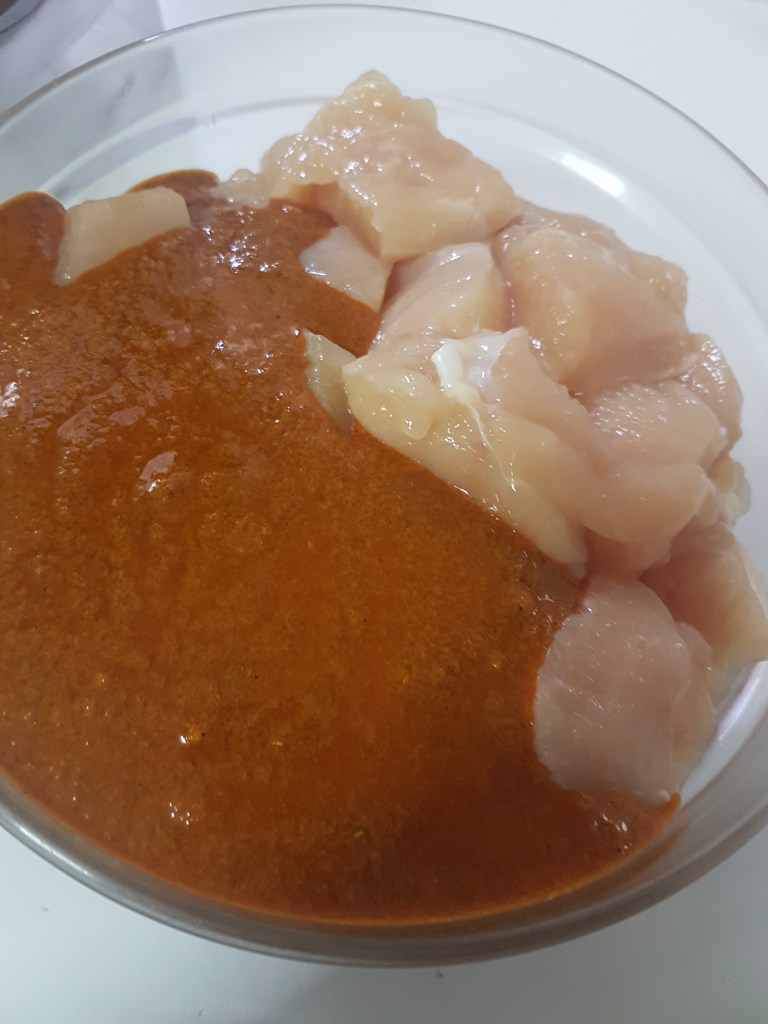
Cut the chicken into cubes, blend the marinade ingredients and pour over the chicken pieces and leave to marinate for 4 hours or overnight.
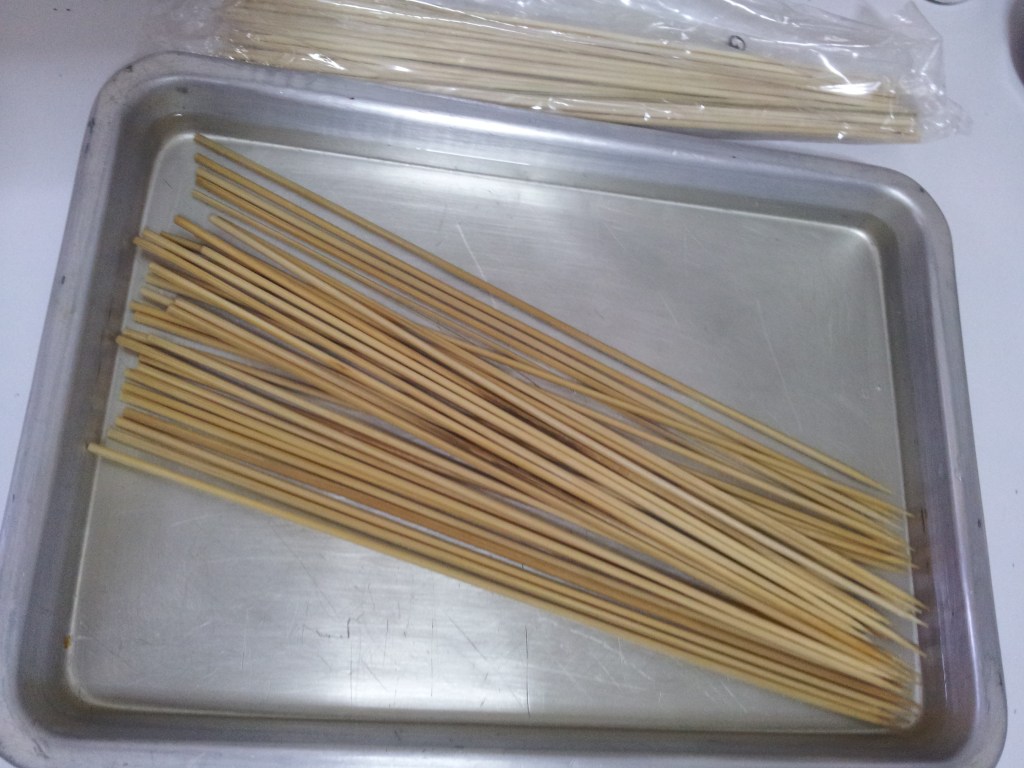
Meanwhile soak the wooden skewers in water. Use as many as required and the balance can be dried again and stored.
Skewer the chicken, alternating with the onion.
Place on a preheated grill and roast till brown on both sides. Can also be grilled on a pan grill or frying pan. Use smaller sized wooden skewers to fit into the pan and roast on a well greased pan till brown all over.
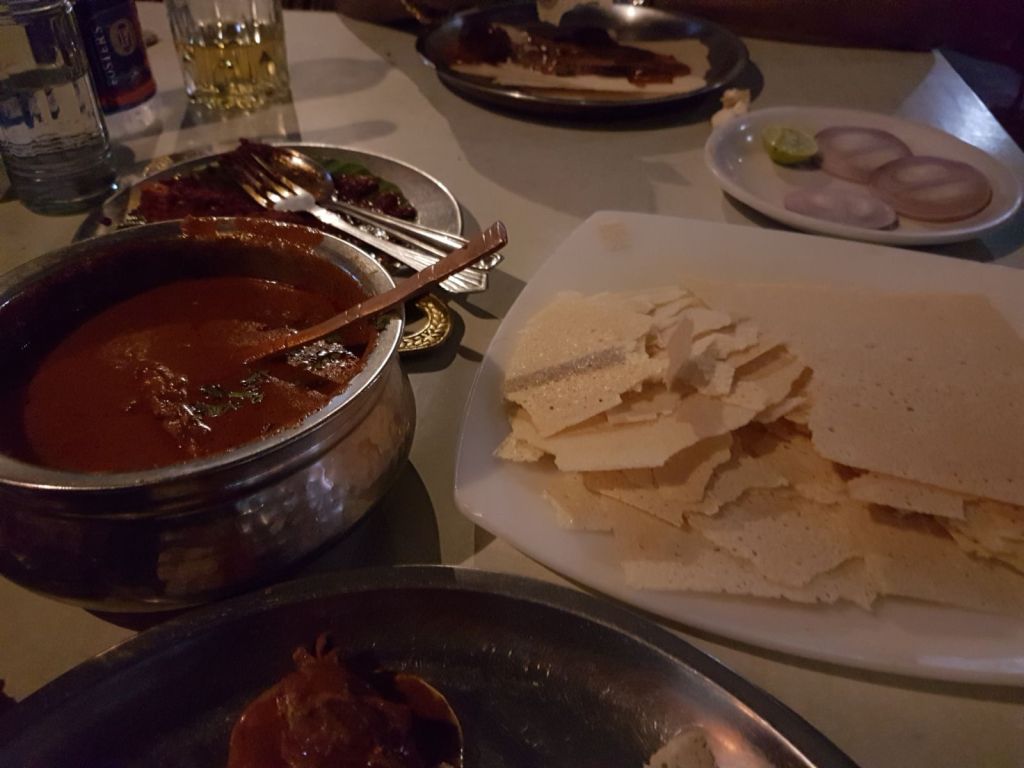
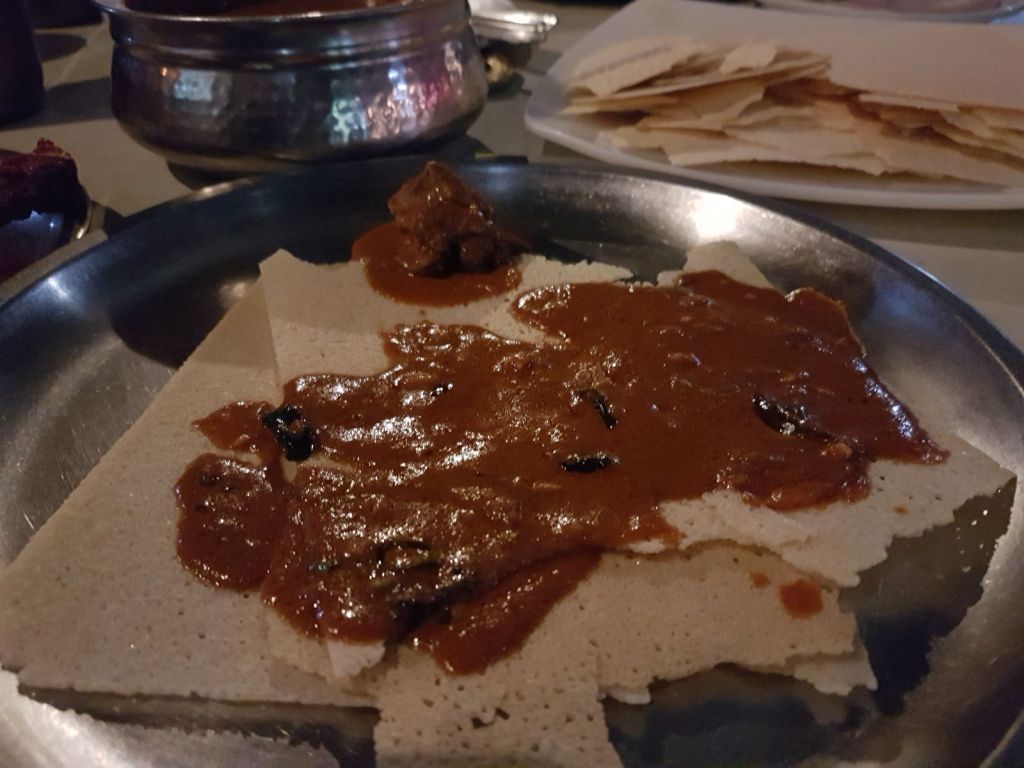
‘Pole’ for Mangaloreans and ‘Kallappam’ for Keralites, these soft spongy pancakes can be relished with chutney for breakfast or even with jam, butter or eaten just plain dipped in your tea or coffee!! These dosas are quite popular in the South of India.
For lunch or dinner serve with a chicken curry, mutton curry or vegetable stew so the dosa mops up the delicious gravy giving you a succulent morsel of food thoroughly satisfying to your tastebuds and your tummy!
Set dosa can be made with sanna or dosa batter which uses rice and urad dal (black gram dal) as its ingredients.
The following recipe does not use urad dal but uses coconut and rice making the dosas lighter & spongy. The recipe is similar to Appam, but the consistency of the batter should be kept slightly thicker for making Set Dosas. The size is smaller than the Udupi masala or sada dosas. You can use a dosa pan for making them but a smaller cast iron pan or frying pan would give a uniform and perfect circular shape to these dosas.
Idli rice can be used, if available, but I used basmati rice with good results. If fresh coconut is not available, use ½ cup coconut milk or ½ cup coconut milk powder. If the batter is fermenting overnight, do check on it in case you wake up in the night (to drink water or use the washroom) and if it has risen but it is too early to make the dosas, promptly put the risen batter in the fridge and make the dosas once you are ready. You don’t have to worry about having to prepare them at 4 or 5 am just because the batter is fermented. The Batter will stay fresh in the refrigerator for 2 to 3 days.
Soak the rice for 4 to 6 hours and grind to a thick paste alongwith the cooked rice and coconut. Mix the yeast with the sugar and warm water and leave to bloom for 10 minutes. Add to the rice paste, mix well and leave to ferment for 6 to 8 hours. Fermenting time will depend on room temperature. If weather is cold, use warm (not hot) water for grinding the batter. In warm weather it will ferment in 4 hours.
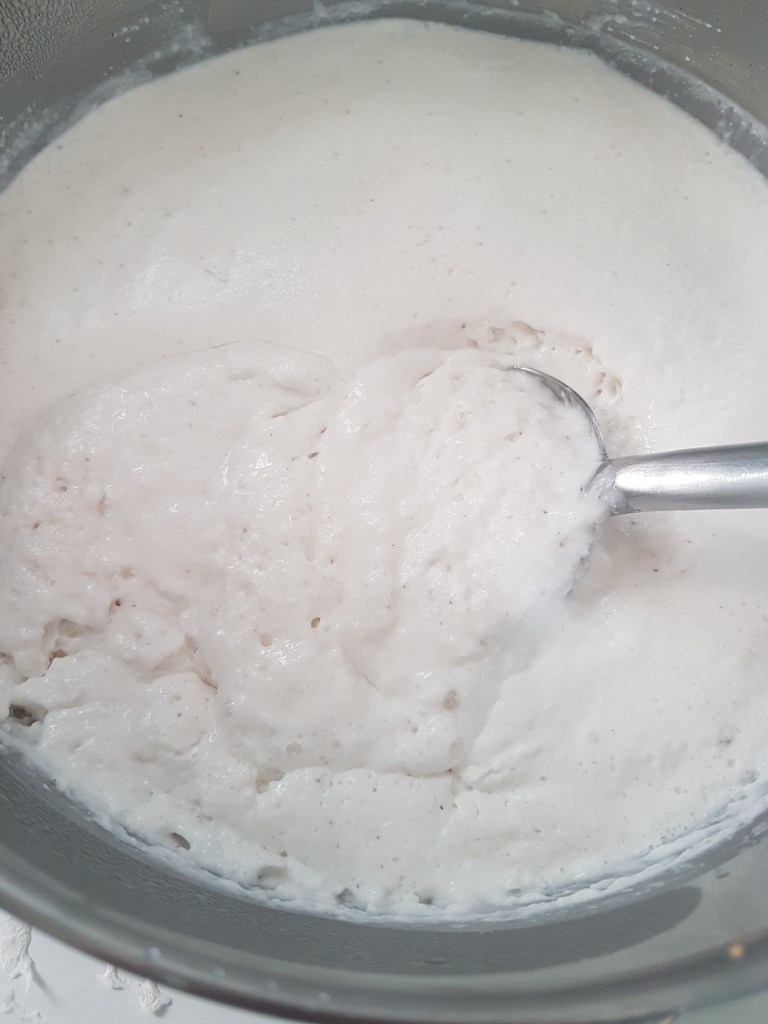
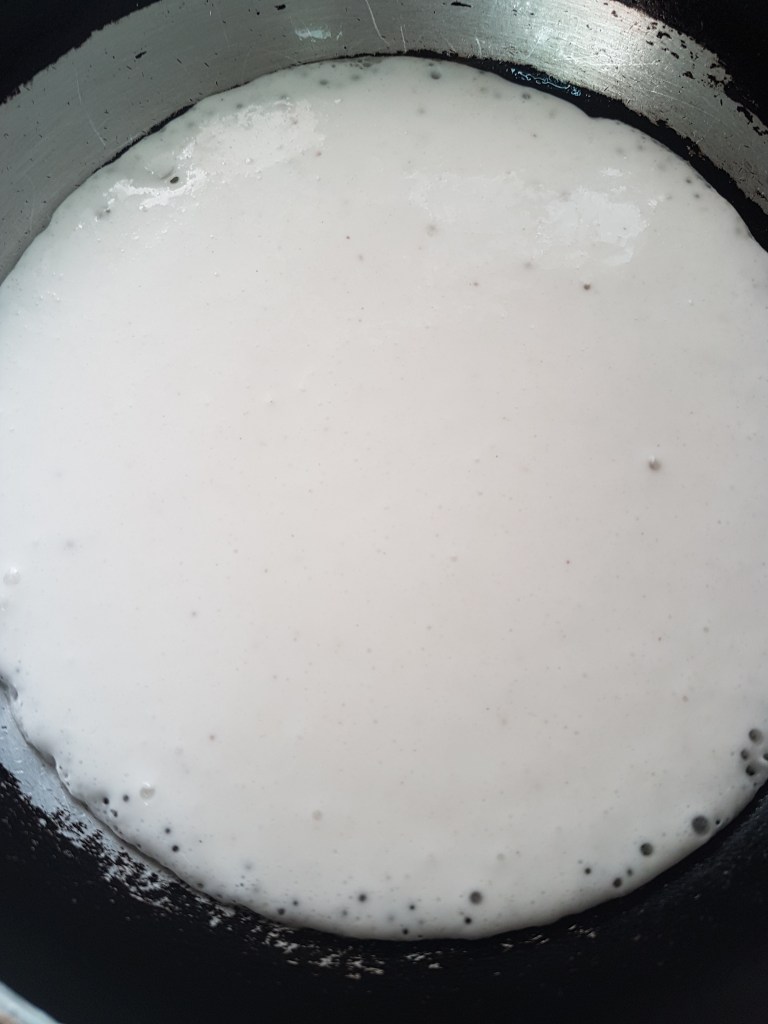
When the batter has risen, add salt and mix. Heat a cast iron pan or a frying pan on medium high heat until very hot.
Pour one ladle or 1/2 cup of batter on the hot pan. (Do not spread the batter like you would do for the Masala dosa). Leave as is, cover with lid and cook till underside turns golden and dosa gets spongy and translucent and is covered with holes.
Soak the rice for 4 to 6 hours and grind to a thick paste alongwith the cooked rice and coconut.
Mix the yeast with the sugar and warm water and leave to bloom for 10 minutes.
Add to the rice paste, mix well and leave to ferment for 6 to 8 hours. Fermenting time will depend on room temperature. If weather is cold, use warm (not hot) water for grinding the batter. In warm weather it will ferment in 4 hours.
When the batter has risen, add salt and mix. Heat a cast iron pan or a frying pan on medium high heat until very hot.
Pour one ladle or 1/2 cup of batter on the hot pan. (Do not spread the batter like you would do for the Masala dosa). Leave as is, cover with lid and cook till underside turns golden and dosa gets spongy and translucent and is covered with holes.
If you wish you may turn and cook the other side.
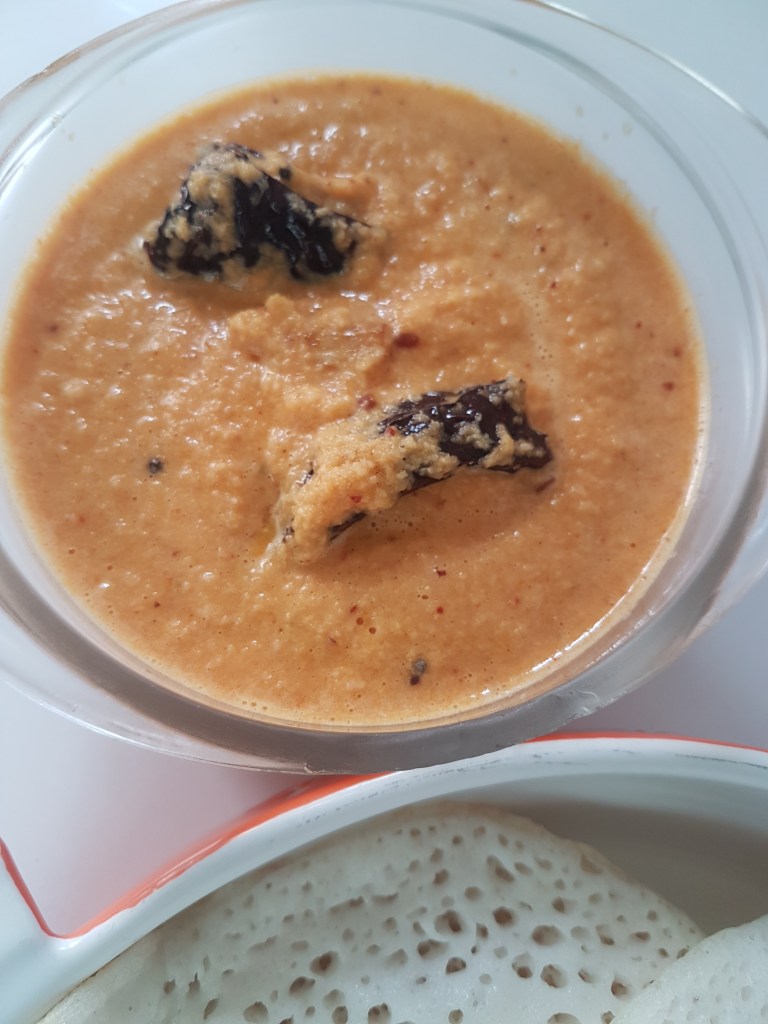
Serve with red coconut chutney
Red coconut chutney
Same as green coconut chutney but substitute the green chilles and coriander leaves with two to three red cillies.
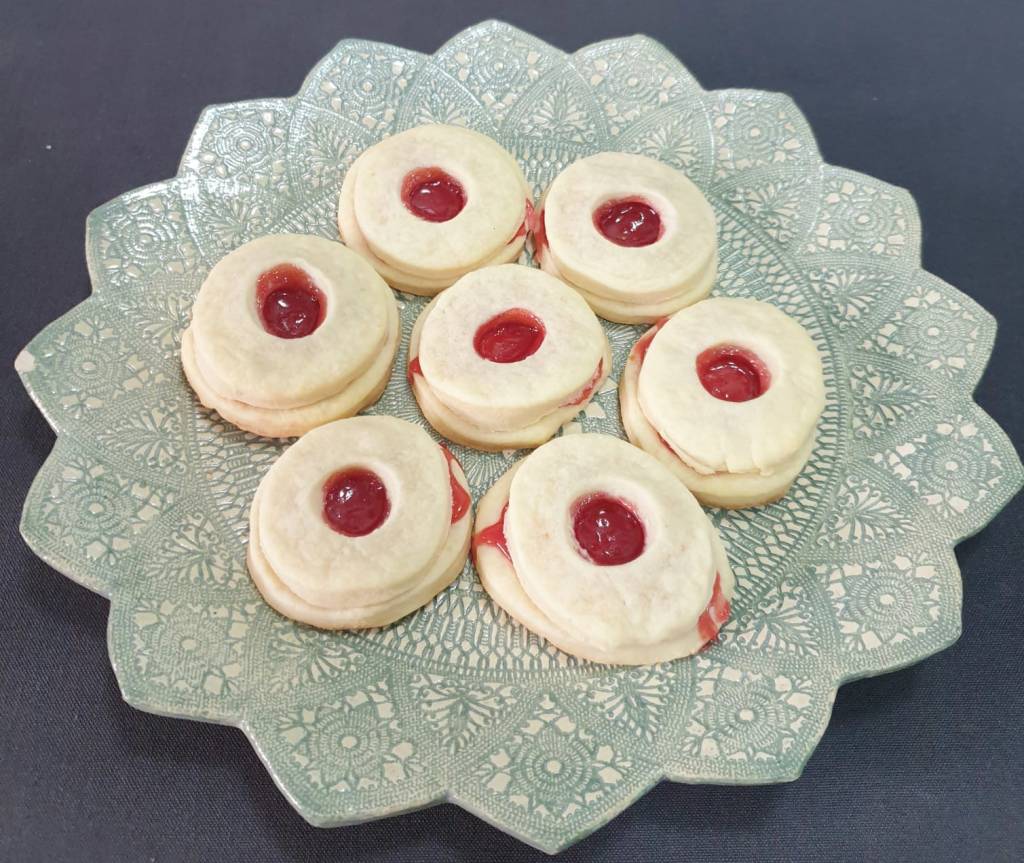
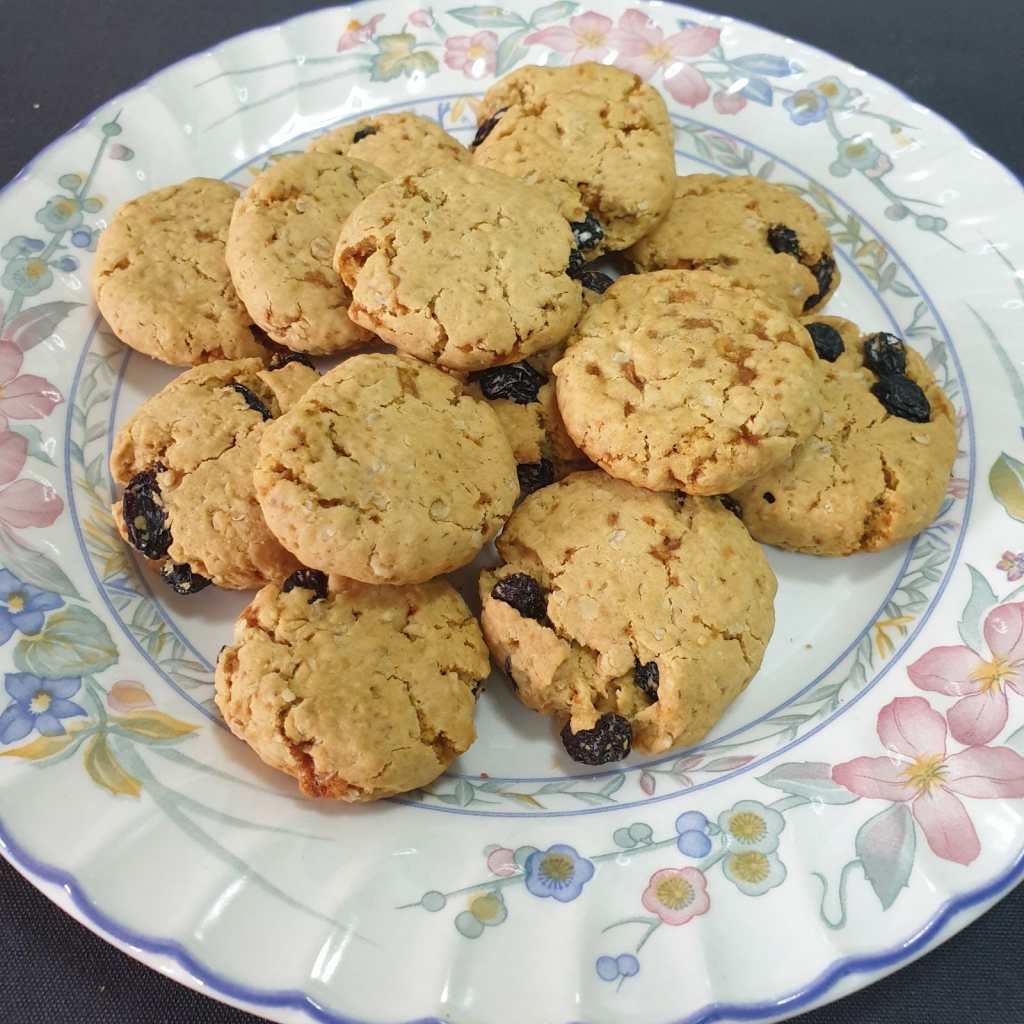
This post is inspired by my eldest grandson Rhys, all of four years, who one day very sweetly and shyly requested “Grandma can you make Strawberry cookies”? And very thoughtfully enquired “Do you have strawberries”? This was enough to melt my heart. Not that he loves strawberries or wants them in the cookies but he loves anything red and associated the red strawberry colour with the cookies he wanted. Little does he know that you don’t require fresh strawberries for Strawberry cookies. When he saw the cookies, he asked for Blueberry cookies for his brother! That set the ball rolling……… There’s no way I can turn down my grandchildren!!
These cookies can be enjoyed anytime of year, celebrate them with family and friends!! Click on the title for the recipe page.
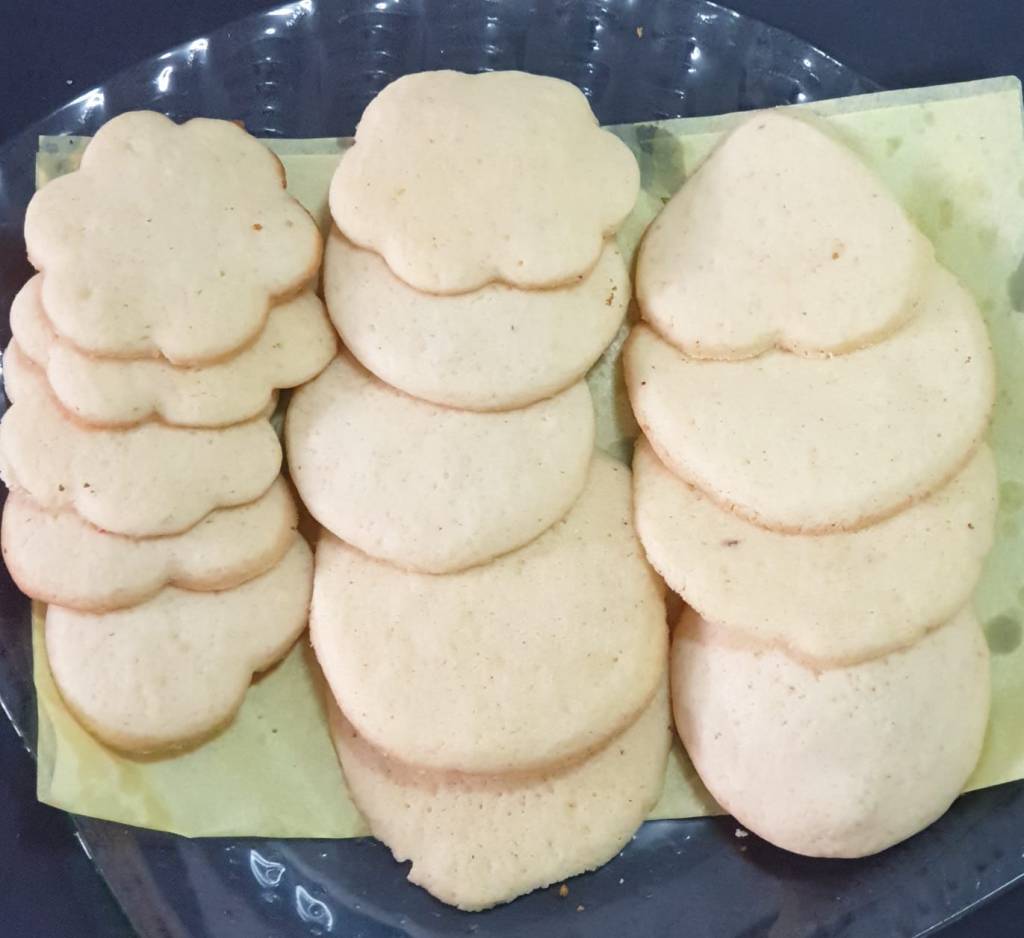
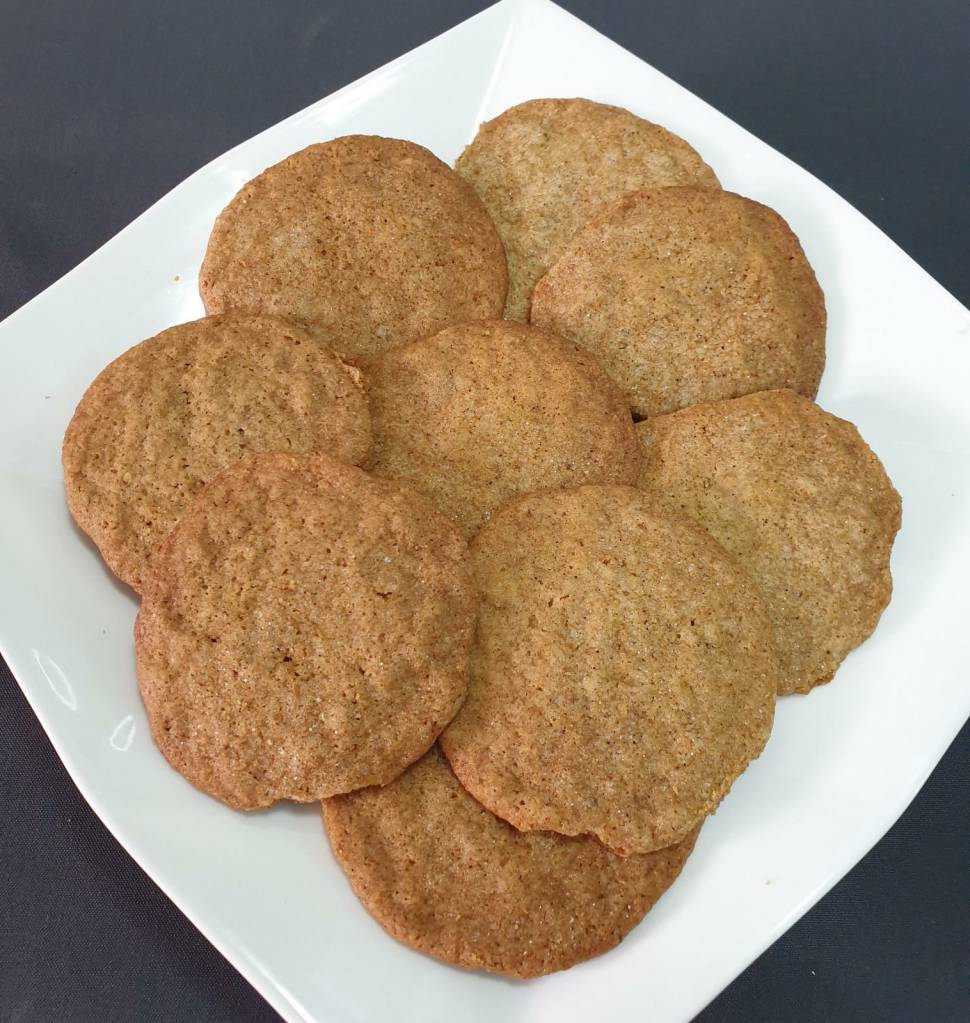
Nowadays as we spend more time working from home, teaching from home, learning from home and managing the household, etc, frequent intermittent breaks more from quarantine fatigue, have become necessary and a break with a cup of tea or coffee just makes everything better! Pair that with a couple of cookies and it goes to another level. Children also need their regular breaks from their online classes, tuitions, etc. and what can be more satisfying than some baked cookies or biscuits with a glass of milk for a healthy snack!
I would recommend you bake several types of cookies back-to-back, not only will you have a variety of cookies and biscuits but it just makes it quicker and easier and you would have cookies that your family can enjoy for weeks. They are also perfect for gifting!
Here are some tips as a guide to baking cookies, specifically for making multiple types of cookies at a time:-
Prior to Baking
Read the recipes well, several times if necessary. Many a failed recipe is attributed to having overlooked an ingredient or missed a step. Check if you have all the ingredients. If not, check if it can be omitted (i.e. if it does not affect the basic recipe) or if it can be substituted with ingredients on hand.
2. Baking day
To make it easier on yourself, plan on baking several types of cookies back-to-back on the appointed day and set aside a couple of hours i.e. an afternoon or morning if you prefer. Cookies store very well. Alternatively, just bake a quick batch of ‘fresh from the oven’ whenever you feel like cookies!!
3. Ingredients
Gather all your ingredients and make sure everything is at room temperature, eggs, butter, etc. Hence ingredients that are refrigerated must be kept out on the kitchen counter in advance so that they are at room temperature when you begin mixing the ingredients. ‘Flour’ refers to All purpose flour, unless otherwise specified.
4. Measuring cups/spoons
I have used cup measures in most cases i.e. the actual ‘Cup measure’, not yogurt cup or icecream cup, glass, etc. Use exact measurements for best results. I find it is just easier using a cup rather than the scale but do use the scale where necessary.
5. Mixing bowls
Always use two bowls, a medium one for dry ingredients and a larger one for wet ingredients. Also using separate measuring cups and spoons for dry and wet ingredients will just make it easier to bake back-to-back. Since the main ingredients in cookies are basically the same i.e. flour, butter, sugar, eggs, would be less effort to avoid changing the utensils after each batch. Cookies requiring coloring can be made last, as the bowls would then definitely require washing.
6. Baking trays & parchment
The same baking trays can be used for several batches, just change the parchment and after you have baked two or three batches, you will find you don’t need the parchment as the trays will be well greased by then. Just wipe off the residue, if any.
7. To prevent cookies from spreading too much
Chill the cookies – TO AVOID THIS!!
For cookies other than cut-out cookies (as most cut-out cookies require prior refrigeration) form the cookies by hand or a scoop, place on baking tray and chill in the refrigerator for 10 to 15 minutes before transferring to the oven. This will avoid the cookies spreading too much and running into each other.
8. Cut-out Cookies – customization
Some recipes, mainly cut-out cookies, require the dough to be refrigerated for a specified period. After refrigeration work with small portions of the dough and put the balance dough back in the fridge. Begin with such recipes so that while the dough is getting chilled, you can move on to the next recipe. After rolling, cutting and placing on baking sheet, bake directly.
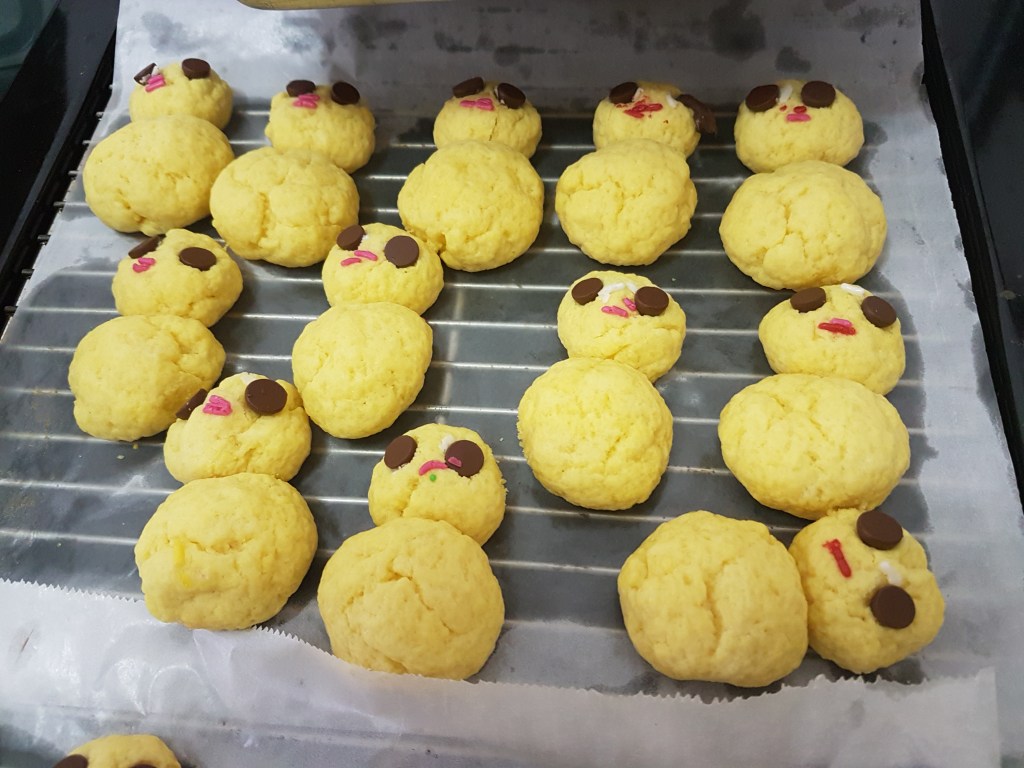
Cut-out cookie shapes can be customised to suit the occasion or festive season. Use regular cutters like round, flower or anyother shape. For festive occasions use the appropriate cutters. Easter bunnies, chicks, eggs, carrots, rabbits etc. at Easter season and Christmas designs like tree, candy cane, snowflake, santa etc. at Christmas and so on. The cookies can also be decorated with royal icing.
9. Oven Temperature
Always heat oven to 180 deg C or 350 deg F and position rack in the centre of the oven. If using multiple racks, rotate the trays on the lower rack to the upper mid-way through baking, if the cookies are browning too quickly.
10. Storing
Make sure the cookies have cooled completely, preferably on a wire rack before storing. In case you wish to store several types of cookies in one large container, put each type in a separate plastic bag, seal well and place in the box, so the cookies don’t lose their crunch. Will stay fresh for weeks!
Tea & cookies, like milk & cookies or coffee & cookies usually go together. The act of drinking tea or coffee is so ingrained in us that consciously or unconsciously it becomes a necessity at the break of day, mid-morning, early evening and several times in between. I therefore, leave you with this beautiful thought, tea and coffee being interchangeable here (as I am an ‘only coffee’ person) –
If you are cold, tea will warm you; if you are too heated, it will cool you; If you are depressed, it will cheer you; If you are excited, it will calm you. -William Ewart Gladstone
I have listed the cookies in the order they are to be made, incase you wish to take up my suggestion of making several types in one go. Just click or tap on the name to access the recipe :-
Cake Toast – Bake the cake, cool completely, slice & toast again in the oven.
(Pictures and step-by-step guide for Thiklem (Sukho Randho) are posted below).
My recent post on Pospartum care Thiklem & Rando gave details of the traditional recipes for Thiklem (Dry Randho also called Sukho Randho) and Randho (Wet, jam like consistency) and the simple version with readily available ingredients.
I will re-state here only the simple version of the recipes, with some modification, to make it easier to understand and prepare.
Randho (Wet)
Ingredients
1 Litre coconut milk
750 gms. Palm Jaggery
250 gms. Poha (flat)
250 gms. Tup/Pure ghee
100 gms. Onions, sliced
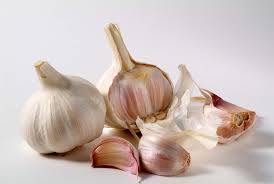
100 gms. Garlic, sliced
50 gms. Dill Seeds (Shopa)/or Fennel seeds
50 gms. Kuskus (Poppy seeds) or Sesame seeds
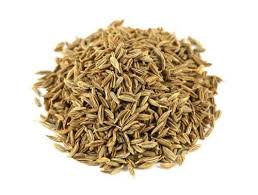
50 gms. Cumin seeds
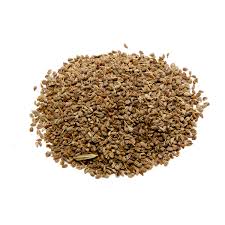
50 gms. Ajwain/Carom seeds
50 gms Fenugreek seeds
50 gms. Corainder seeds
50 gms. Mustard seeds
50 gms. Black Pepper corns
50 gms. Turmeric
10 gms. Cardamom
1 no. Nutmeg
1 gm. Saffron (Kesar)
100 gms. Dry Dates
50 gms. Raisins
100 gms. Almonds
100 gms. Cashewnuts
Method
Roast all the spices from Dill seeds to Black pepper and grind to a paste with some water.
Take a pan, place on heat and add the coconut milk alongwith the ground paste.
Add the chopped dry fruits, kesar, poha and cook till glossy.
Remove, allow to cool and store in glass or steel container or bottle and refrigerate.
1 tbsp. to be given warm, once day at breakfast to the mother of new born baby after ten days.
Thiklem (Dry)Also called Sukho Randho
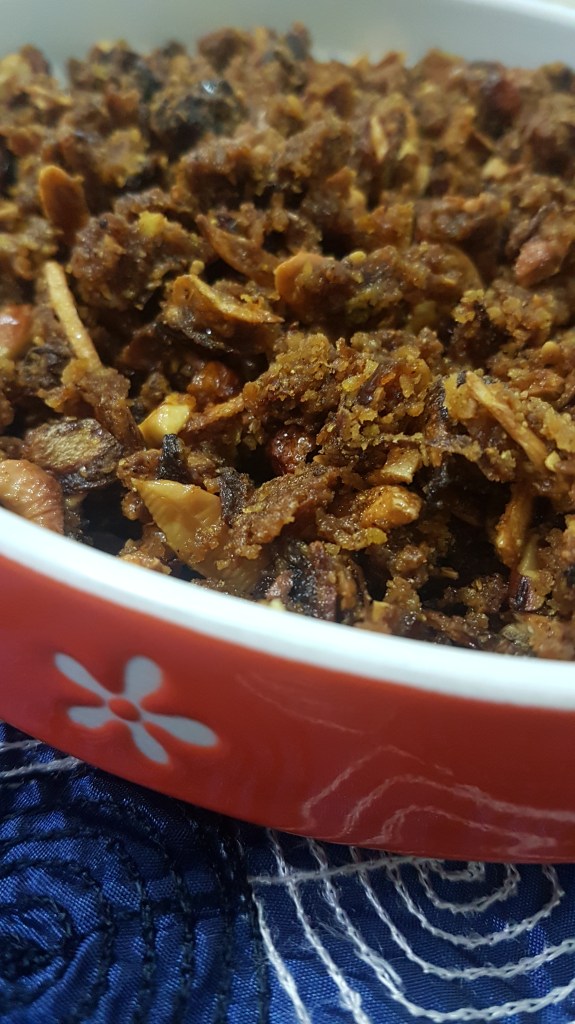
Thiklem (Sukho Randho)
I have now tried the recipe and happy to post the step-by-step pictures and modifications in the recipe so as to simplify the process. To make it easier I have used a third of the quantities from the previous recipe. Feel it is better to make in small quantities so the process does not become too tedious. Secondly, if it is enjoyed and benefiting the new mother then additional batches can be easily made.
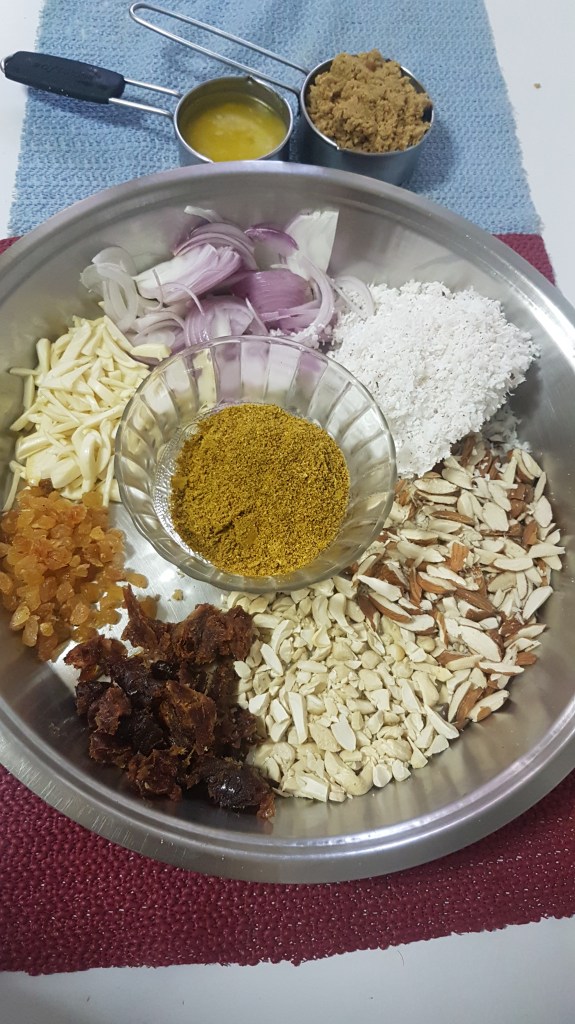
Ingredients (Same as above except coconut milk but add fresh or dessicated coconut as stated below)
1 cup (packed) Coconut (Fresh or dessicated)
1 1/2 cup Palm Jaggery (if not use any available jaggery)
1/2 cup Tup/Pure ghee
1 large Onion, sliced
1/4 cup Garlic, sliced
1/2 tsp. Fennel Seeds
1 tsp. Kuskus (Poppy seeds) (Substitute with sesame seeds, if not available)
1/2 tsp. Cumin seeds
1/2 tsp. Ajwain/Carom seeds
1/2 tsp. Fenugreek seeds
1/2 tsp. Corainder seeds
1/2 tsp. Mustard seeds
1/2 tsp Black Pepper corns
1/2 tsp. Turmeric
1/4 tsp. Cardamom seeds
1/4 tsp. Nutmeg
A pinch Saffron (Kesar)
1/4 cup Dry Dates
1/4 cup Raisins
1/4 cup Almonds
1/4 cup Cashewnuts
Method
Dry roast all the spices from Fennel seeds to Black Pepper. Grind to a powder alongwith the turmeric, cardamom, nutmeg and saffron.
Slice the onion, garlic, dates, raisins, almonds and cashews.
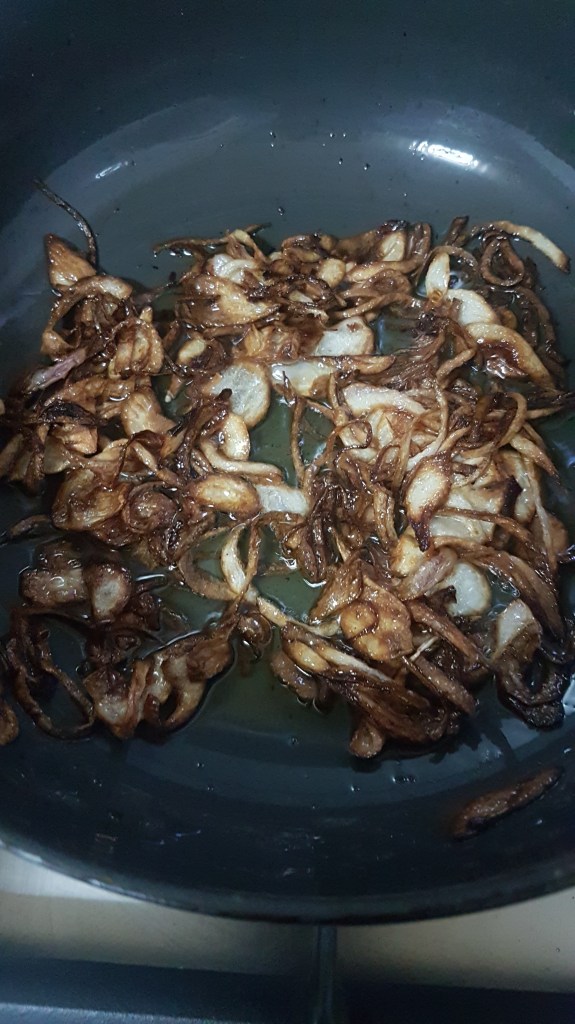
Take half the tup/pure ghee in a wide pan or kadai and gently fry the sliced onions till golden brown, remove.
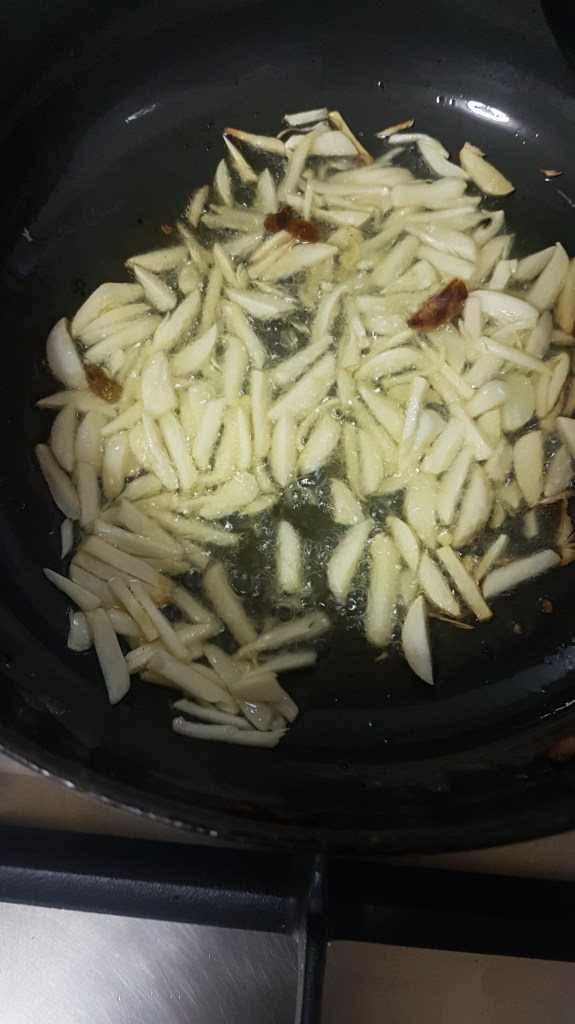
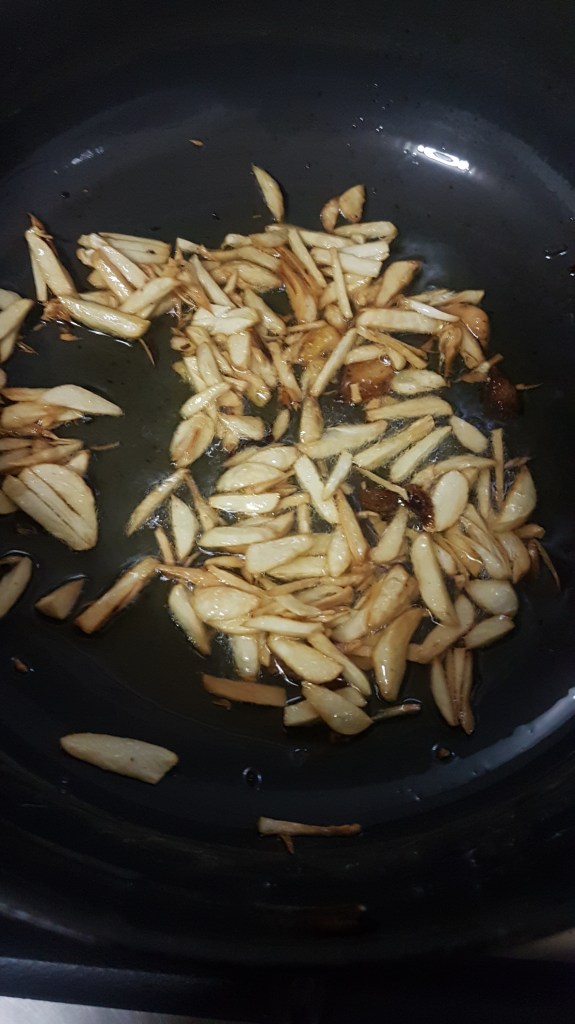
Fry the garlic till light brown, remove.
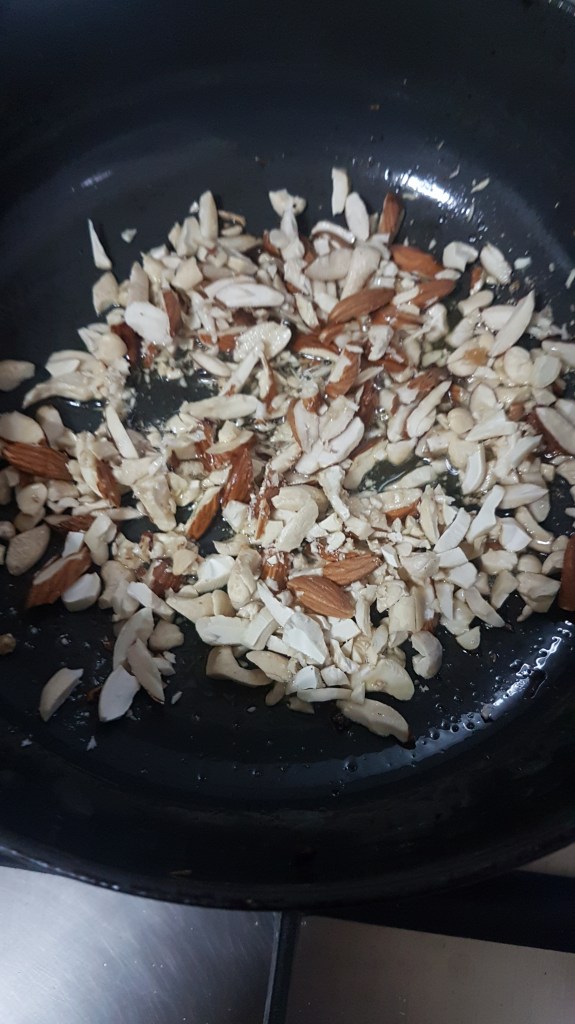
Fry the raisin, almonds, cashewnuts, dates, one by one and remove.
Add the remaining ghee and add the spice powder, saute a few seconds.
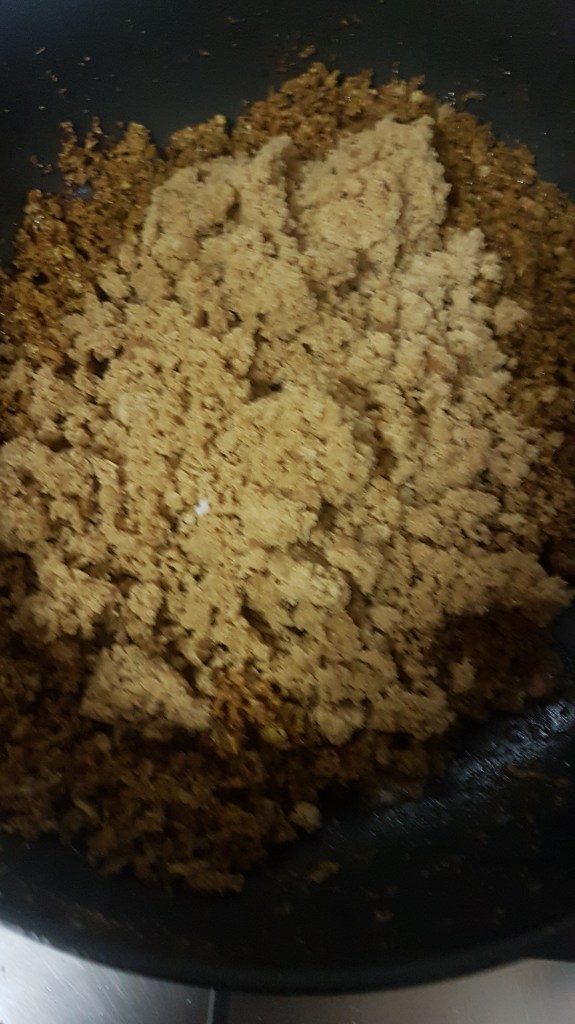
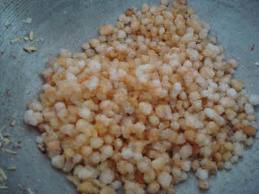
Add the coconut and fry till golden brown.
Add the jaggery and saute till it begins to melt.
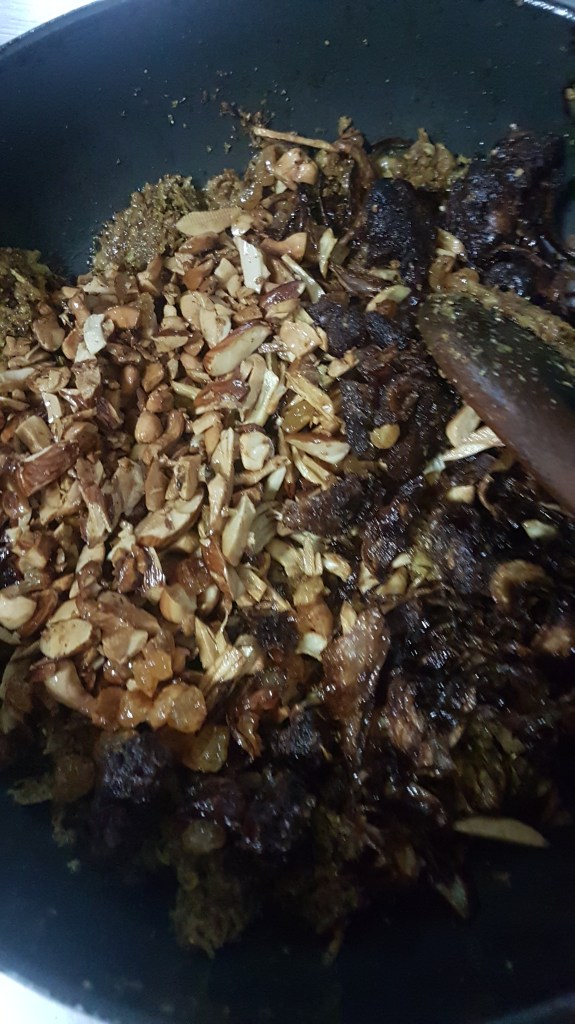
Add the fried onion, garlic, almonds, raisins, cashews, date mixture and fry gently till dry and ghee just starts to separate.
Remove to a dish and leave to cool.
Crush lightly to break-up the lumps and store in a glass or steel container when completely cool.
1 tbsp. to be taken warm, once or twice a day at breakfast & evening tea by the mother of new born baby after ten days.
Powder the spices
Slice the nuts, onion, garlic
Fry the Onion in ghee
Fry Onion try golden brown
Fry the sliced garlic
Fry garlic till brown
Fry raisins
Fry almonds & cashewnuts
Fry nuts till brown
Fry spice powder in ghee
then add the fresh coconut
and fry till brown, add jaggery
As jaggery is melting add the remaining ingredients and saute till dry.
Thiklem (Sukho Randho) is ready
As stated in my Postpartum care Thiklem and Randho post, I have yet to try the Wet Randho recipe. Shall post the pictures and fine tune the recipe as done for the Sukho Randho recipe, if necessary. Meanwhile, if anyone makes it would love to know/see the outcome.
Due to the lockdown many new mothers are having to fend for themselves post delivery with no mothers/mother-in-law/grandmothers, etc. to be with them and assist as restrictions on travel continue to be in place. As a result, I have received several requests for these recipes. Other recipes for lactating mothers and baby care are already menioned in my previous posts on Foods for lactating mothers.
Below I have given the most traditional of the recipes here, mainly for reference, as I was unable to source majority of the 41 ingredients required, so could not prepare it myself, but anyone enterprising enough and is able to procure all the ingredients could very well try the recipe. I have also given below a more recent and easier recipe which I am sure will be more appealing and can be easily prepared.
I absolutely do not post any recipes unless I have tried atleast a couple of times to satisfactory results. But as I have been receiving constant requests for Randho & Thiklem, I have decided to post the recipes as is.
In my post Postpartum Care – Foods for lactating mothers, I stated my intention to post the Thiklem and Rando recipes as and when I find them. This traditional olden days recipe is for Randho – both the wet and dry version – the wet jam like paste is called Randho and the dry version is called Thiklem. This recipe from the book “Randpi” by Isidore Coelho, was kindly given to me by Mrs. Jenifer Dias, who also helped me with the english translation, to whom I am grateful for sharing with me so that it can benefit all new mothers.
I am posting a picture of the Konkani recipe which contains all the traditional medicinal herbs and spices, all of 41 ingredients, that go into its preparation. Those who can read konkani would understand the recipe better. I have given a translation, with assistance, as I can neither read nor write konkani. I have done my utmost to provide it accurately. The ingredient pictures should assist further in your understanding. This recipe seems to have been published in the 1940s, most likely so I am not aware of the quantity one could get for 50 paise!
Thiklem/Randho Page 1 of 3 Thiklem/Randho Page 2 of 3 Thiklem/Randho Page 3 of 3
Randho (wet) (Translated from above Konkani recipe)
Ingredients
50 paise Badishep/Fennel
50 ” Lutipal ?
50 ” Lutiphol ?
75 ” Pepper (Nanji Mirian)
75 ” Vayu Vilanga/All Spice
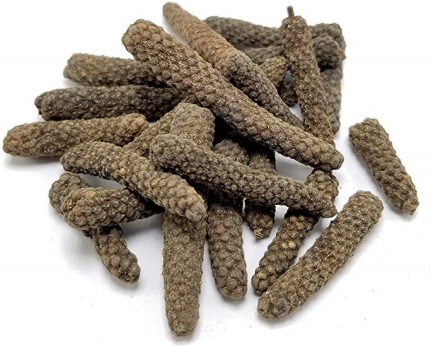
75 ” Peempli (Long Pepper)
50 ” Cloves
75 ” Chor Owon/Ajwain (Same as 22?)
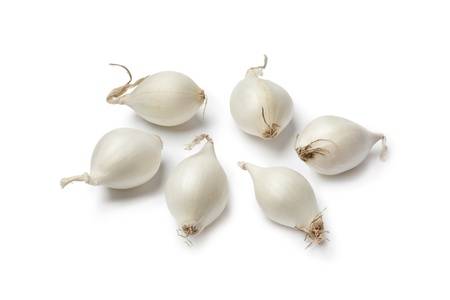
75 ” Poulancho Kando ?
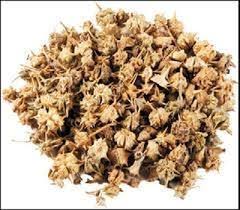
75 ” Ratan Purush
75 ” Hasigundi ?
25 ” Taraviti Jeera
75 ” Neggina Mullu
1.00 Rupee Nilpee
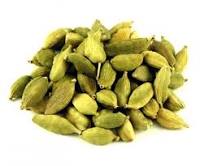
75 nos Cardamom
1.00 Rupee Kesar
75 nos. Pepper (Hadi miri)
1 spoon Mustard seeds
15 gms Kala Misri
15 gms. Safed Misri
125 gms. Jeera
125 gms. Ovon/Ajwain
250 gms. Small Badishep
75 gms. Dry Ginger
500 gms. Doodhval ?
50 gms. Coriander seeds
100 gms. Garlic
300 gms. Arbi Gond
250 gms. Kuskus
500 gms. Small Badam
500 gms. Khadi Sakkar
500 gms. Kismis
750 gms. Ghati Jaggery
500 gms. Ushe God ?
4 pcs. Nutmeg/Jaiphal
3 pcs. Myfol
¼ Litre Coconut oil
1 Litre Tup
1/2 litre Milk
5 pcs. Flat round jaggery
5 nos. Coconuts
(If I have made an error in the translation or a misrepresentation in the illustrations, I would love to know so I can correct myself).
Method
Pick, clean and wash all medicinal herbs and dry well in sun, grind to a powder. Clean and dry all spices in the sun, grind to a powder. Grind the kuskus and remove juice and grind the herbs and spices powder with this juice. Remove juice of the coconuts. Heat the oil and fry the gond till it puffs. Remove and keep aside. Add the kuskus-herb-spice paste, coconut milk, jaggery, milk, misri, khadi shakar, mix and cook on slow flame for one hour. Then add the tup, oil and gond, mix and simmer. Add nuts and kismis and cook for 8 hours making sure it does not stick to the bottom of he pan.
Thiklem (Dry) Also called Sukho Randho
Ingredients (Same as above)
All above ingredients (with some variation).
Take the medicinal herbs and spices, clean, wash and dry in the sun and grind to powder. Scrape 6 coconuts and slice 750 gms. onions. Mix both and dry in the sun for half a day. Extract juice of 1 and half coconuts, take 750 gms basmati rice and the medicine/spice powder and grind to paste with the coconut milk. Form into small balls and fry in some oil/tup. Remove and pound the fried rice balls. Put gond in oil till fluffy. Add garlic, almonds (assume the garlic and almonds would be cut into slivers), kismis and kuskus and fry gently. Pour the remaining oil in the kadai and fry the onion coconut mixture. Pound the jaggery and khadi shakar and add to the other ingredients, mix well, heat on flame and cook till dry.
I have had the sukho Thiklem/Randho, made by my ‘Balanti Posteli’ in 1983 in Kuwait when my first child Raoul was born. But it was definitely a very simple version of the above recipe. I distinctly remember munching and enjoying a tablespoon each morning of a crunchy and loosely dry mixture of deep fried onion, coconut, almonds, raisins and garlic which were the predominant ingredients. That was the only time I had it.
I have tried to get the pictures of the herbs and spices, as much as possible, for easy reference (Some may be indicative).
1. Badishep/Fennel
4. Pepper/Nanji Miri
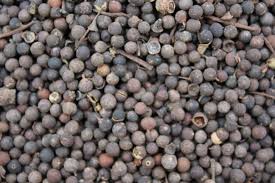
5. Vayu Vilanga/All Spice
6. Peempli/Long Pepper
7. Cloves
8. Ajwain/Carom seeds
9. Poulancho Kando
10. Ratan Purush
12. Taravati Jeera
13. Negina mullu
15. Cardamom
16. Kesar
17. Pepper/Hadi Misri
18. Mustard Seeds
19. Kala Misri
20. Safed Misri
21. Jeera/Cumin
22. Ajwain/Carom seeds
23. Barik Badishep
24. Soonth/Dry Ginger
27. Garlic
28. Arbi Gond
29. Kuskus
30. Small Badam
31. Khadi Sakkar
32. Kismis/Raisins
33. Jaggery
34. Ushe God (indicative)
35. Nutmeg/Jaifol
37. Coconut Oil
39. Milk
40. Palm Jaggery/Flat
41. Coconut
36. Myfol
However, don’t be overwhelmed wih the above recipe, here is a simple one (I recently came across) to save your day!
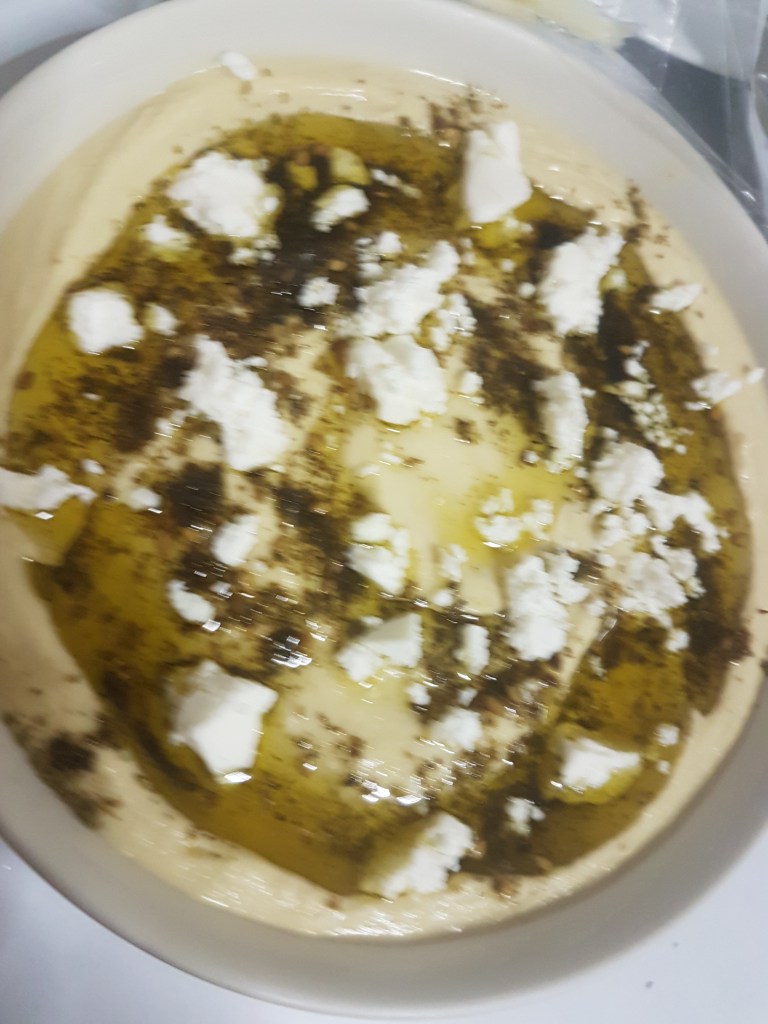
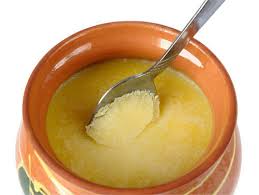
Randho (Wet) (Indicative picture below)
Randho – Jam like consistency similar to picture
Ingredients
1 Litre coconut milk
750 gms. Palm Jaggery
250 gms. Poha (flat)
250 gms. Tup/Pure ghee
100 gms. Onions, sliced
100 gms. Garlic, sliced
50 gms. Dill Seeds (Shopa)
50 gms. Kuskus (Poppy seeds)
50 gms. Cumin seeds
50 gms. Ajwain/Carom seeds
50 gms Fenugreek seeds
50 gms. Corainder seeds
50 gms. Mustard seeds
50 gms. Black Pepper corns
50 gms. Turmeric
10 gms. Cardamom
1 no. Nutmeg
1 gm. Saffron (Kesar)
100 gms. Dry Dates
50 gms. Raisins
100 gms. Almonds
100 gms. Cashewnuts
Method
Roast all the spices from Dill seeds to Black pepper and grind to a paste with some water.
Take a pan, place on heat and add the coconut milk alongwith the ground paste.


Recent Comments